Optional Installation/Assembly 10-7
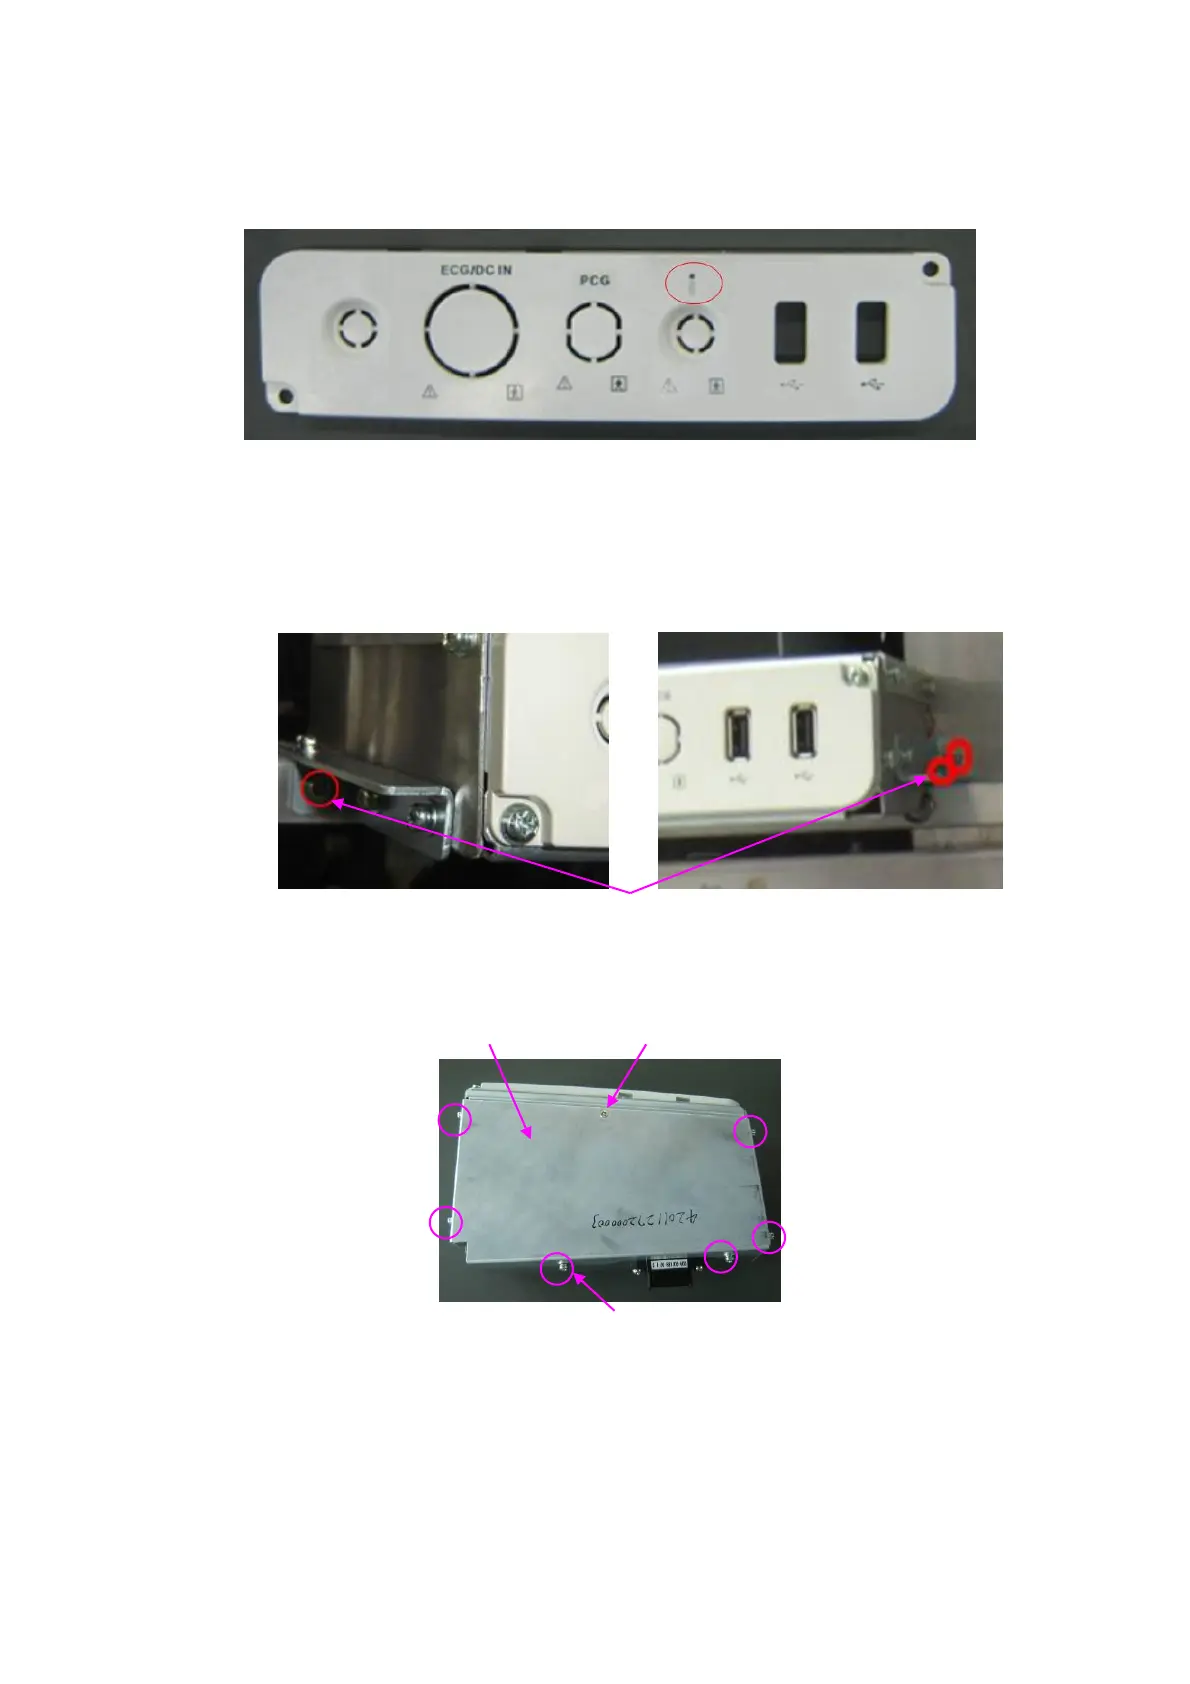
If the pencil probe silk print is on the position as depicted below, please install the
pencil probe outlet and cable by the following procedure.
1. Remove the front cover of the main unit, refer to 9.3.2 chapter step 1-5 for details.
2. As shown in the following graph, remove the M4X8 Philips pan headed screws (3pcs) for
fixing the front board USB&ECG and Pencil Probe Port assembly, grasp and pull out the
assembly.
3 pcs of M4X8 Philips pan headed screws (1 pcs on the left, and 2 on the right)
3. As shown in the following graph, remove the M3X6 Philips sunk head screw (one pcs) and M3X8
Philips pan headed screws (6 pcs) for fixing the top cover to take out the top cover.
ECG top cover one M3X6 Philips sunk head screw
6pcs of M3X8 Philips pan headed screw
4. As shown in the following figure, cut cable tie for the ECG cable and PCG cable, tidy the
cables and remove the M3X6 Philips sunk head screws (3 pcs) and M3X8 Philips pan headed
screws (2 pcs) for fixing the front cover assembly. Pull the front cover assembly slightly for
convenience. Distinguish the product model by figure a/b.