13-36 Probes and Biopsy
Adjust guide line position
Move the cursor onto [Position], press <Set> key to move it linearly, or press and
rotate the multifunctional-knob. This is operative when there is only one guide line
displayed.
Adjust angle
Move the cursor onto [Angle], press <Set> key to change the guide line angle, or
press and rotate the multifunctional-knob. This is operative when there is only one
guide line displayed.
Save verified settings
After the position and angle of the guide line are adjusted, click [Save], and the
system will save the current settings of the guide line. When enter biopsy again, the
displayed Position and Angle are the verified value.
Restore the factory default settings
Click [Load Factory], and the position and angle of the guide line will be restored to
the factory default settings.
Exit the biopsy verify status
Click [Exit], and the system will exit the verification status of the guide line.
13.2.6 iNeedle (Needle Visualization Enhancement )
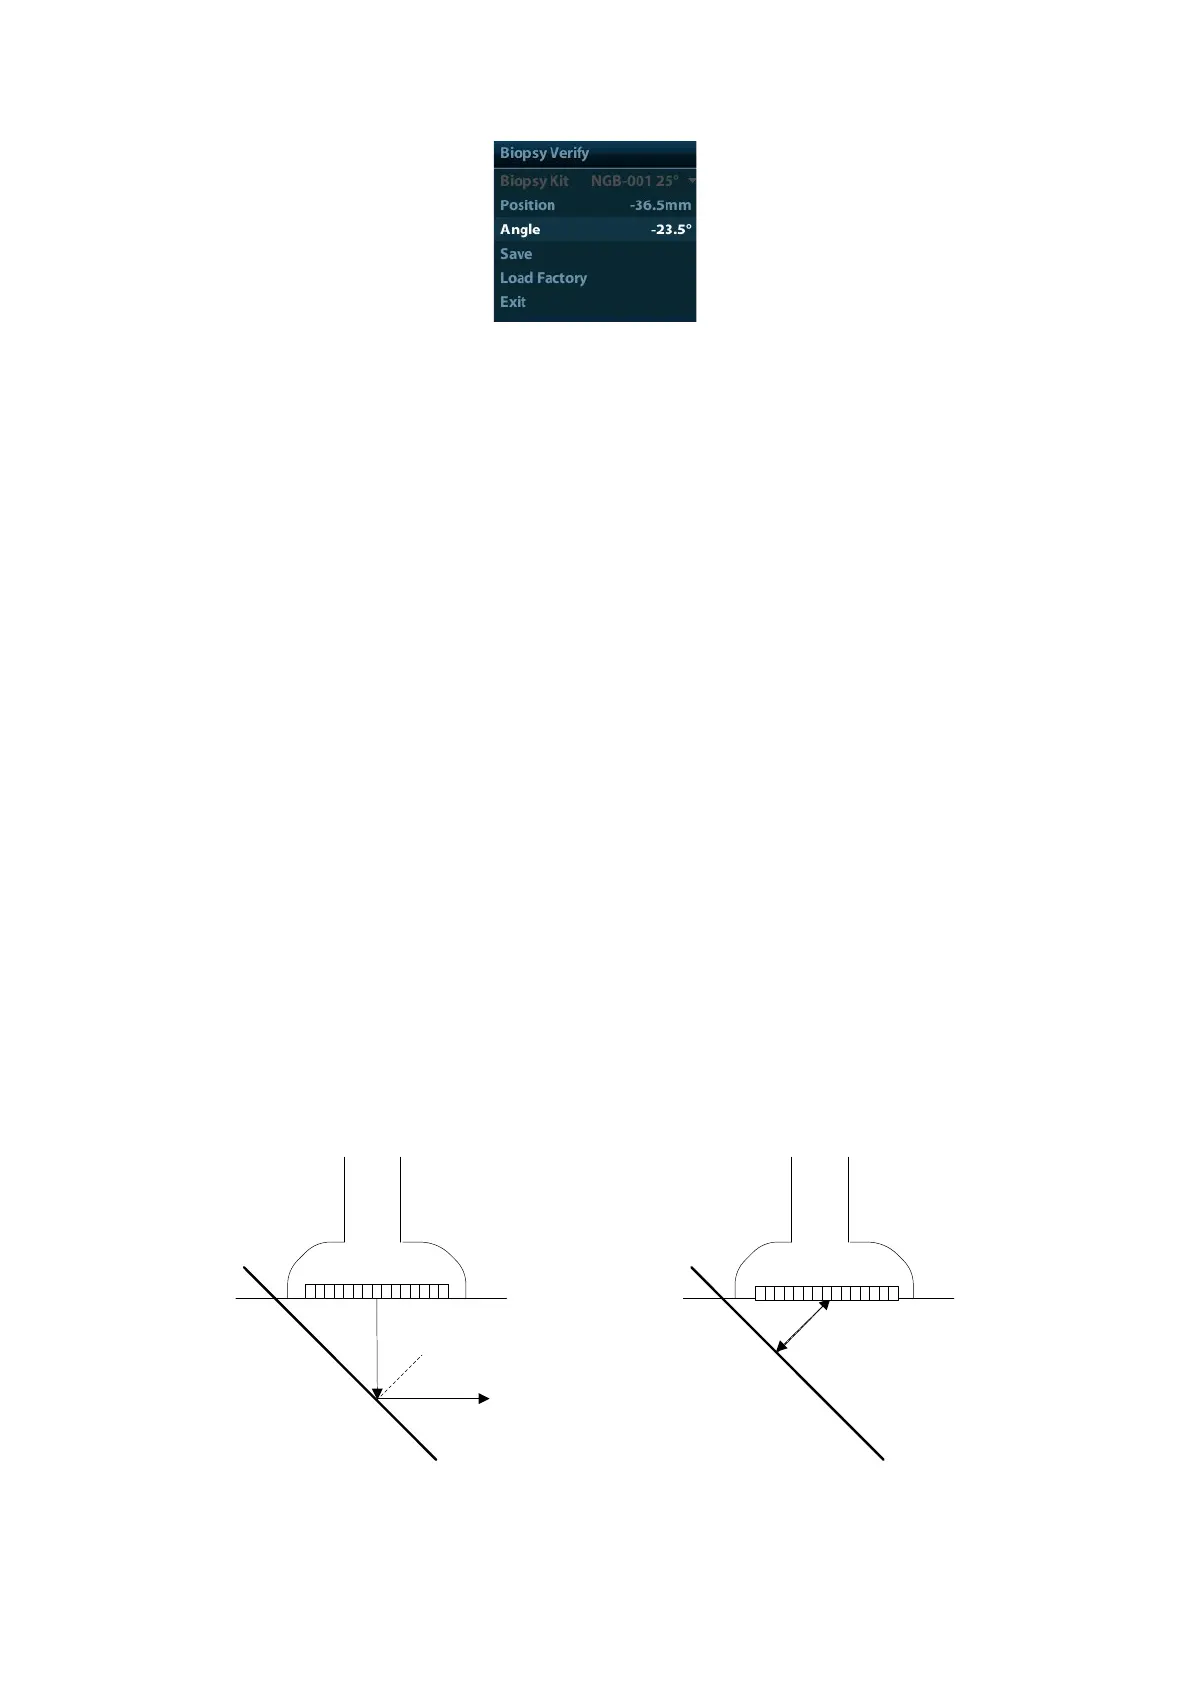
In the course of biopsy, the metal needle attached to the probe is punctured into the tissue
with a certain angle; because of the needle acoustic impedance, the ultrasonic beam cannot
penetrate the metal needle, a reflecting boundary is formed. As in Figure 1, if the deflection
angle is very large, the needle display is not clear.
In the condition of deflected ultrasonic transmission, the beam direction is perpendicular to
the needle direction, and the reflection direction will be the same with the needle, as shown in
Figure 2, when the needle display in the ultrasound image is very clear. The system provides
an additional deflection transmission that is approximately perpendicular to the metal needle,
as the normal transmission (perpendicular to the transducer surface) is contained as well. And
the deflection angel can be chosen by users.
iNeedle is an option. Only the linear probe supports the iNeedle.
Figure 1 Figure 2