Preliminary
miniDSP Ltd, Hong Kong / www.minidsp.com / Features and specifications subject to change without prior notice 15
3 HARDWARE OVERVIEW
3.1 REAR PANEL
3.1.1 miniDSP Flex
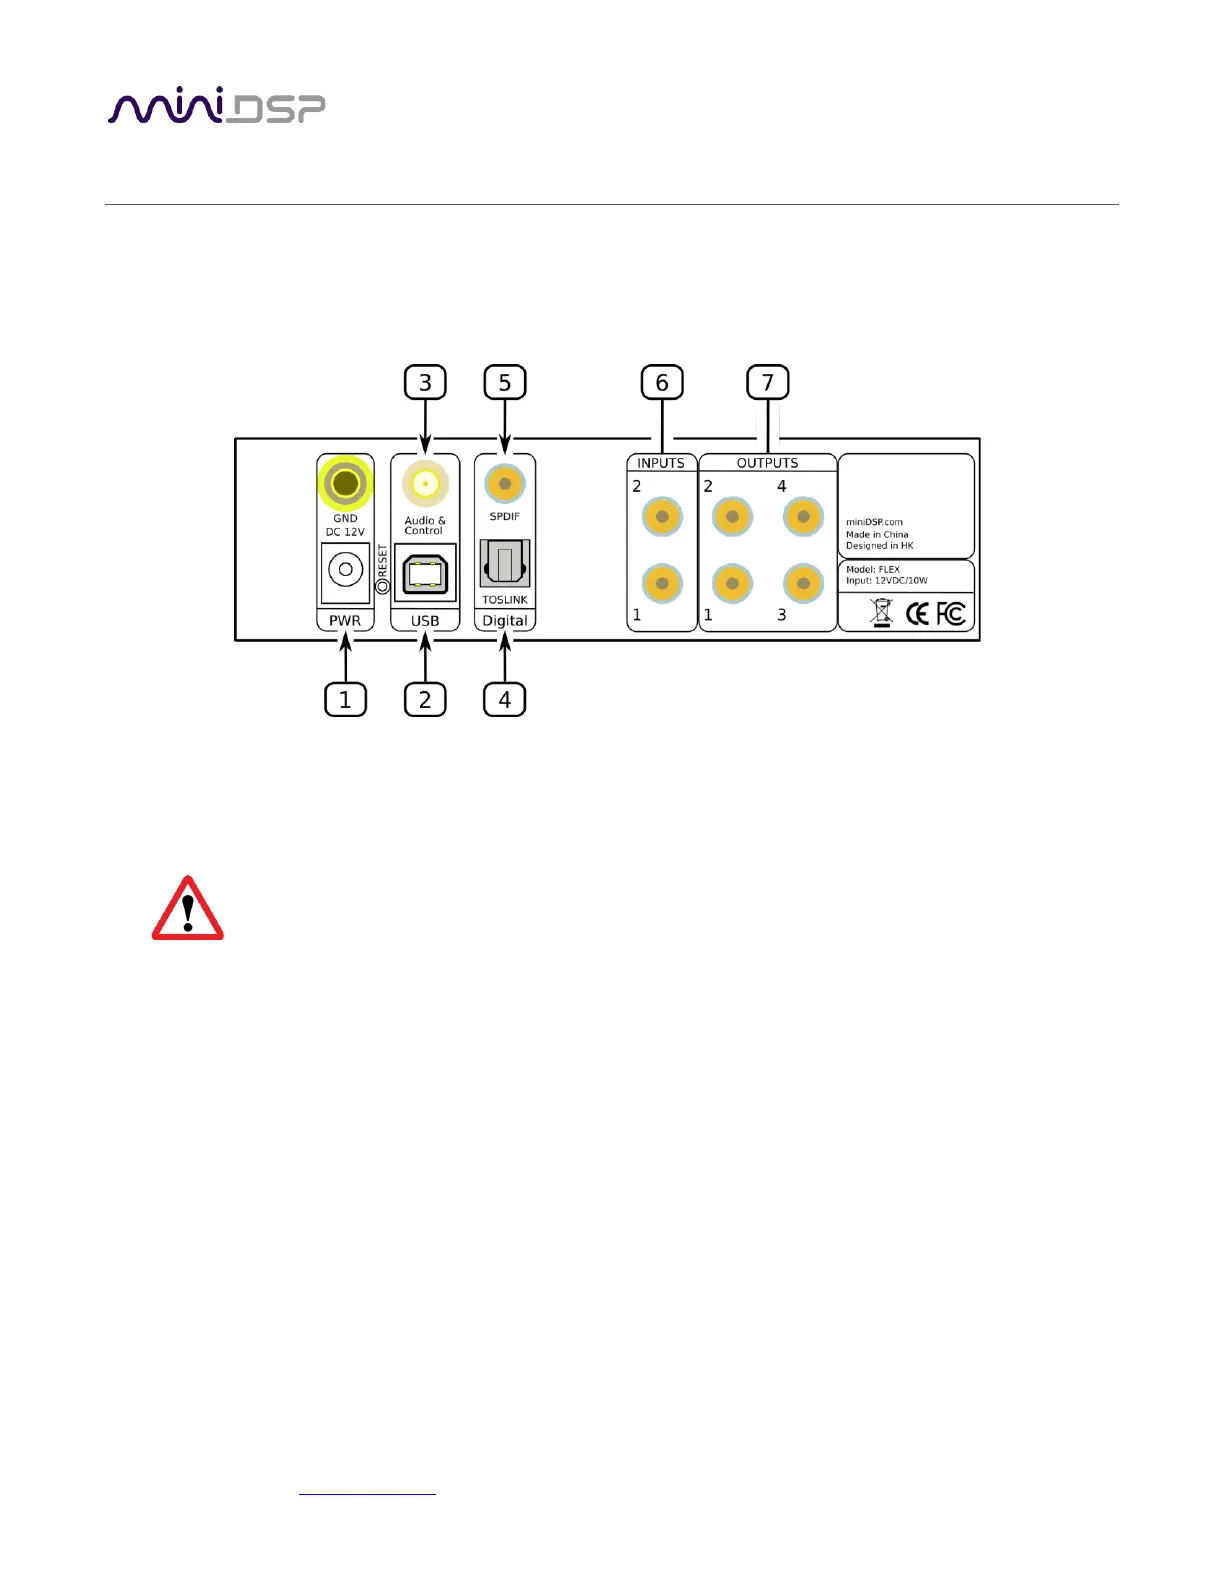
1. DC power. The supplied 12 VDC power supply includes a set of interchangeable power pins for USA, UK,
Europe and Australia. Fit the correct pins for your country. Connect the DC plug to the 12 VDC power
socket.
Apply power to the processor only after all input and output connections have been made.
2. USB port for control and audio streaming. Connect to an available USB port on your computer. This port
can also be connected to a network streamer with USB output for audio playback.
3. Bluetooth antenna. Screw on the supplied Bluetooth antenna here.
4. Optical digital input. Connect a digital source using a TOSLINK optical cable. Sample rates from 32 up to
216 kHz are supported.
5. Coax digital input. Connect a digital source using an RCA cable. Sample rates from 32 up to 216 kHz are
supported. The three digital inputs can be individually selected with the front panel encoder or the remote
control.
6. Analog inputs. Connect an analog source here using RCA cable. Typically, the left channel is connected to
input 1 and the right channel is connected to input 2. See Specifications for maximum input voltages.
7. Analog outputs. Connect equipment such as a power amplifier and subwoofer using RCA cables. Typically,
output 1 is the left channel and output 2 is the right channel. See Section 6.4 for a variety of other
connections. See Specifications for maximum output voltages.