Preliminary
miniDSP Ltd, Hong Kong / www.minidsp.com / Features and specifications subject to change without prior notice 30
6.2 CONNECTING TO THE PROCESSOR
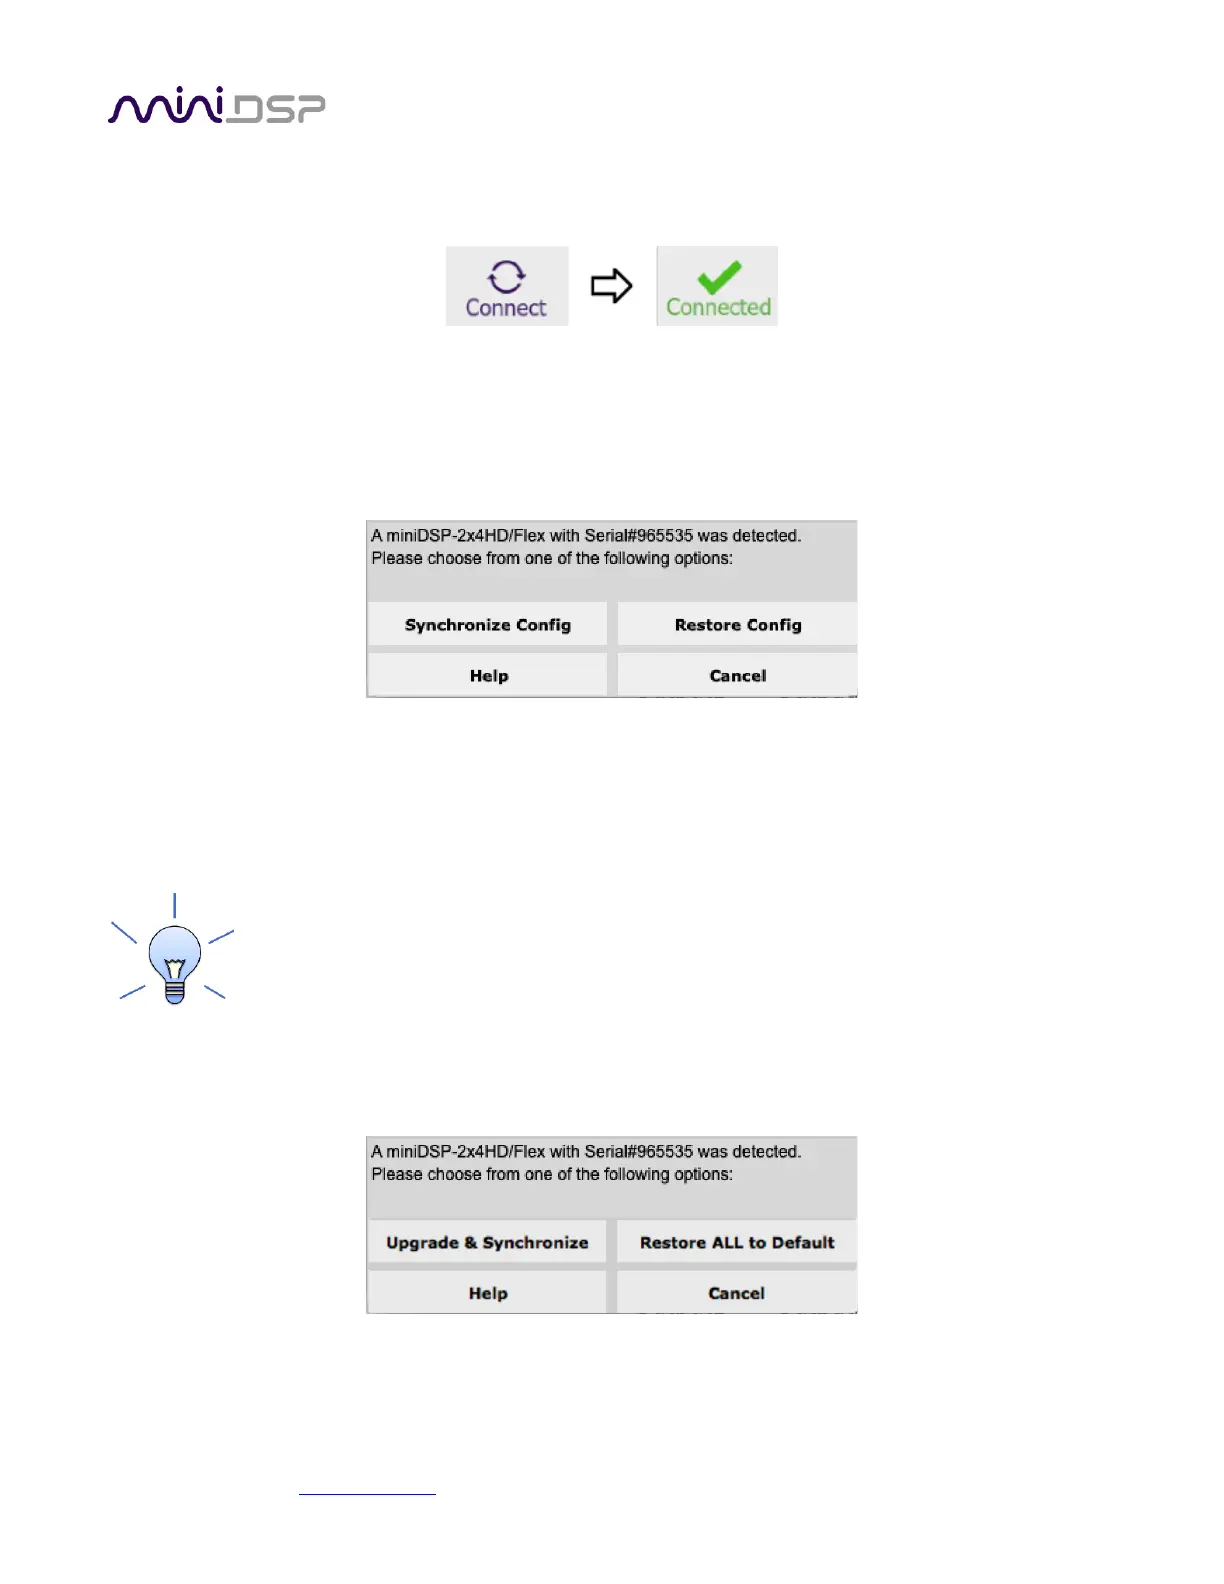
Connect the miniDSP Flex to a USB 2.0 port on your computer. In the plugin, click on the Connect button:
If successful, the button changes to a green check mark. While the plugin is connected, any changes made in the
plugin are immediately transferred to the processor and will be heard in the audio signal.
If the processing parameters (routing, parametric EQ, crossovers and so on) stored on the computer do not
match those stored in the processor, the synchronization dialog box will appear. The first time you connect, click
on Restore Config. Thereafter, you will typically click on Synchronize Config.
Synchronize Config
Download all parameters from the plugin to the processor. Note that Dirac Live filters are not changed.
Restore Config
Restore the parameters in the currently selected preset to factory defaults. Note that Dirac Live filters are
not reset.
When getting started with the plugin, to save doing this for each of the four configuration slots,
drop down the Restore menu and select Restore all to Default.
If you have just upgraded the plugin, the following dialog box may appear. Upgrade & Synchronize upgrades the
processor’s internal data and software and then synchronizes. The Restore ALL to Default option will upgrade
the processor’s internal data and software and reset all four presets to default.
Once the miniDSP Flex has been configured, you can quit the plugin and disconnect the computer. Runtime
functions are controlled with the front panel or an infrared remote. If desired, however, the plugin can remain
connected during use for real-time (“live”) control of the audio processing parameters.