FleX-Net
TM
Installation and Operation Manual
83
Mechanical Installation for the Expansion Audio Cabinet
QBB-5001/R Expansion Audio Cabinet Installation
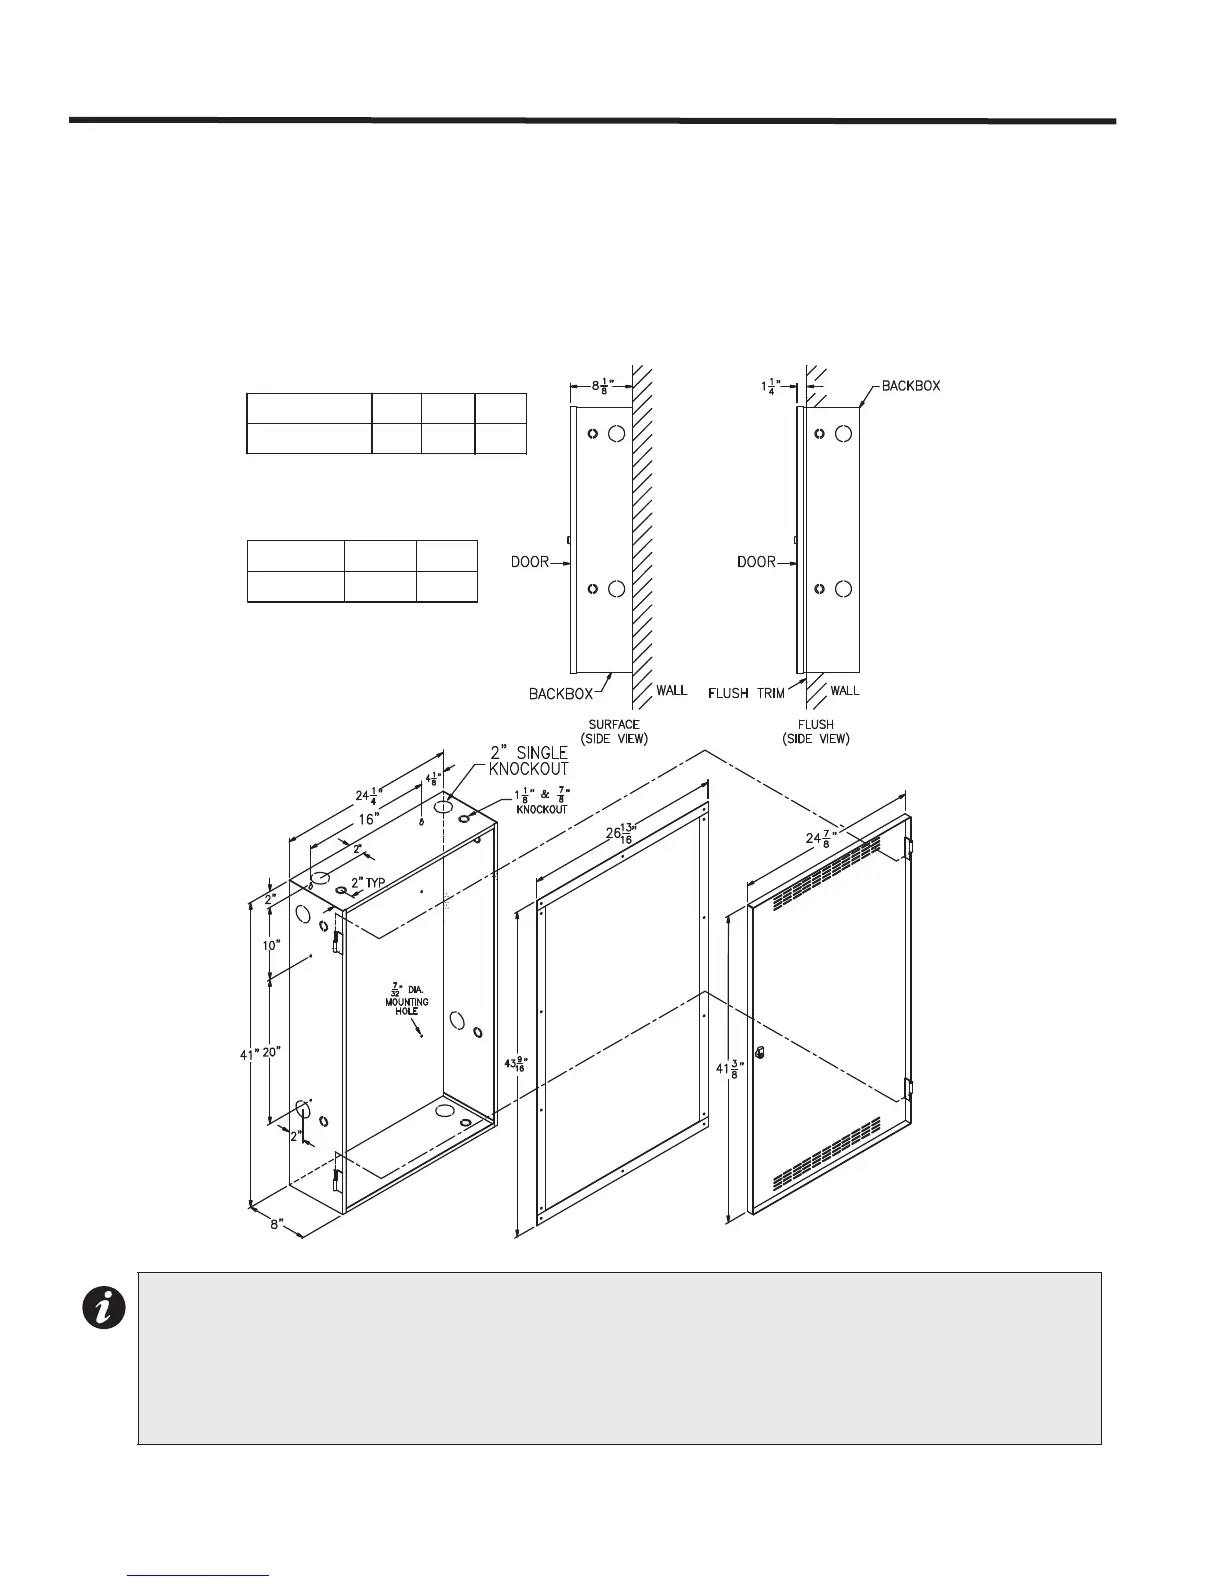
Expansion audio cabinets are mounted as shown in Figure 56 below. The QBB-5001/R is the backbox and door.
The QBB-5001/R backbox may be flush or surface mounted. The QBB-5001TR is the metal flush trim. Install all
cabinets and enclosures empty. Pull all required wiring in through the conduit holes provided (must be punched out).
Do not mount the modules until mechanical installation is complete and all wires have been fed into the cabinets and
enclosures.
Figure 56: Expansion Audio Cabinet Mechanical Installation
Notes:
• It is extremely important to connect the audio cabinets earth-ground point (chassis ground) to the earth
ground.
• The power supply mounts on the bottom left-hand corner of the backbox and the batteries are placed
on the bottom to the right of the power supply. Conduits should be brought in only through the conduits
provided at the bottom right hand corner of the cabinet.
QBB-5001(R)
MATERIAL: 16 GA (0.069") CRS
FINISH: DOOR PAINTED WHITE OR RED
BACLBOX PAINTED BLACK
ENCLOSURE
WIDTH
HEIGHT
DEPTH
24 1/4" 41" 8"
FLUSH TRIM WIDTH HEIGHT
QBB-5001TR 26 13/16" 43 9/16"
MATERIAL: 16 GA (0.069") CRS
FINISH: PAINTED BLACK
DOOR
MATERIAL: 14 GA (0.075") CRS
QBB-5001TR
FLUSH TRIM
BACKBOX