SECTION 5
46
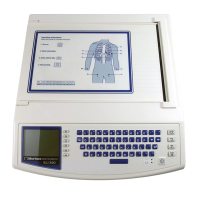
Network Data Export and Import (Request Directory)
If the Network option has been installed on the X-Scribe, users may export data to a compatible management system
or other systems that accept PDF, XML, TIFF, and/or DICOM files.
1. Select Settings.
2. Select Miscellaneous.
3. Go to Export Directory and enter path where reports will be sent. Select Save Profile. This must be
done for each profile.
4. Selecting Sub Directories will export reports in the format(s) selected. Reports are identified by ID number
followed by patient name with a tagline signifying export format. Do NOT use subdirectories with
networking to EMR.
5. Selecting Export on Save will automatically export the final report to the defined export directory once
saved in Report Manager.
With the Network option users can also import patient demographic data to the X-Scribe. From the hospital
information system:
1. Go to Request Directory.
2. Enter path data is being requested from.
Setting IP Address
Exit the X-Scribe application. From Windows:
Select Start.
Select Settings.
Select Network Connections.
Select Local Area Connection.
Enter Local IP Network Address.
NOTE: This may vary depending on the version of Windows software. It is highly recommended a trained
IT professional complete this task.