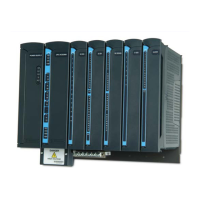
ACE IP Gateway Module
20-8
Pushbutton Functionality
The table below describes the use of the two pushbuttons in various scenarios, during power-
up and run-time. To press a pushbutton during startup, first press the pushbutton(s), then turn
on the RTU using the On/Off switch on the front panel. Keep the pushbutton(s) depressed for
the required number of seconds, as specified in the scenarios below.
Table 20-2 ACE IP GW Pushbutton Functionality
Scenario Trigger Action
LEDs Test During run-time, press PB1
for five or more consecutive
seconds (but less than 30).
All the LEDS on the GW will be lit until
let go of PB1 and then returned to their
previous states.
RTU Restart During run-time, press PB1
for 30 consecutive seconds.
All the LEDs will be lit. Then all the LEDs
will blink once.
The buzzer will buzz several short beeps.
(If PB1 is released during this time the
restart will not be performed.)
At the long beep, release PB1 and the RTU
will restart (and the buzzer will buzz.)
Turn LEDs ON During run-time, press PB1
for one second.
Those LEDs which are currently active
will be turned on for a period of time
(configured in the RTU configuration
using the STS.)
RAM Test During startup, press PB1. A detailed memory test of SDRAM is
performed.
- At the beginning of the RAM test, the
four indicator LEDs (see LEDs Location in
Table 20-3) will blink three times. During
the RAM test, the LEDs may blink or be
lit.
If the RAM test succeeds, the four LEDs
will blink three times and turn off and the
restart sequence will continue.
If the RAM test fails, the RTU will freeze
(restart sequence stops), the PWR LED
will blink and the four LEDs will blink
seven times. The failure error code will
then be displayed on the LEDs, in binary
code, as described in Table 20-3.
- To exit/abort the RAM test in the middle,
restart the RTU using the On/Off switch
on the front panel.

 Loading...