Switch Services
5-43
4. Select a row, and click the Details button to display additional details for this member. For more
information, see Displaying Redundancy Member Details on page 5-43.
5. Select a row and click the Delete button to remove a member from the redundancy group. The
redundancy group should be disabled to conduct an Add or Delete operation.
6. Click the Add button to add a member to the redundancy group. The redundancy group should be
disabled to conduct an Add or Delete operation. For more information, see
Adding a Redundancy Group Member on page 5-45.
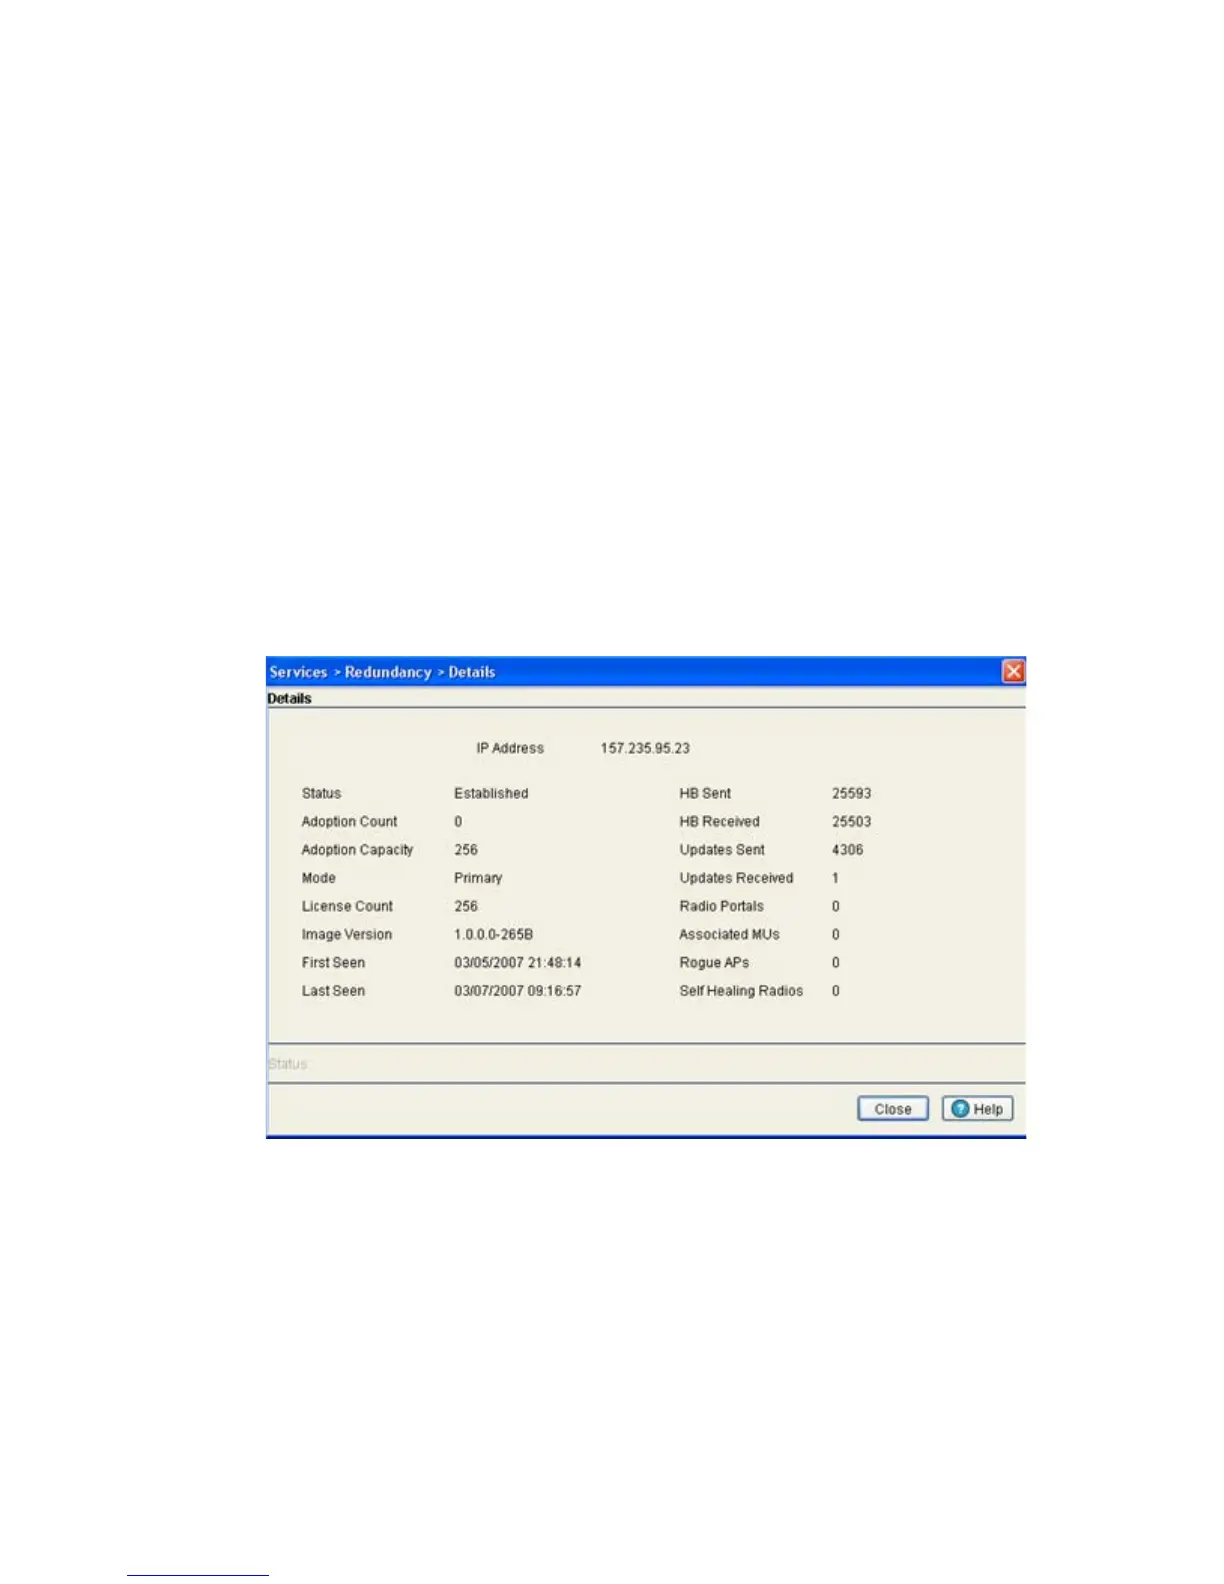
5.4.2.1 Displaying Redundancy Member Details
Use the Details screen (in conjunction with its parent Member screen) to display additional (more detailed)
information on the group member selected within the Member screen.
To review the details
1. Select Services > Redundancy from the main menu tree.
The Redundancy screen displays with the Configuration tab selected.
2. Select the Member tab.
3. Highlight a member of the group and select the Details button.
4. Refer to the following redundancy member information:
IP Address Displays the IP addresses of the members of the redundancy group.
There are a minimum of 2 members needed to define a redundancy
group, including this current module
 Loading...