Diagnostics
8-19
6. Provide the name of the file to be transferred to the location specified within the File field.
7. If Server has been selected as the target, use the Using drop down-menu to configure whether the
panic file transfer will be sent using FTP or TFTP.
8. If Server has been selected as the target, enter the IP Address of destination server or system
receiving the target panic file.
9. If Server has been selected as the target, enter the User ID credentials required to send the file to
the target location. The User ID is required for FTP transfers only.
10. If Server has been selected as the target, enter the Password required (for FTP transfers) to send the
file to the target location.
11. Specify the appropriate path name to the target directory on the local system disk or server as
configured using the "To" parameter. If local server is selected, use the Browse button to specify a
location on your local machine.
12. Refer to the Status field for the current state of the requests made from applet. This field displays
error messages if something goes wrong in the transaction between the applet and the switch.
13. Click the Transfer button when ready to move the target file to the specified location. Repeat the
process as necessary to move each desired log file to the specified location.
14. If a problem occurs during the file transfer, the process can be stopped by clicking the Abort button.
15. Click the Close button to exit the dialogue and abandon the transfer.
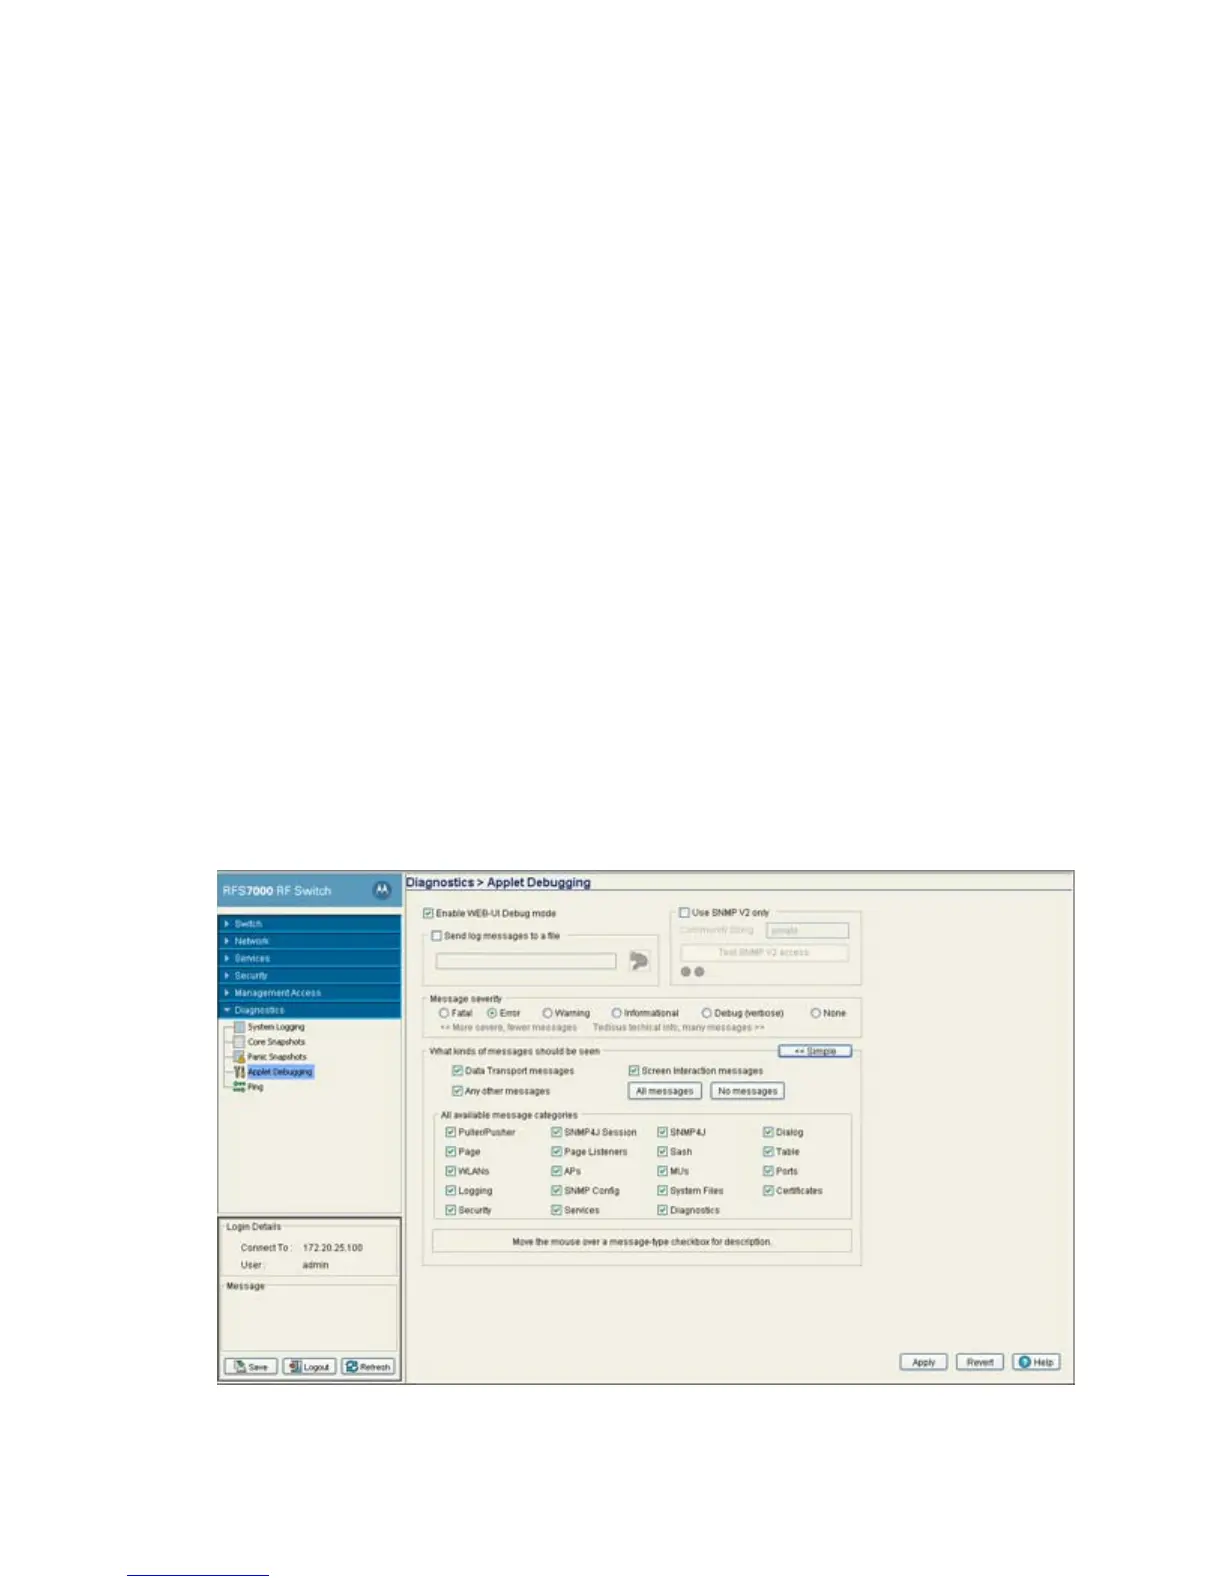
8.5 Debugging the Applet
Refer to the Applet Debugging screen to debug the applet. This screen allows you to view and debug system
events by a criticality level you define.
1. Select Diagnostics > Applet Debugging from the main menu.
2. To use this window, select the Enable Web-UI Debug Mode checkbox.
The Applet Debugging screen is partitioned into the following fields:

 Loading...