OPERATING AND MAINTENANCE MANUAL
Chapter 9 - Operation and maintenance
TAEevo Tech 015÷802 60 Hz UL
187
The data in this manual are not binding and they can be modified by the manufacturer without notice. Reproduction of this manual is strictly prohibited
EN
ENGLISH
9.5.5 Setting
The valves can be delivered with a set pressure and sealed by the factory or without set pressure with the desired range of
adjustment. Valves which have been set and sealed by the factory are marked with the set pressure. Before changing the set
pressure the seal has to be removed. If valves are unsealed, the desired pressure can be set within the pressure range of the
spring.
618 tGFO:
9.5.6 Operating and maintenance
The operating pressure of the plant is to be at least 5 % lower than the closing pressure of the valve if it is used as a pressure
limiting valve. In this way, the valve can satisfactorily close again after blowing off.
In the event of minor leaks, the valves can be made to respond by lifting the lever for version 618 sGFL (the lever is not used
for adjusting the valve!), or by applying overpressure for the remaining model series. If this does not remove the leak the
valve has to be overhauled. After long periods of non-use the function of the valve must be tested.
9.5.7 Warranty
Every valve is tested prior to leaving the factory. We grant a warranty for our products which entails the repair, free of
charge, of any parts that are returned and verified as being prematurely unsuitable for use due to defective material or
manufacturing. We shall not assume liability for any damage or other such obligations. If the factory seal is damaged (in the
case of pressure limiting valves), in the event of any incorrect handling or installation, contamination or normal wear,
warranty claims shall be null and void.
9.5.8 Marking
Valves adjusted at the factory have the set pressure marked in a permanent manner on the nameplate or on a brass label that
is attached to the valve. For valves that are not adjusted at the factory the range of adjustment for the installed spring is
specified on it.
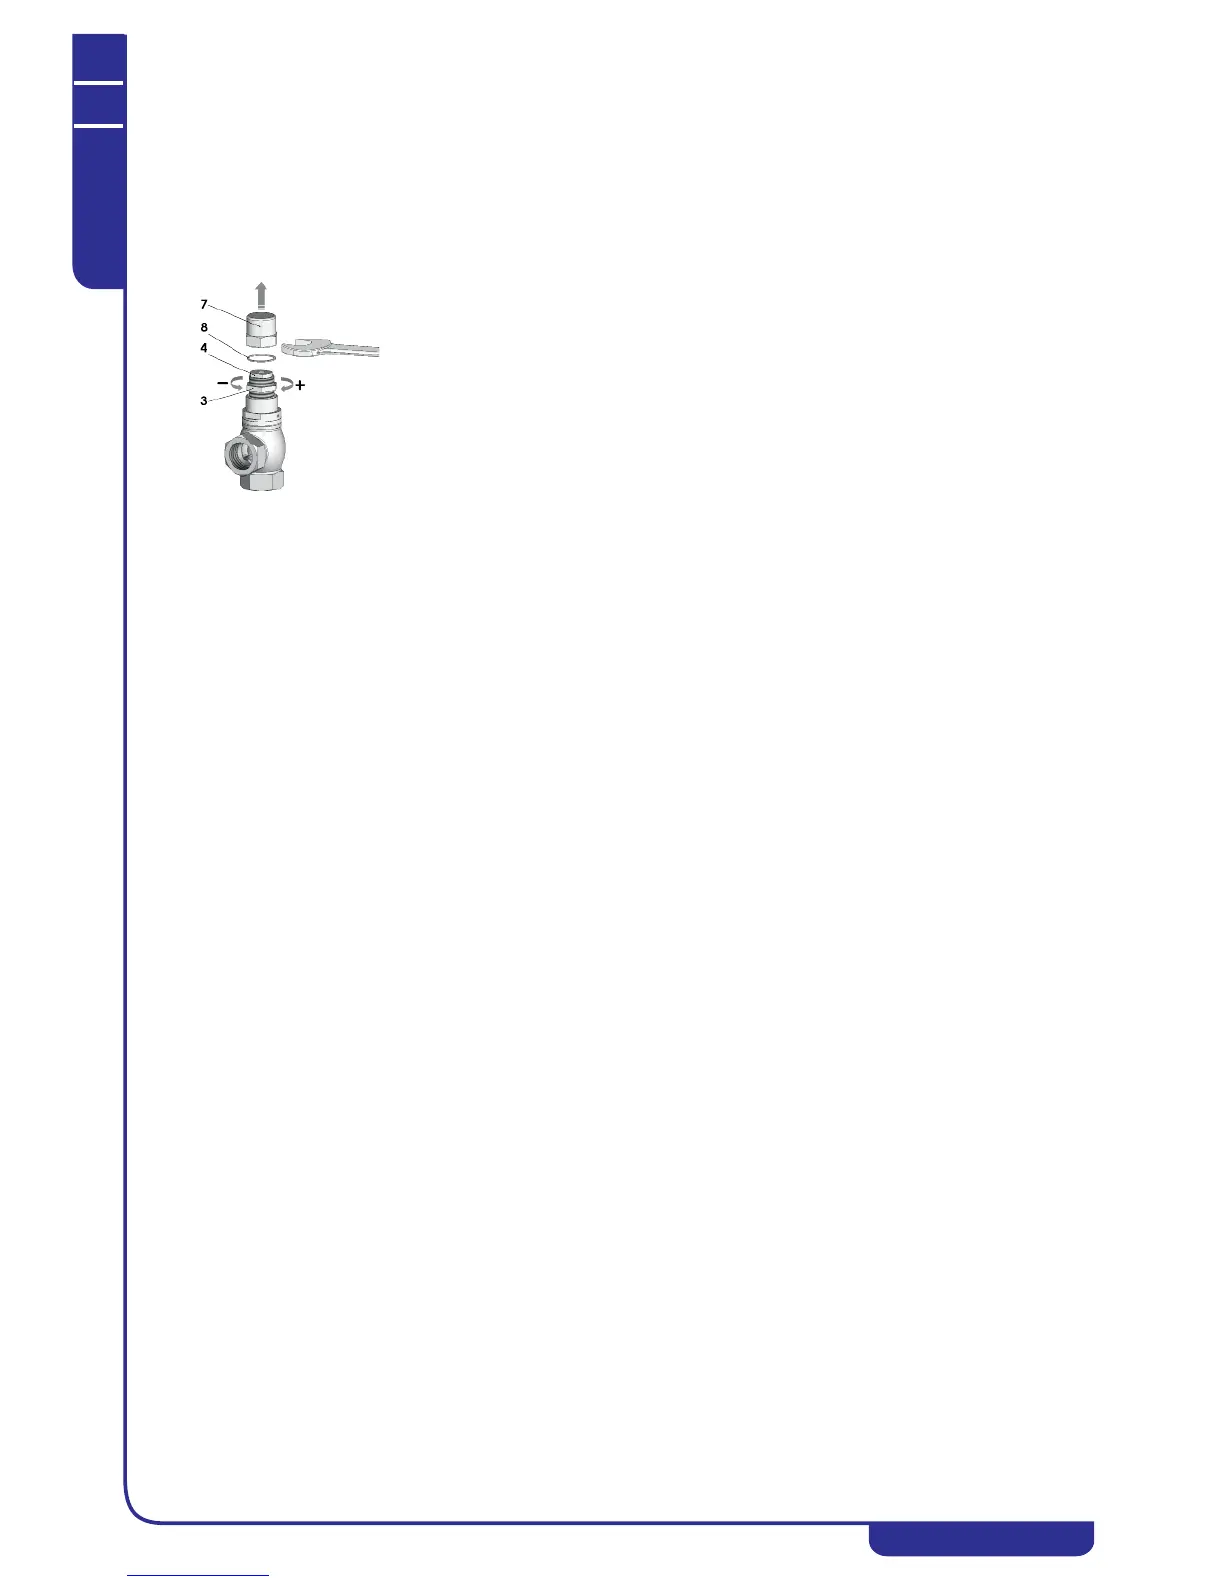
1. Unscrew cap nut (7) and remove copper gasket (8).
2. Release locknut (3).
3. Turn pressure screw (4):
Turn in clockwise direction to increase pressure, turn in counterclockwise
direction to reduce pressure.
4. Tighten locknut (3) again and mount copper gasket (8).
5. Screw on cap nut (7) and tighten.
The setting can be secured by means of a seal.