Creating and customising models
2. Open the REV/TRM parameter and set aileron travel to the left.
If the left aileron does not move up, reverse the servo using the
REV/CLR button.
3. Move the aileron stick to the centre position. Move the control surface to
the neutral position using the central wheel or the + / – buttons.
The setting range is +/-10%. Offsets exceeding 5% should be corrected
mechanically.
4. Open the input field P1.
5. Press the button: .
Both ailerons move to maximum.
6. Choose a P1 setting so that the left aileron (servo 1) stops a little way from
the mechanical stop.
7. Now open P5.
8. Press the F button.
Both ailerons move to the opposite maximum.
9. Set the positive travel on the left aileron (servo 1) to a safe value.
10. You can use the points P2 and P4 to linearise the control curve, if required.
P3 shifts the neutral position without changing the other points.
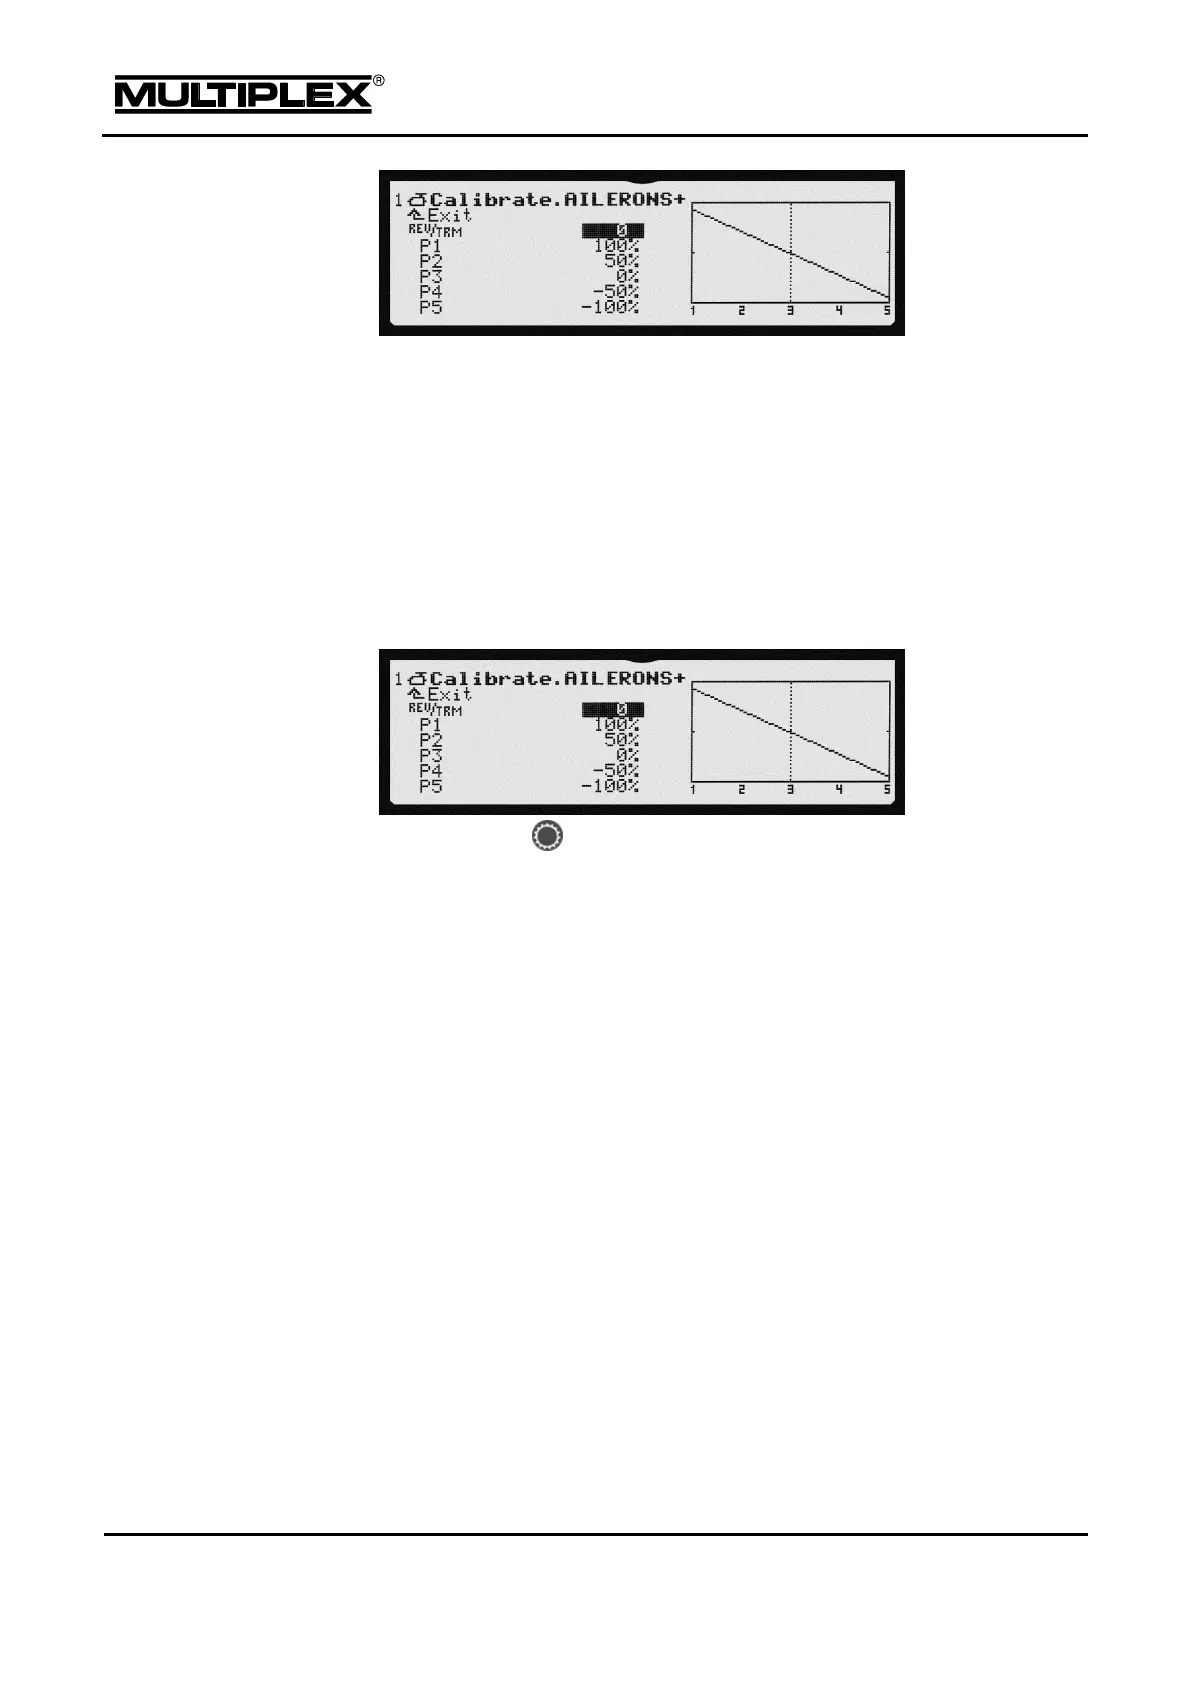
11. Open the Servo > Calibrate > 5: AILERONS+ menu.
12. Open the REV/TRM parameter and set aileron travel to the right.
If the right aileron does not move up, reverse the servo using the
REV/CLR button.
13. Move the aileron stick to the centre position. Move the control surface to
the neutral position using the central wheel or the + / – buttons.
The setting range is +/-10%. Offsets exceeding 5% should be corrected
mechanically.