NOTE! The pipe from the container must be drained of
water before the air can be removed. This means that
the system is not necessarily vented, despite water
emerging from the safety valve (52) when it is opened
for the first time.
■ Vent FIGHTER 360P through the safety valve (52)
and the rest of the heating system through the rel-
evant venting valves.
■ Keep topping up and venting until all air has been
removed and the pressure is correct.
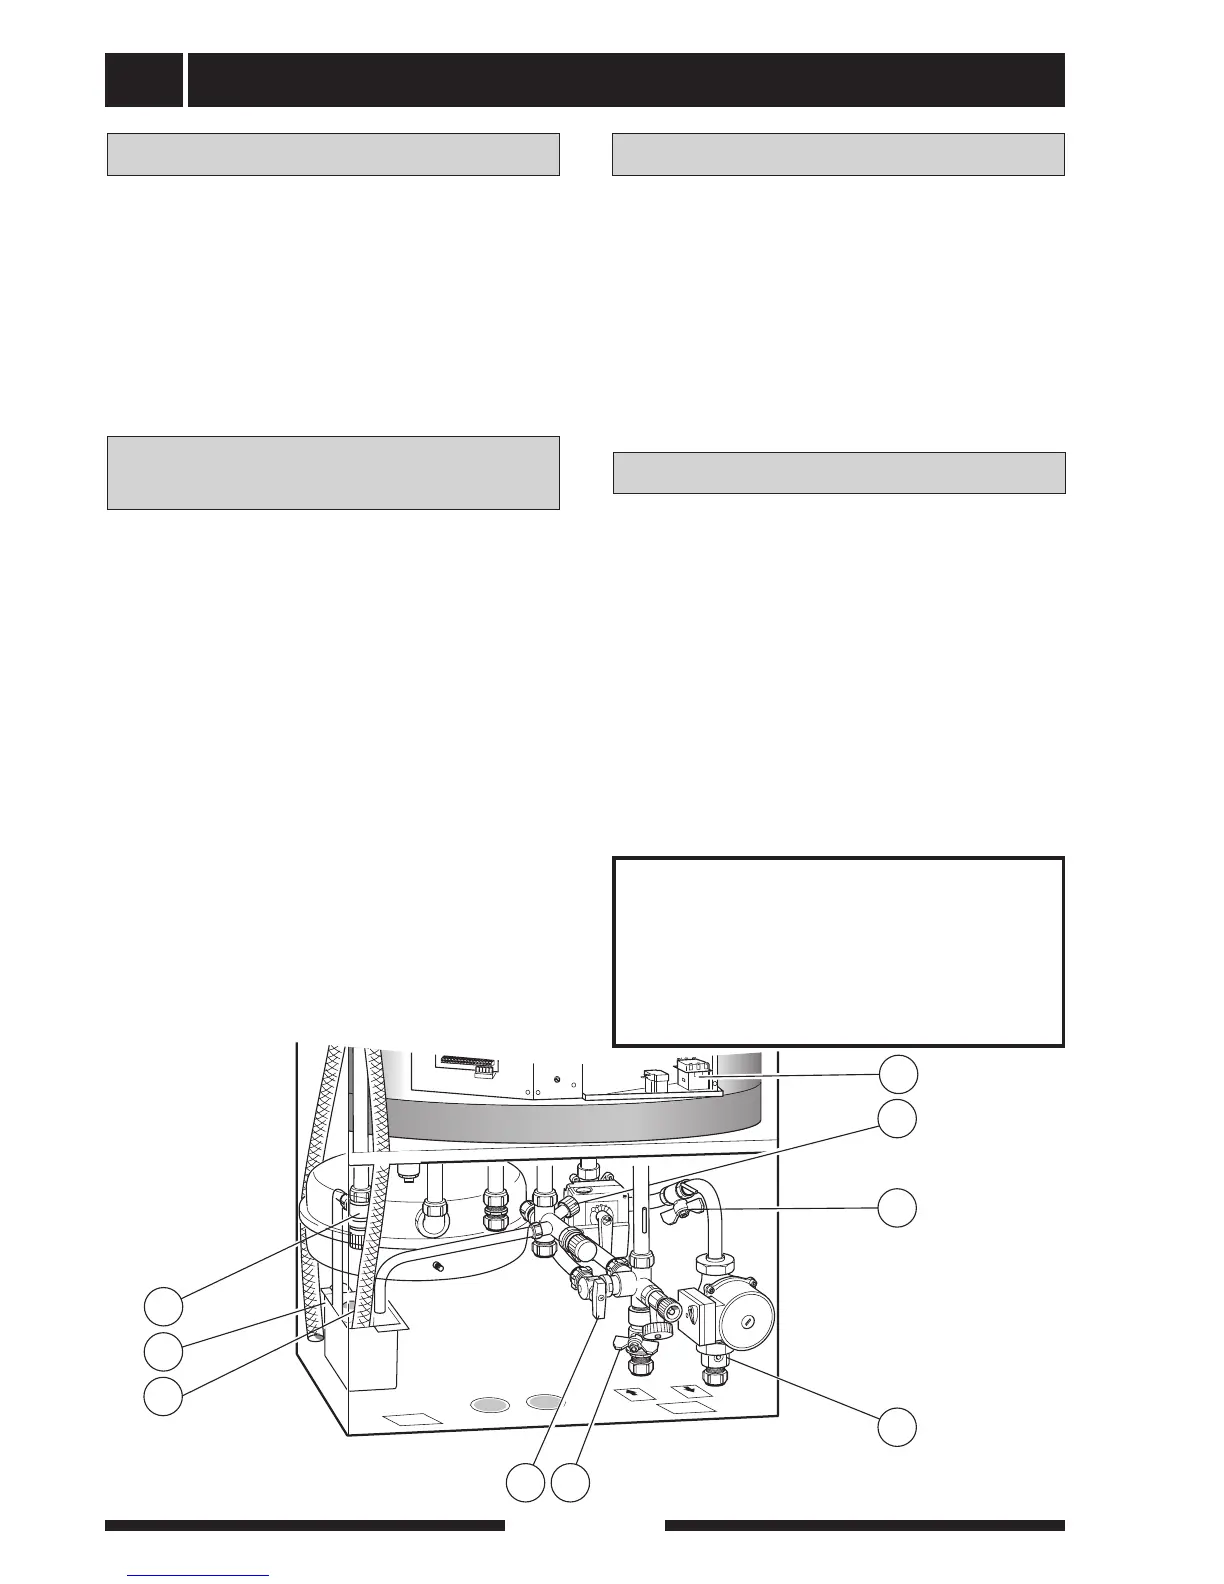
Check that the switch (8) is set to 0.
Check that valves (44) and (50) are fully open and that
the temperature limiter (6) has not tripped (press the
button firmly).
Fill the condensation water hose (97) with a little water
to prevent it making a noise. This is done by loosening
the hose which is located on the waste water pipe (98)
and pouring water in the end of the hose so a water
seal arises. Refit the hose.
Venting the heating system
Starting
Preparations
■
The water heater is filled by first opening a hot water
tap and then opening the filling valve (46) fully. This
valve should then remain fully open. When water
comes out of the hot water tap, it can be closed.
■ Open the filling valve (49). The boiler part of the
heat pump and the radiator system are now filled
with water.
■ After a while the pressure gauge (42) will show ris-
ing pressure. When the pressure reaches 2.5 (bar)
(approx. 25 mvp) a mixture of air and water starts
to emerge from the safety valve (52). The filling
valve then closed (49).
■ Turn the safety valve (52) until the boiler pressure
reaches the normal working range (0.5 - 1.5 bar).
Filling the water heater
and the heating system
Set the switch (8) to 1. When the exhaust air tempera-
ture drops below 16 °C the compressor does not start.
The immersion heater is then used for heating. Dis-
played as “Low exhaust air” in menu 1.0. When the
exhaust air temperature exceeds 16 °C the compres-
sor is permitted to start automatically.
Note! A large area is required to be heated during
under-floor heating and therefore it takes a long time
before the desired room temperature is reached. In
addition, if the outdoor temperature is above +5 °C
(Trend calculation parameter, menu 9.1.7), the heat
pump's immersion heater will be blocked to save ener-
gy. However, this can be temporarily by-passed by
activating extra hot water.
For the Installer
NOTE!
Heating curve in menu 2.1 and Max
supply temp. in menu 2.5 are adjusted
according to the heating system in
question.