English – 11
smxi - smxis radio receiver
0682
SMXI and SMXIS are 4-channel radio receivers for control units equipped
withSM-typeconnector.Thepeculiarityofcompatibletransmittersisthatthe
identicationcodeisdifferentforeachtransmitter.Therefore,inordertoallow
the receiver to recognise a determined transmitter, the recognition code must
bememorised.Thisoperationmustrepeatedforeachtransmitterrequiredto
communicate with the control unit.
Notes:
– Up to a maximum of 256 transmitters can be memorised in the receiver. No
one transmitter can be cancelled; all the codes must be deleted
– For more advanced functions use the appropriate programming unit.
PRODUCT DESCRIPTION
1
Thereceiverfeatures4outputs,allavailableontheunderlyingconnector.To
ndoutwhichfunctionisperformedbyeachoutput,seechapter6.1.
During the transmitter code memorisation phase, one of these two options may
be chosen:
Mode I - Table B1: Each transmitter button activates the corresponding out-
putinthereceiver,thatis,button1activatesoutput1,button2activatesout-
put 2, and so on. In this case there is a single memorisation phase for each
transmitter;duringthisphase,itdoesn’tmatterwhichbuttonispressedand
just one memory sector is occupied.
Mode II - Table B2: Each transmitter button can be associated with a particu-
laroutputinthereceiver,e.g.,button1activatesoutput2,button2activates
output1,andsoon.Inthiscase,thetransmittermustbememorised,pressing
the required button, for each output to activate. Naturally, each button can
activate just one output while the same output can be activated by more than
onebutton.Onememorysectionisoccupiedforeachbutton.
TABLE B1 - Mode I memorising (All buttons are memorised on the related receiver output)
01. Press and hold down the receiver button for at least 3 seconds
02. Release the button when the Led lights up
03. Push,foratleast2seconds,anyofthebuttonsofthetransmittertobememorisedwithin10seconds
Note – If the procedure was memorised correctly, the Led on the receiver will ash 3 times. If there are other transmitters
to memorise, repeat step 3 within another 10 seconds. The memorisation phase nishes if no new codes are received
for 10 seconds.
3s
RX
RX
2s
x3
INSTALLING THE AERIAL
2
ThereceiverrequiresanABForABFKITtypeaerialtoworkproperly;withoutan
aerialtherangeislimitedtojustafewmetres.Theaerialmustbeinstalledas
highaspossible;iftherearemetalorreinforcedconcretestructuresnearbyyou
can install the aerial on top. If the cable supplied with the aerial is too short, use
acoaxialcablewith50-Ohmimpedance(e.g.lowdispersionRG58),thecable
mustbenolongerthan10m.
If the aerial is installed in a place that is not connected to earth (masonry struc-
tures),thebraid’sterminalcanbeearthedtoprovidealargerrangeofaction.
Theearthpointmust,ofcourse,belocalandofgoodquality.IfanABFor
ABFKITaerialcannotbeinstalled,youcangetquitegoodresultsusingthe
lengthofwiresuppliedwiththereceiverastheaerial,layingitat.
WARNING – When the memorisation phase is activated, any tran smitter
correctly recognised within the reception range of the radio is memo-
rised. Consider this aspect with care and remove the aerial if necessary
to reduce the capacity of the receiver.
MEMORISING A REMOTE CONTROL
3
Theproceduresformemorisingtheremotecontrolsmustbeperformedwithin
acertaintimelimit;pleasereadandunderstandthewholeprocedurebefore
starting.
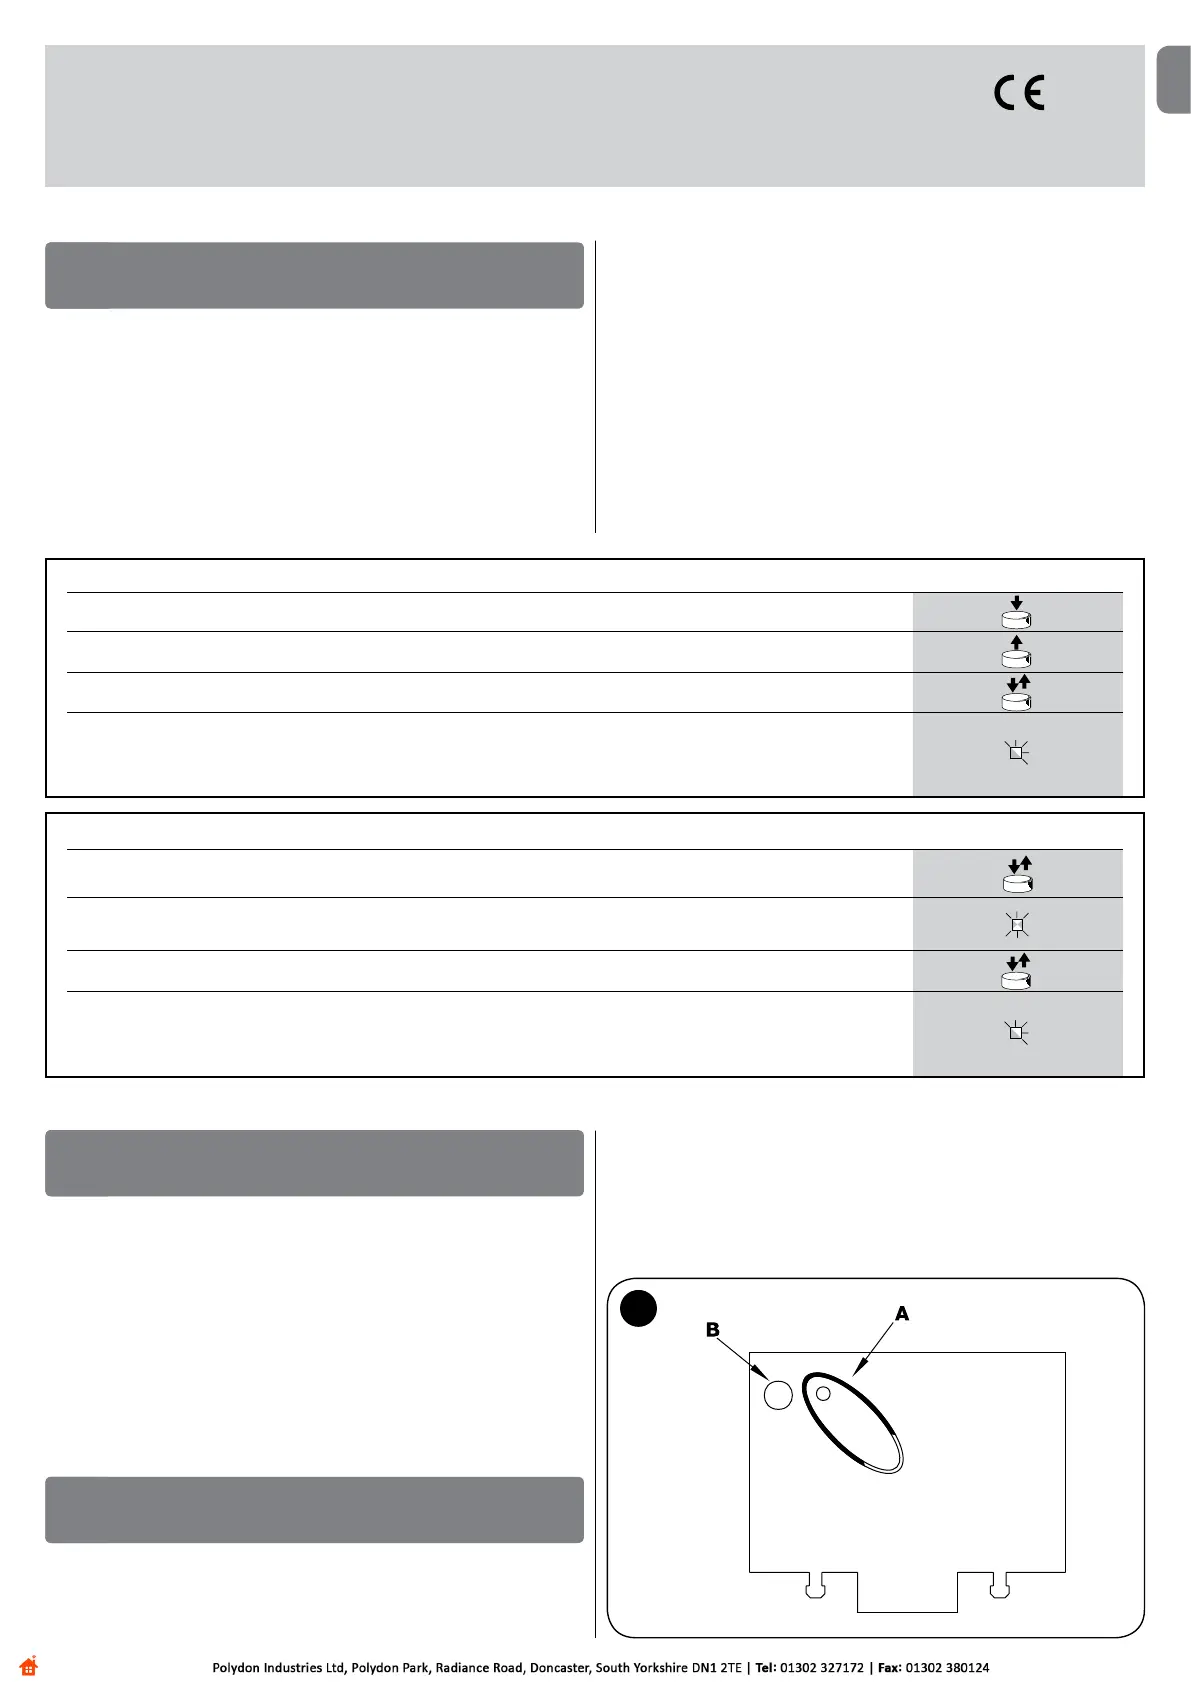
In order to carry out the following procedure, it is necessary to use the button
located on the box of the radio receiver (reference A,Fig.1a),andthecorre-
sponding LED (reference B,Fig.1a)totheleftofthebutton.
1a
TABLE B2 - Mode II memorising (A specic receiver output can be associated to each button)
01. Pressandreleasethereceiverbuttonasmanytimesasthenumberofthedesiredoutput(OnceforoutputNo.1,
twiceforoutputNo.2)
02. CheckthattheLEDemitsthesamenumberofashesasthedesiredoutput,repeated over10secondsinregular
intervals(1ashifoutputNo.1,2ashesifoutputNo.2)
03. Within10secondspressthedesiredbuttononthetransmittertobememorised,holdingitdownforatleast2seconds.
Note – If the procedure was memorised correctly, the Led on the receiver will ash 3 times. If there are other transmitters
to memorise, repeat step 3 within another 10 seconds. The memorisation phase nishes if no new codes are received
for 10 seconds.
2s
x3
RX
TX
EN
 Loading...


