ENGLISH – 25
RADIO PROGRAMMING
7
7 RADIO PROGRAMMING
7.1 RADIO PROGRAMMING DESCRIPTION
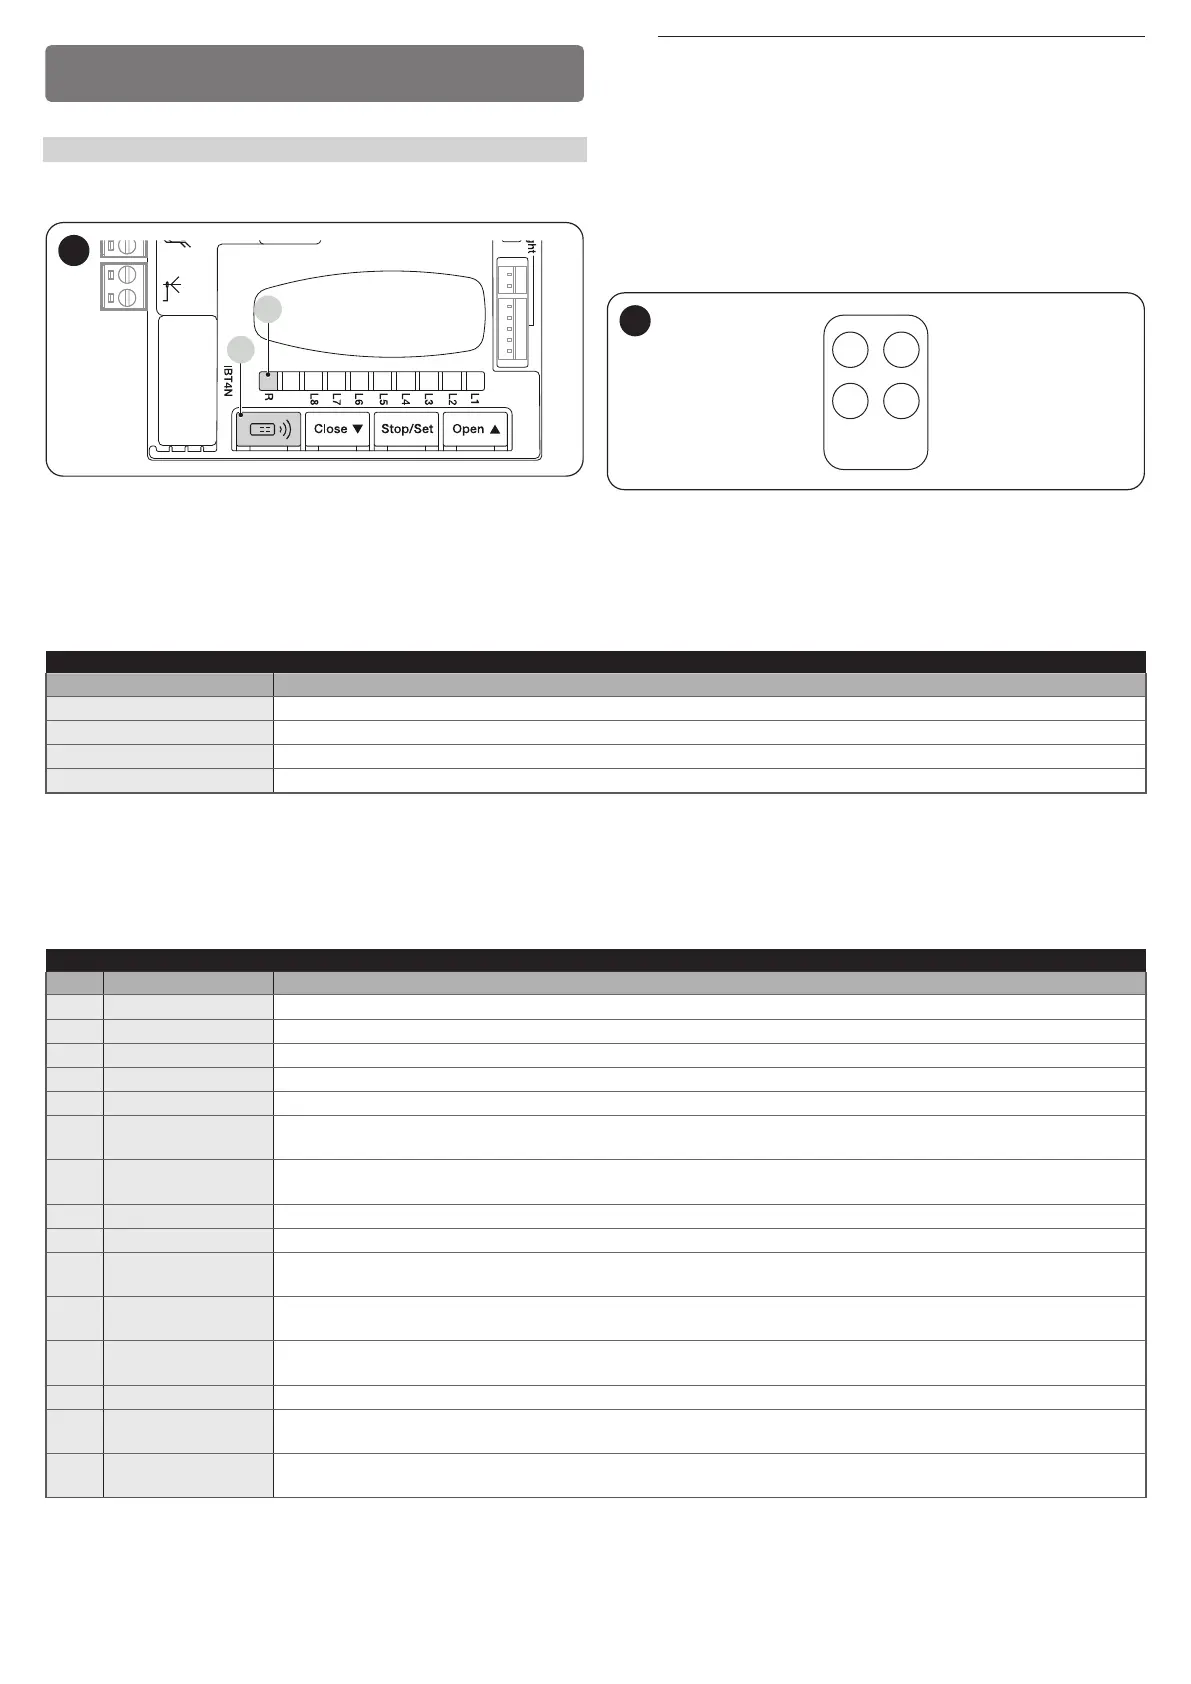
During the execution of the programming procedures, refer to “Figure 48”
to identify the radio button (A) and LED R (B) on the control unit.
Aerial
A
B
48
a
The procedures have a limit time for being performed.
Before starting, it is necessary to understand the entire
process.
The symbols used in the various programming / deletion procedures with
the internal radio module are listed in “Table 10”.
7.1.1 PROCEDURE FOR MEMORISING TRANSMITTER
BUTTONS
The radio remote controls can be memorised in 2 ways: in “standard”
mode (or Mode 1) and in “custom” mode (or Mode 2).
1 2
3 4
49
7.1.1.1 STANDARD memorisation (Mode 1: all buttons)
Procedures of this kind allow for simultaneously memorising, during their execution, all the buttons on the transmitter. The system automatically asso-
ciates each button with a pre-dened command, according to the following scheme:
Table 8
TRANSMITTER FUNCTION PAIRINGS
Command Button
Step-by-Step Will be paired with button 1
Partial Open Will be paired with button 2
OPEN Will be paired with button 3
CLOSE Will be paired with button 4
7.1.1.2 CUSTOM memorisation (Mode 2: one button only)
Procedures of this type allow for memorising – during their execution – a single button among those present on the transmitter.
The installer decides which button to associate with the command on the basis of the automation’s needs.
The commands available in this mode are those present in “Table 9”.
Table 9
OXI / OXIBD / OXIFM / OXIT / OXITFM EXTENDED MODE II
No. Command Description
1 Step-by-Step “SbS” (Step-by-Step) command
2 Partial opening 1 “Partial opening 1” command
3 Open “Open” command
4 Close “Close” command
5 Stop Stops the manoeuvre
6
Condominium Step-
by-Step
Command in condominium mode
7
High priority Step-
by-Step
Commands also with the automation locked or the commands enabled
8 Partial open 2 Partial open (the gate opens up to the position set through Partial Open 2)
9 Partial open 3 Partial open (the gate opens up to the position set through Partial Open 3)
10
Opens and locks the
automation
Triggers an opening manoeuvre and, once this terminates, locks the automation; the control unit will not accept any
command other than “High-priority Step-by-Step”, “Unlock”, “Unlock and close” and “Unlock and open”
11
Closes and locks
the automation
Triggers a closing manoeuvre and, once this terminates, locks the automation; the control unit will not accept any command
other than “High-priority Step-by-Step”, “Unlock”, “Unlock and close” and “Unlock and open”
12 Lock automation
Triggers the stoppage of the manoeuvre and locks the automation; the control unit will not accept any command other than
“High-priority Step-by-Step”, “Unlock”, “Unlock and close” and “Unlock and open”
13 Release automation Triggers unlocking of the automation and restores normal operation
14
On Timer
Courtesy light
The courtesy light output switches on with timer-based switching off
15
On-Off
Courtesy light
The courtesy light output switches on and off in Step-by-step mode