17
Section 2 - Installation
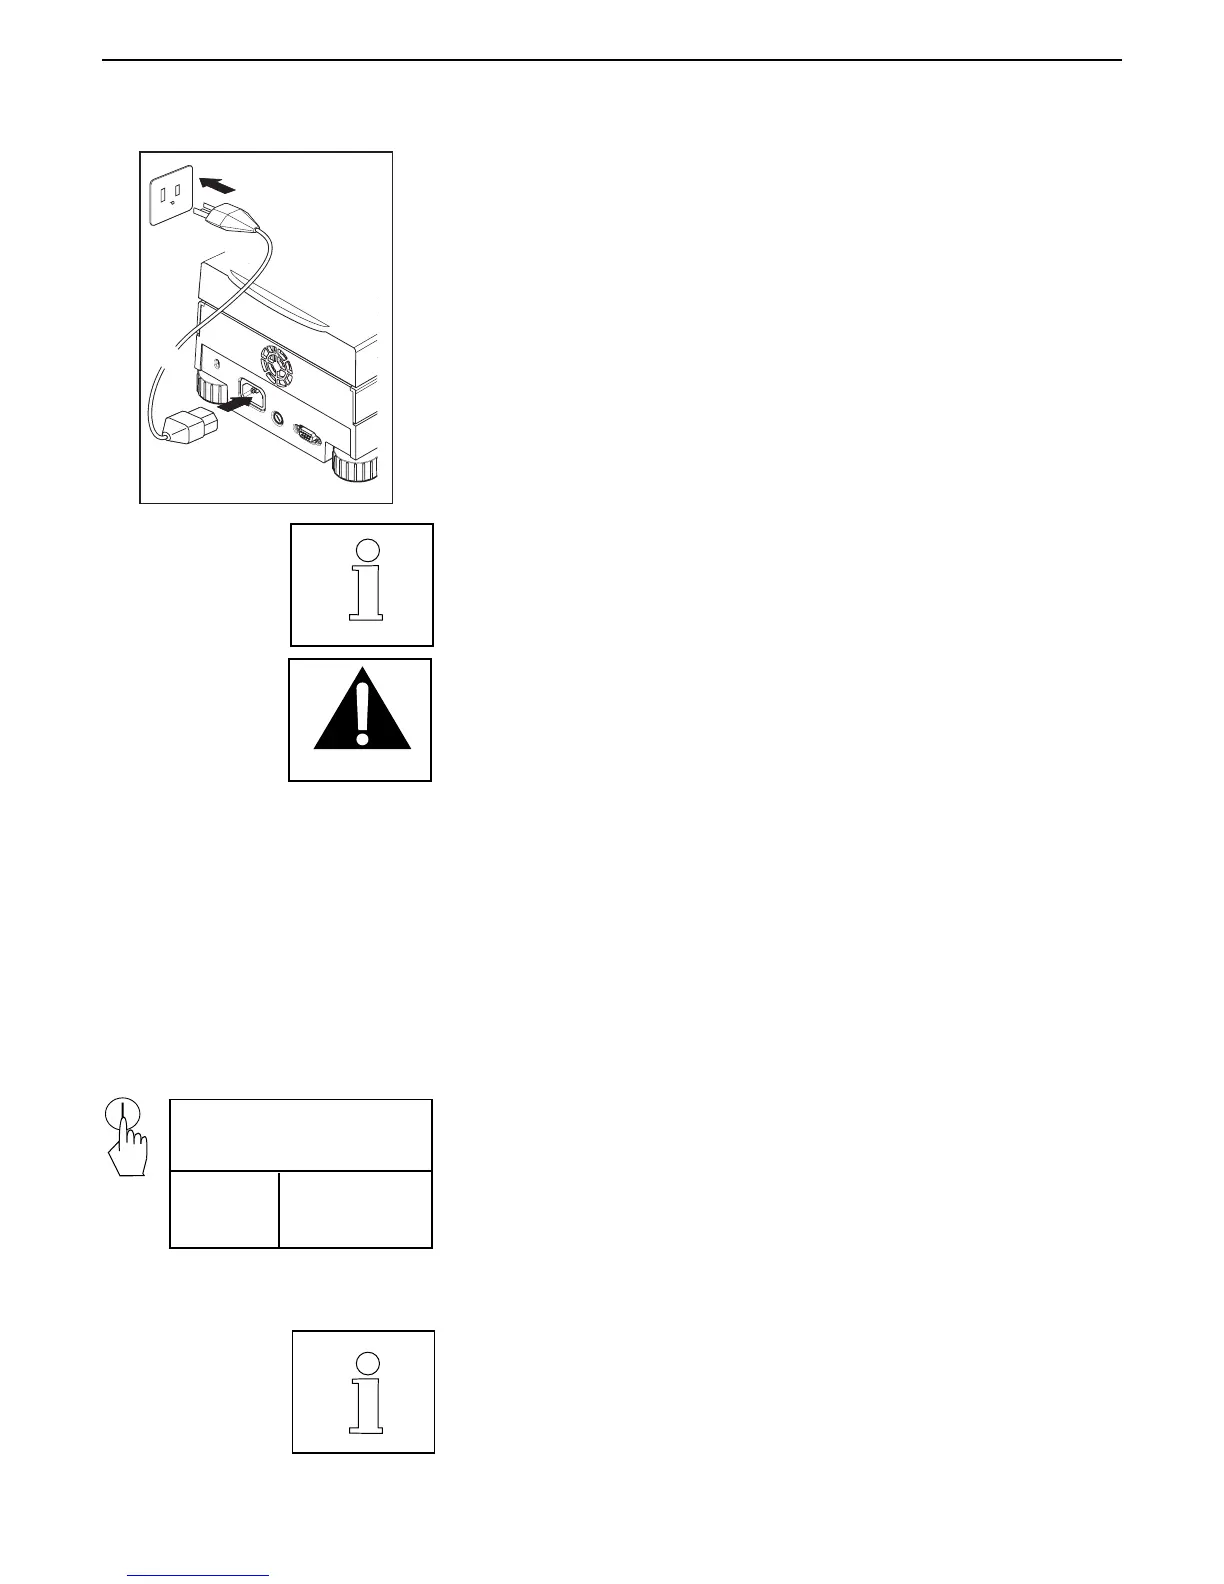
Connect the power cord supplied to the three pin connector located at the
rear of the Moisture Analyzer and to a power source. The Moisture Analyzer
becomes operational as soon as power is applied. The display will remain
off until the On/Off button is pressed.
WARNING:
If the power cable supplied is not long enough, use only a 3-pin extension
cable with equipment grounding connector.
Allow the Moisture Analyzer to warm up for at least 30 minutes to enable
it to adapt itself to the ambient conditions. If the Moisture Analyzer has been
stored in a very cold environment before installation, it may require several
hours for it to stabilize.
2.6 Switching the Moisture Analyzer on and off
Your Moisture Analyzer is on at all times when connected to a power source. The display can be turned on or off.
To switch the Moisture Analyzer on, press the On/Off button. An internal
diagnostic test is performed; the display lights and the logo and product
name appears followed by the initial display.
To switch the Moisture Analyzer off, press the On/Off button. After the
analyzer has been switched off, it is in the standby mode. If you wish to
perform a test, press the On/Off button again.
As your Moisture Analyzer needs no warm-up time when in the standby
mode and is immediately ready for testing samples, we advise you to switch
the display off by use of the On/Off button and not to disconnect it from the
power supply. This also ensures that the Moisture Analyzer is always in
thermal equilibrium.
On/Off
CLEAR
PAN
PRESS
TARE
TEST ID: -DEFAULT-
TEMP/TIME: 100C / 10:00
TARG. WGT: 1 GRAMS
0.000
* GRAMS