45850101TH Rev.1
4-37
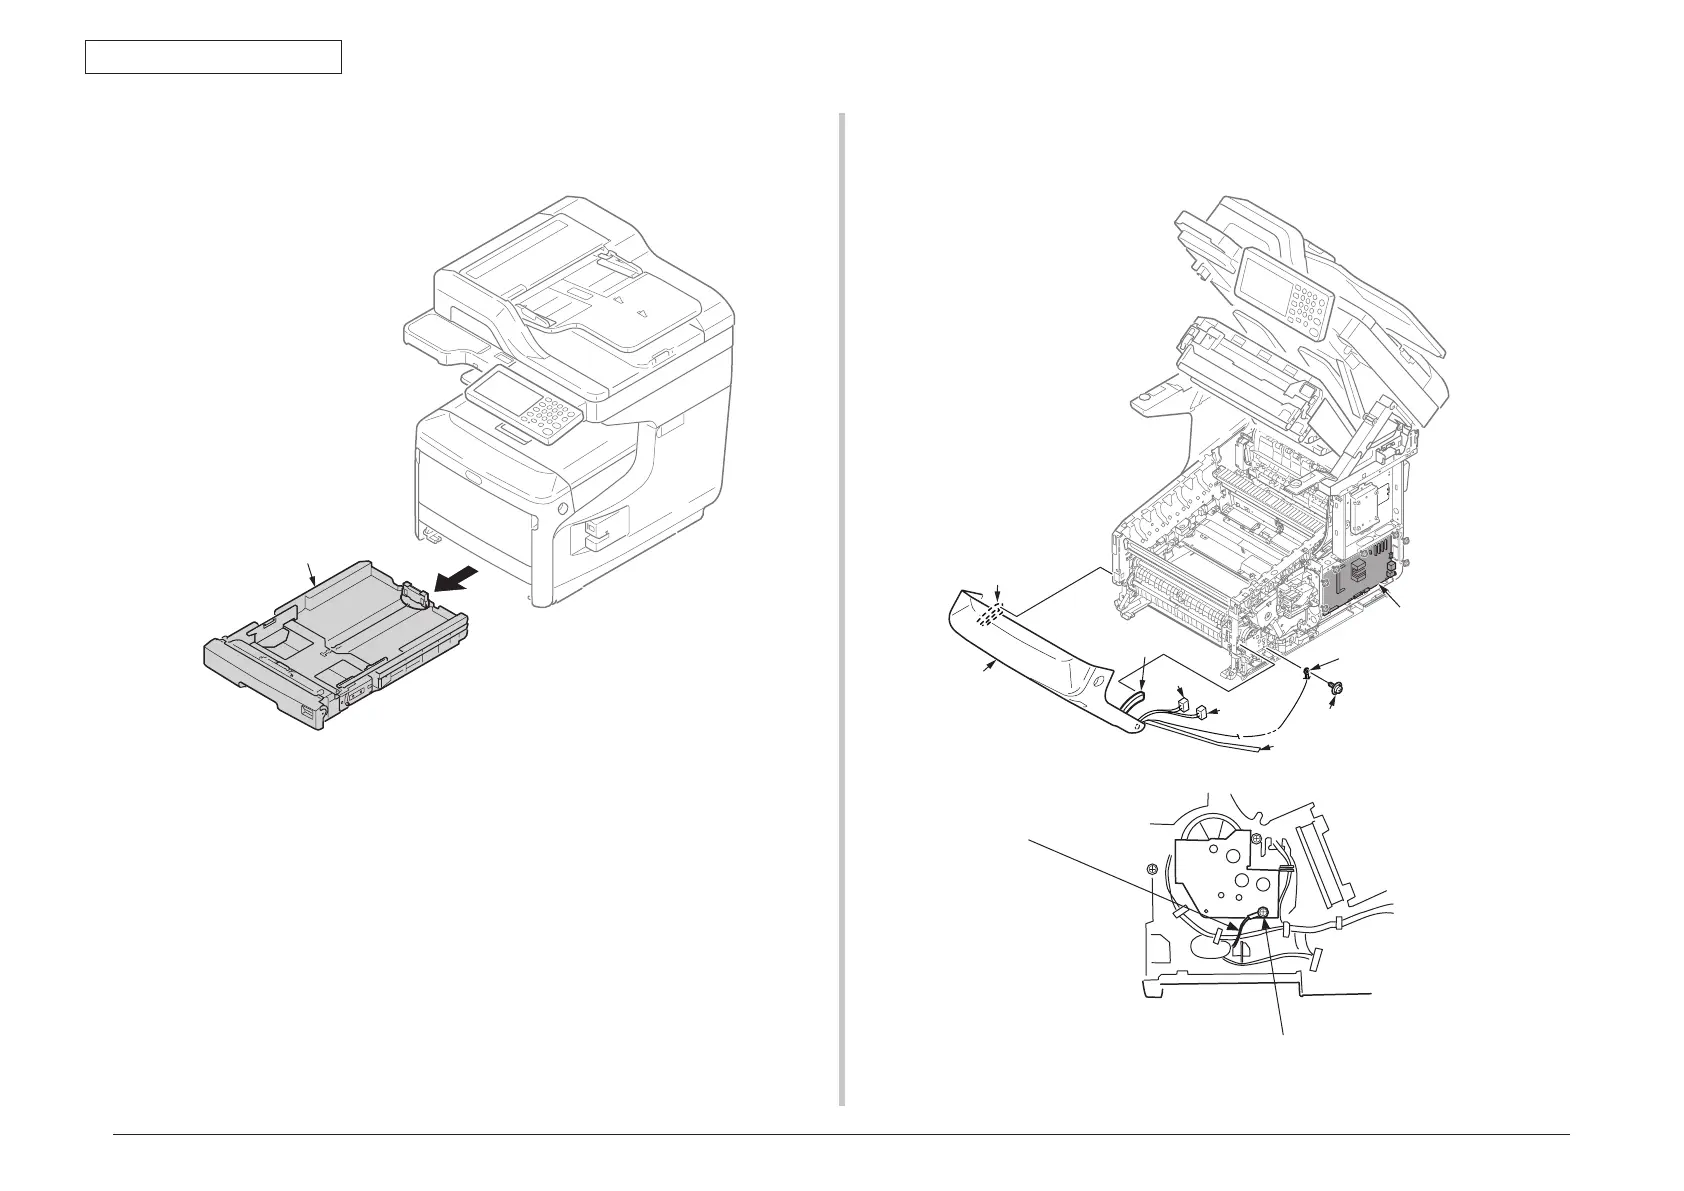
4.2.17 Front cover Assy.
(1) Pull the cassette
①
out of the MFP.
(2) Remove the image drum unit/belt unit. (Refer to section 4.2.1)
(3) Detach the cover side-L Assy. (Refer to section 4.2.3)
(4) Detach the Plate-shield. (Refer to section 4.2.8)
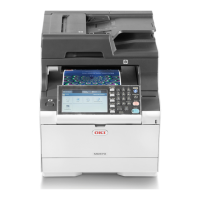
(5) Disconnect the FFC cable
②
from the main board Assy., release the clamp that is
holding the FFC cable
②
, and disconnect the FFC cable
②
from the main unit.
(6) Disconnect the Cable
③
and the Cable
④
.
(7) Release the two stays
⑤
.
(8) Remove the screw (silver)
⑥
to estrange the FG cable from the main unit.
(9) Pull the support of the front covert Assy.
⑦
out of the post of the main unit and
detach the front cover Assy.
⑦
.
①
FG cable
⑤
⑤
④
③
⑥
⑦
FG cable
④


 To Next Page