Basic Operation
3-2 OPERATION GUIDE
Basic Copying Procedure
1
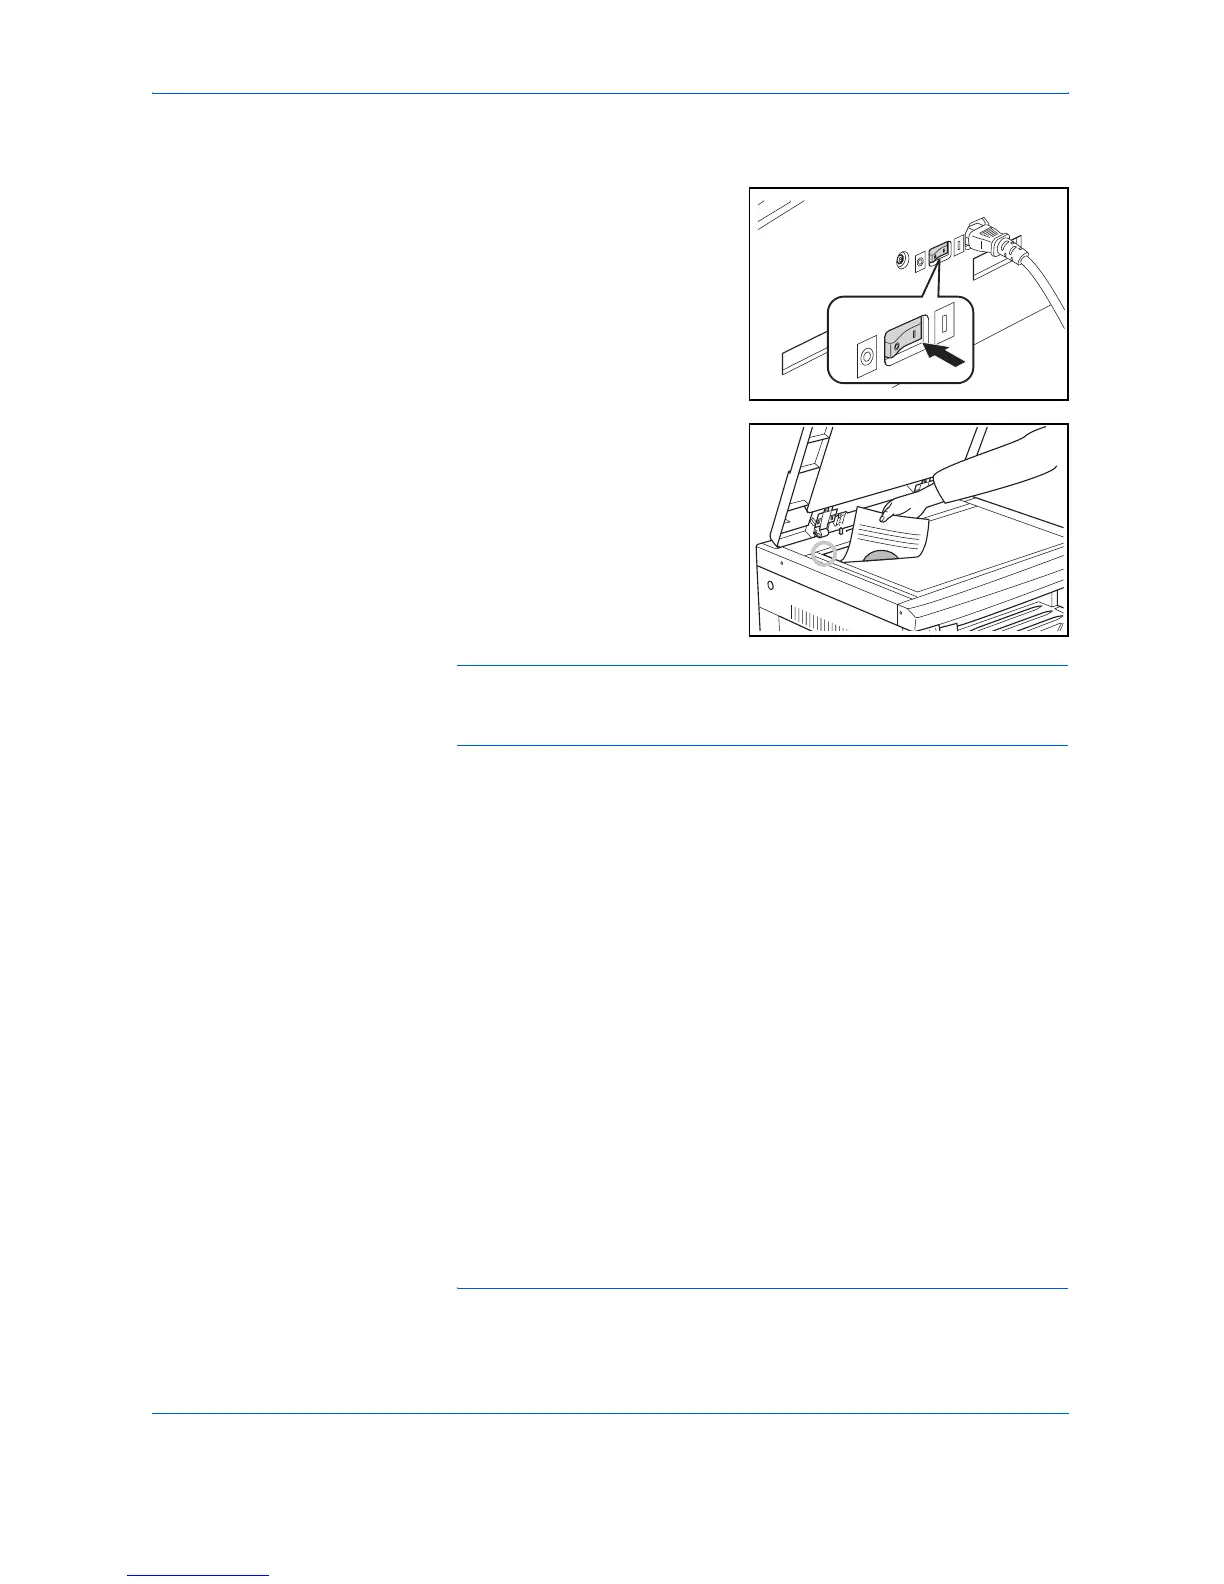
Warm-up
Turn ON (|) the Power Switch.
Start will light up after warm up
has been completed.
2
Setting the Original
Set the copy original on the glass
platen. Align the original so that
the left rear corner is flush against
the original size indicator.
NOTE: Please refer to Setting Originals in the Document Processor on
page 7-3 for the procedure used for placing the original when using the
optional Document Processor.
3
Selecting Functions
Select any of the various functions available.
4
Paper Selection
When Automatic Paper Selection is lit, a paper size identical to the original
will be automatically selected. Press [Paper Selection] in order to select
a different paper size to copy.
NOTE: It is possible to turn off the Automatic Size Selection function.
(Refer to Cassette Selection on page 5-13.)
• Making enlarged and reduced copies (Refer to page3-5.)
• Interrupt Copying (Refer to page3-7.)
• Making 2-Sided copies from various types of originals (Refer to
page4-2.)*
*. The Duplex Unit (option) is necessary.
• Split Copy Modes (Refer to page4-6.)
• Making a margin space on the copies (Refer to page4-8.)
• Making copies with clean edge (Refer to page4-10.)
• Fitting the image of either two or four originals onto a single copy
page (Refer to page4-12.)
• Automatic Collating of copy sets (Refer to page4-19.)