93
GB
1505093, Edition 2012-05, Version 5
8 Dismantling / Mounting in Case of Service
2. Position the pivot with 3-pole plug coupling 6, keeping it straightly aligned,
and establish the assembly connection 5 by gently pushing towards the
LCH spring arm 6.
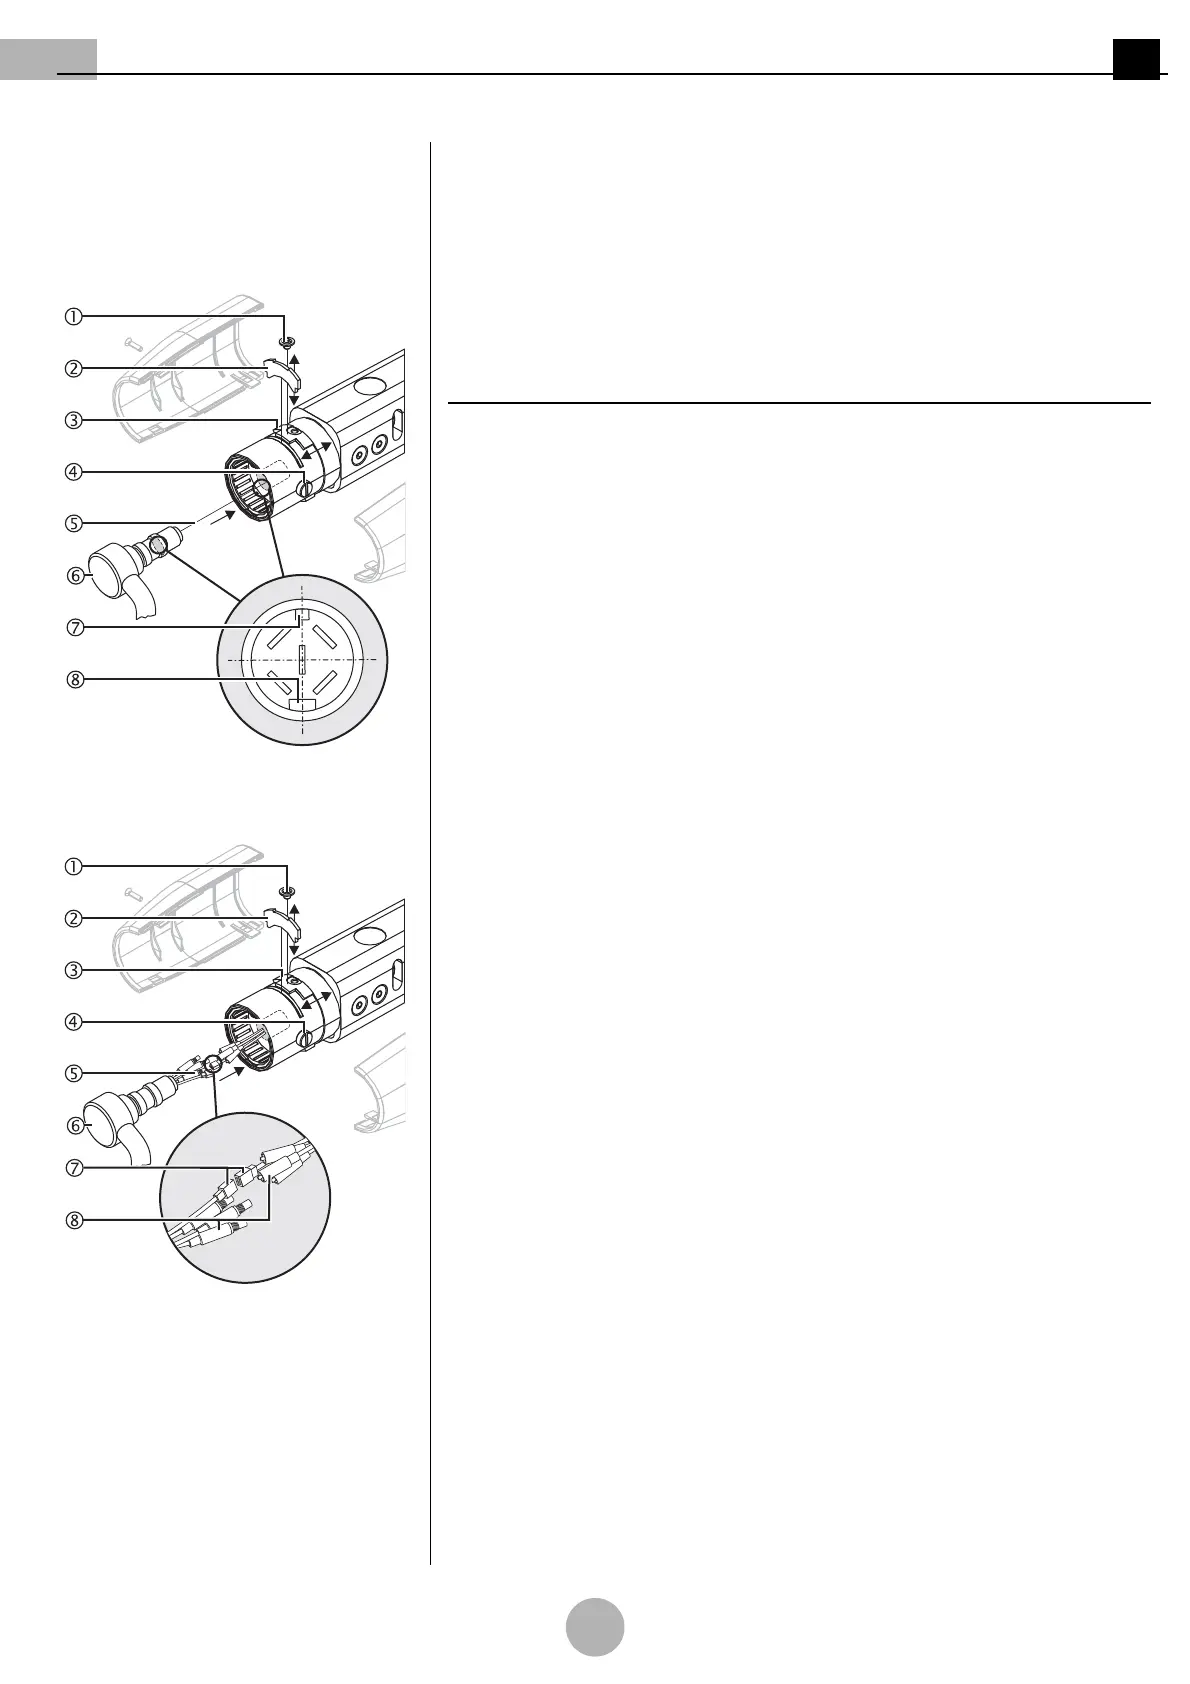
Figure 19: Version with 5-pole plug cou-
pling
Only for version with 5-pole plug coupling
(See "Figure 19")
1. Grease the pivot groove and the pivot 6 using a suitable anti-friction bearing grease
(e.g. Optimol).
NOTE – Plug positioning through the grooves
• The 5-pole plug coupling 6 has a narrow groove 7 and a wide groove 8.
• To establish the plug connection 5, the grooves 7/8 must fit into the corresponding
grooves of the counter piece.
2. Position the pivot with 5-pole plug coupling 6, keeping it straightly aligned,
and establish the assembly connection 5 by gently pushing towards the
LCH spring arm 6.
Figure 20: Version with 7/9-pole plug cou-
pling
Only for version with 7/9-pole plug coupling
(See "Figure 20")
Connecting the plug
1. Connect the 6-pole plug 7.
2. Screw 3 plug adapters 8 into each other in accordance with the colour code.
3. Gently push the 6-pole plug 7 and the plug adapters 8 into the LCH spring arm
6.
Mounting the end device
4. Grease the pivot groove and the pivot 6 using a suitable anti-friction bearing grease
(e.g. Optimol).
5. Insert the pivot 6 into the LCH spring arm 6, keeping it precisely axially aligned.