24 The Information Company
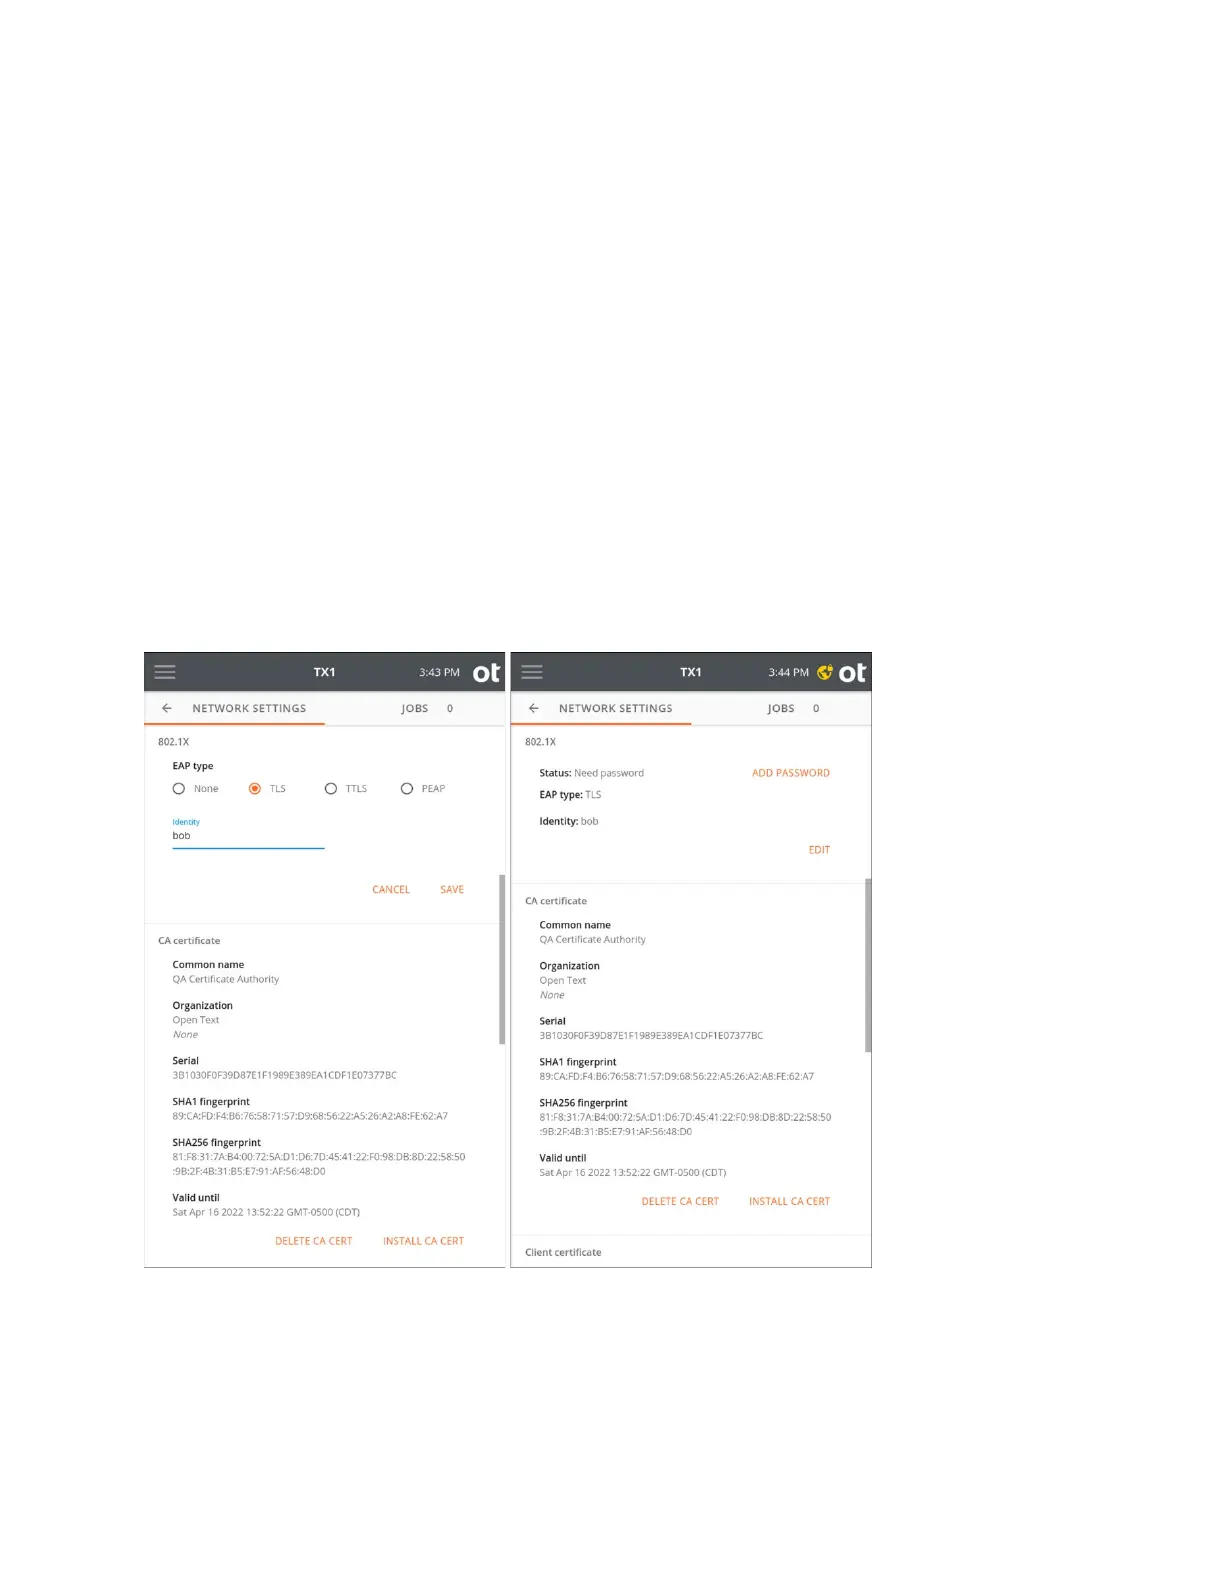
Then tap Identity to enter your 802.1X identity (required). Note that each EAP type has
additional requirements and configuration settings depending on the type selected, as
covered in the sections below.
Note that one or more certificates (depending on the EAP type and other settings) may
need to be loaded onto your TX1 before attempting to authenticate on the network. The
certificate loading process is straightforward. First, store the required certificates on a
USB memory device, and then insert that device into a TX1 USB Accessory port. In the
CA and/or Client certificate areas in the Network Settings screen, tap the appropriate
certificate installation button (Install CA Cert or Install Client Cert). A browse window
will appear, allowing navigation to the appropriate memory device and certificate file.
Simply select the desired certificate file from the browser and tap the Install button.
TLS: TX1 and the authentication server authenticate each other by mutually verifying
their certificates. A CA (Certificate Authority) certificate, and a client certificate, issued by
the certification authority, must be installed before authenticating using this method.
Tap Save to show the selected EAP type and status in the settings summary.
TTLS: Select a Phase two internal protocol (EAP-MSCHAPv2, MSCHAPv2, MSCHAP,
CHAP, or PAP). A CA certificate must be installed on TX1 to enable server
authentication. This method uses an identity and password for client authentication. A
client certificate is not required.
Copyright © 2022 Open Text. All rights reserved. Trademarks owned by Open Text.