2-4
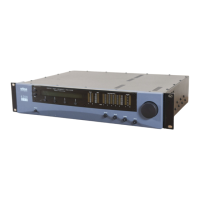
INSTALLATION ORBAN Model 8400
This will break most potential ground loops. If you have an installation that
does not respond to use of the
Ground Lift switch, you can always break a
ground loop by using Orban’s CIT25 Composite Isolation Transformer. If
the CIT25 is in use, the
Ground Lift switch will almost always be set to
GROUND.
For RFI protection, the 8400’s headphone output gets its ground return from
chassis (not circuit) ground. Therefore, if there is no connection between cir-
cuit and chassis ground, headphones will not work. This can occur if the
8400 is removed from the rack and the
Ground Lift switch is in the LIFT posi-
tion. Temporarily set the
Ground Lift switch to the GROUND position to cure
the problem.
4. Mount the 8400 in a rack.
The 8400 requires three standard rack units (5 inches/12.7 cm).
There should be a good ground connection between the rack and the 8400
chassis—check this with an ohmmeter to verify that the resistance is less than
0.5Ω.
Mounting the unit over large heat-producing devices (such as a vacuum-tube
power amplifier) may shorten component life and is not recommended. Ambi-
ent temperature should not exceed 45°C (113°F) when equipment is powered.
Equipment life will be extended if the unit is mounted away from sources of
vibration, such as large blowers and is operated as cool as possible.
5. Connect inputs and outputs.
See the hookup and grounding information on the following pages.
Audio Input and Audio Output Connections .................................... Page 2-7
AES/EBU Digital Input and Output
................................................. Page 2-8
Composite Output and Subcarrier Inputs..........................................
Page 2-9
Grounding
....................................................................................... Page 2-11
6. Connect remote control interface. (optional)
For a full listing of 8400’s extensive remote control provisions,
refer to “Re-
mote Control Interface Programming” on page 2-51.
Optically isolated remote control connections are terminated in a type
dB-25
male connector located on the rear panel. It is wired according to Fig. 2-2. To
select the desired function, apply a 5-12V AC or DC pulse between
the appro-
priate
Remote Interface terminals. The (−) terminals can be connected together
and then connected to ground at pin 17 to create a Remote Common. A cur-
rent-limited +12VDC source is available on pin 25. If you use 48V, connect a
2kΩ ±10%, 2-watt carbon composition resistor in series with the Remote
Common or the (+) terminal to provide current limiting.
In a high-RF environment, these wires should be short and should be run
through foil-shielded cable, with the shield connected to CHASSIS
GROUND at both ends.