211
2-14 Image Display Screen
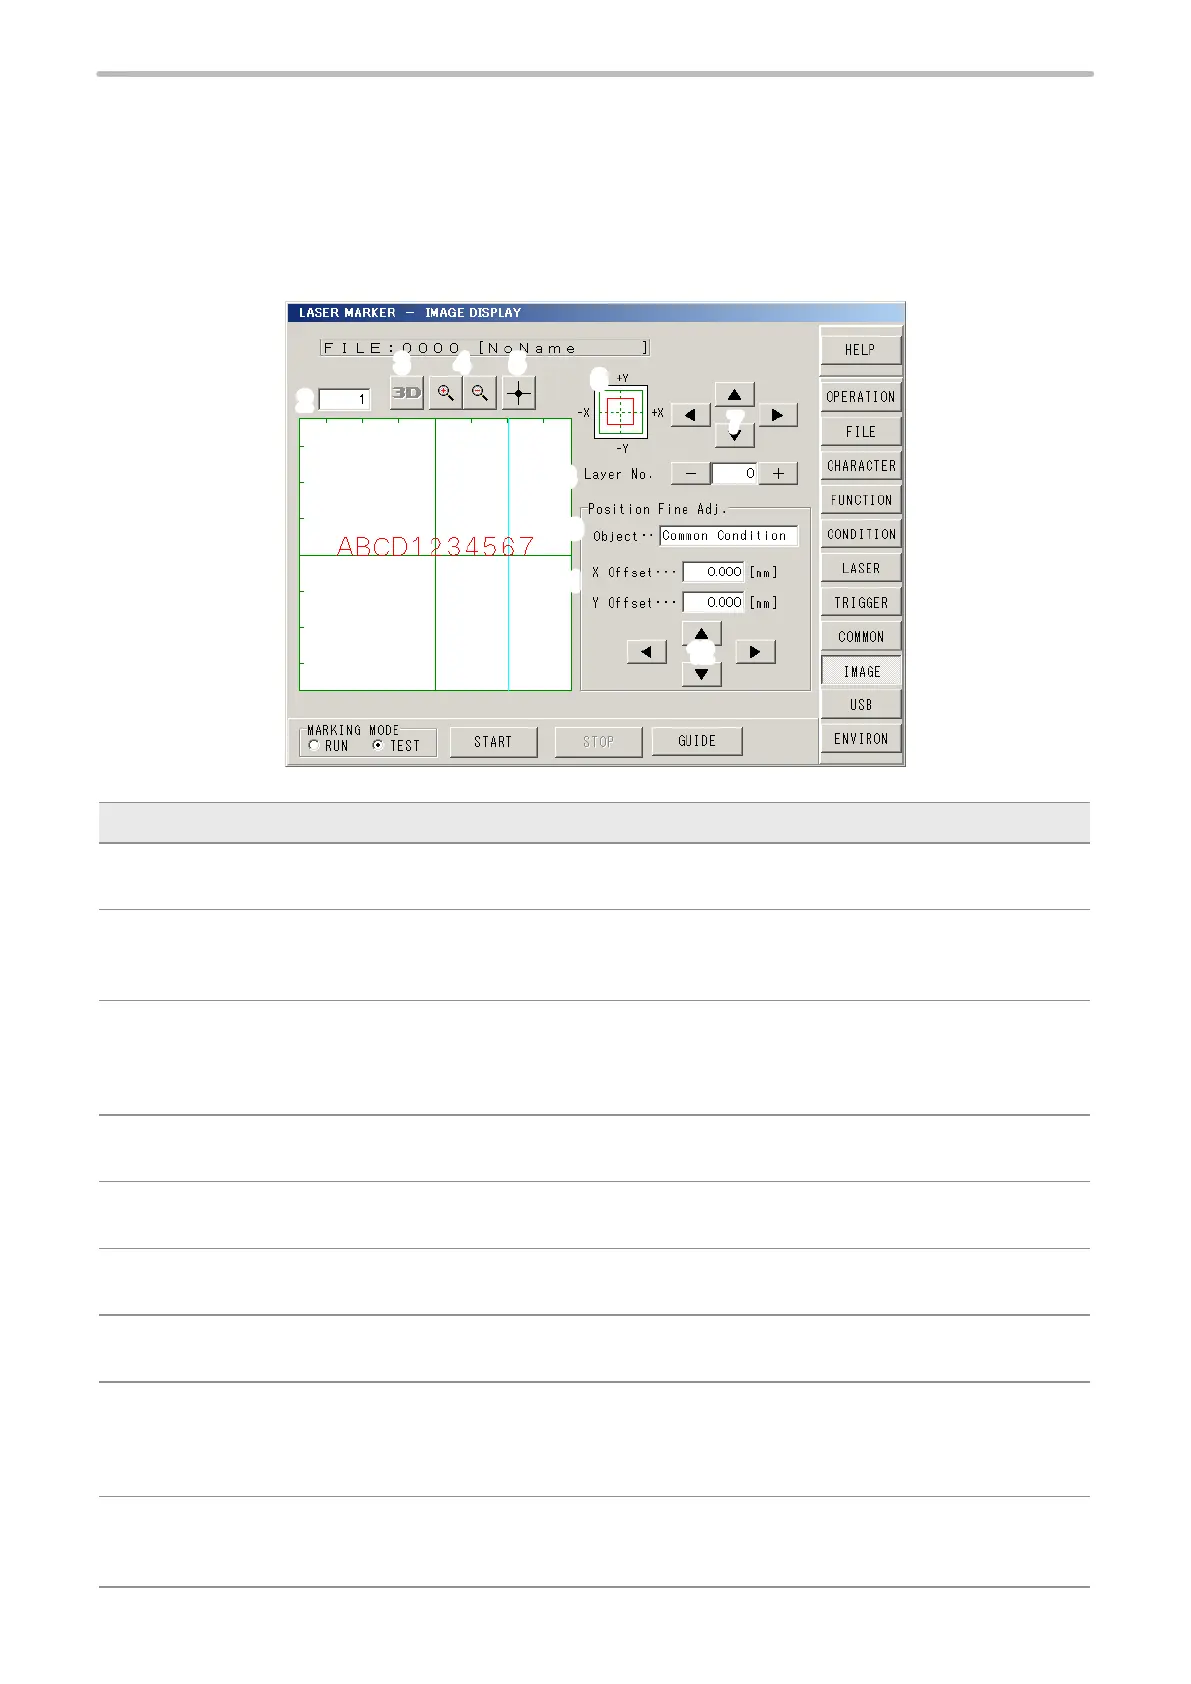
This is a screen for checking the image of character string/logo set in the character setting or condition setting.
Image checking before marking is effective to reduce any errors.
Position adjustment is also possible on this screen. Adequate position can be set by checking the image.
2-14-1 Image Display
1
43 5
6
7
8
10
9
2
11
12
Description
1 Image Screen :
Image-displays the marking content set previously.
2 Magnication :
Sets the magnication ratio of the image display.
Press the numeric part of the magnication to set the arbitrary magnication on the screen.
3 3D Display (LP-M / LP-Z series only) :
This button appears when the 3D marking mode is selected. By pressing this button, both the 3D gure and
marking content are displayed with 3D view screen.
Refer to “2-14-3 3D View Screen” (P.213).
4 Image Display Zoom-in/Zoom-out :
The image can be zoomed in and out by 18 steps.
5 Center of Image Display :
Set the origin center to image display position.
6 Image Display Position :
Indicates where the current image is in the marking eld.
7 Shift Display Position :
Shifts image display part up and down, left and right. Pressing arrow shifts the image display part.
8 Layer No. *1:
The layer No. is displayed when the 3D marking mode is selected (only for LP-M and LP-Z series) or the marking
mode “Mark on Flying Object” is selected for the trigger setting.
Press [+] or [-] to select the desired layer number. The image corresponding to the selected layer No. is displayed.
9 Auxiliary Line *1:
Auxiliary line used for setting marking to ying object.
Refer to “Concatenated Marking Setting” (P.200).



 To Next Page