243
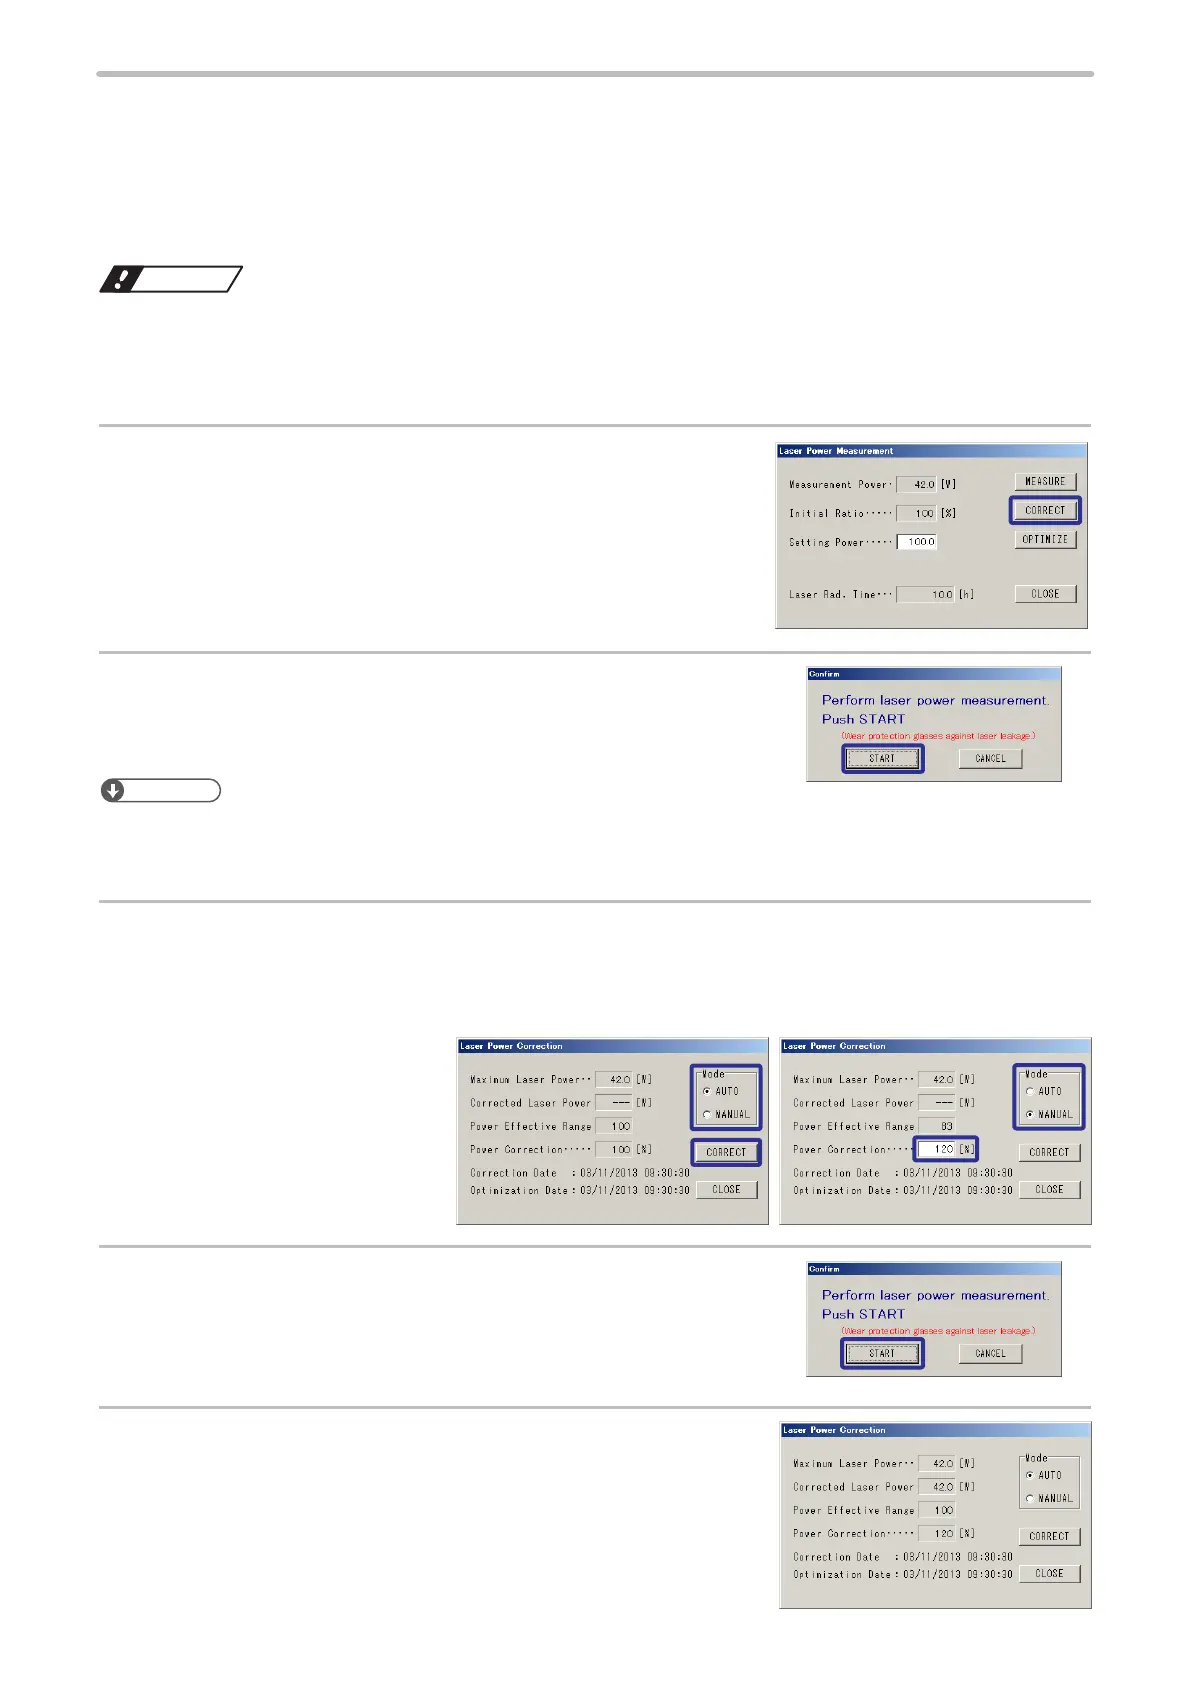
Laser power correction
After the laser power measurement if the power decays lower than the delivery status, correct the laser power setting value.
Select the correction mode from “Auto” or “Manual”.
• Auto: Sets the power correction ratio with the auto-calculated value so as to set the power to the power output at
shipping.
• Manual: Corrects the power setting with the given value [%].
Notice
• Power correction refers to the function to correct not the max. laser power [W] value but the laser power setting value.
Power correction cannot increase the output power at the maximum power setting.
• Use “Laser Output Optimize” (P.237) function to improves the accuracy of “Laser power auto correction” after the
installation, replacement or moving of laser marker.
1.
Press [CORRECT].
2.
The starting check screen is displayed.
Press [START].
The current laser power is measured.
Reference
• Step 2 is skipped directory after the laser power is measured with the laser power setting being 100.
• For LP-M5xx-S / M2xx-S type, laser power measurement / correction function is available when the laser gate is
opened.
3.
For the auto correction, select “AUTO” mode and press “Correct”.
For the manual correction, select “MANUAL” mode and input power correction value, then press
[CORRECT].
Setting range: 50 to 200[%].
4.
The starting check screen is displayed.
Press [START].
5.
Corrected Laser Power, Power Correction Ratio and
Correction Date are updated.
 Loading...