45
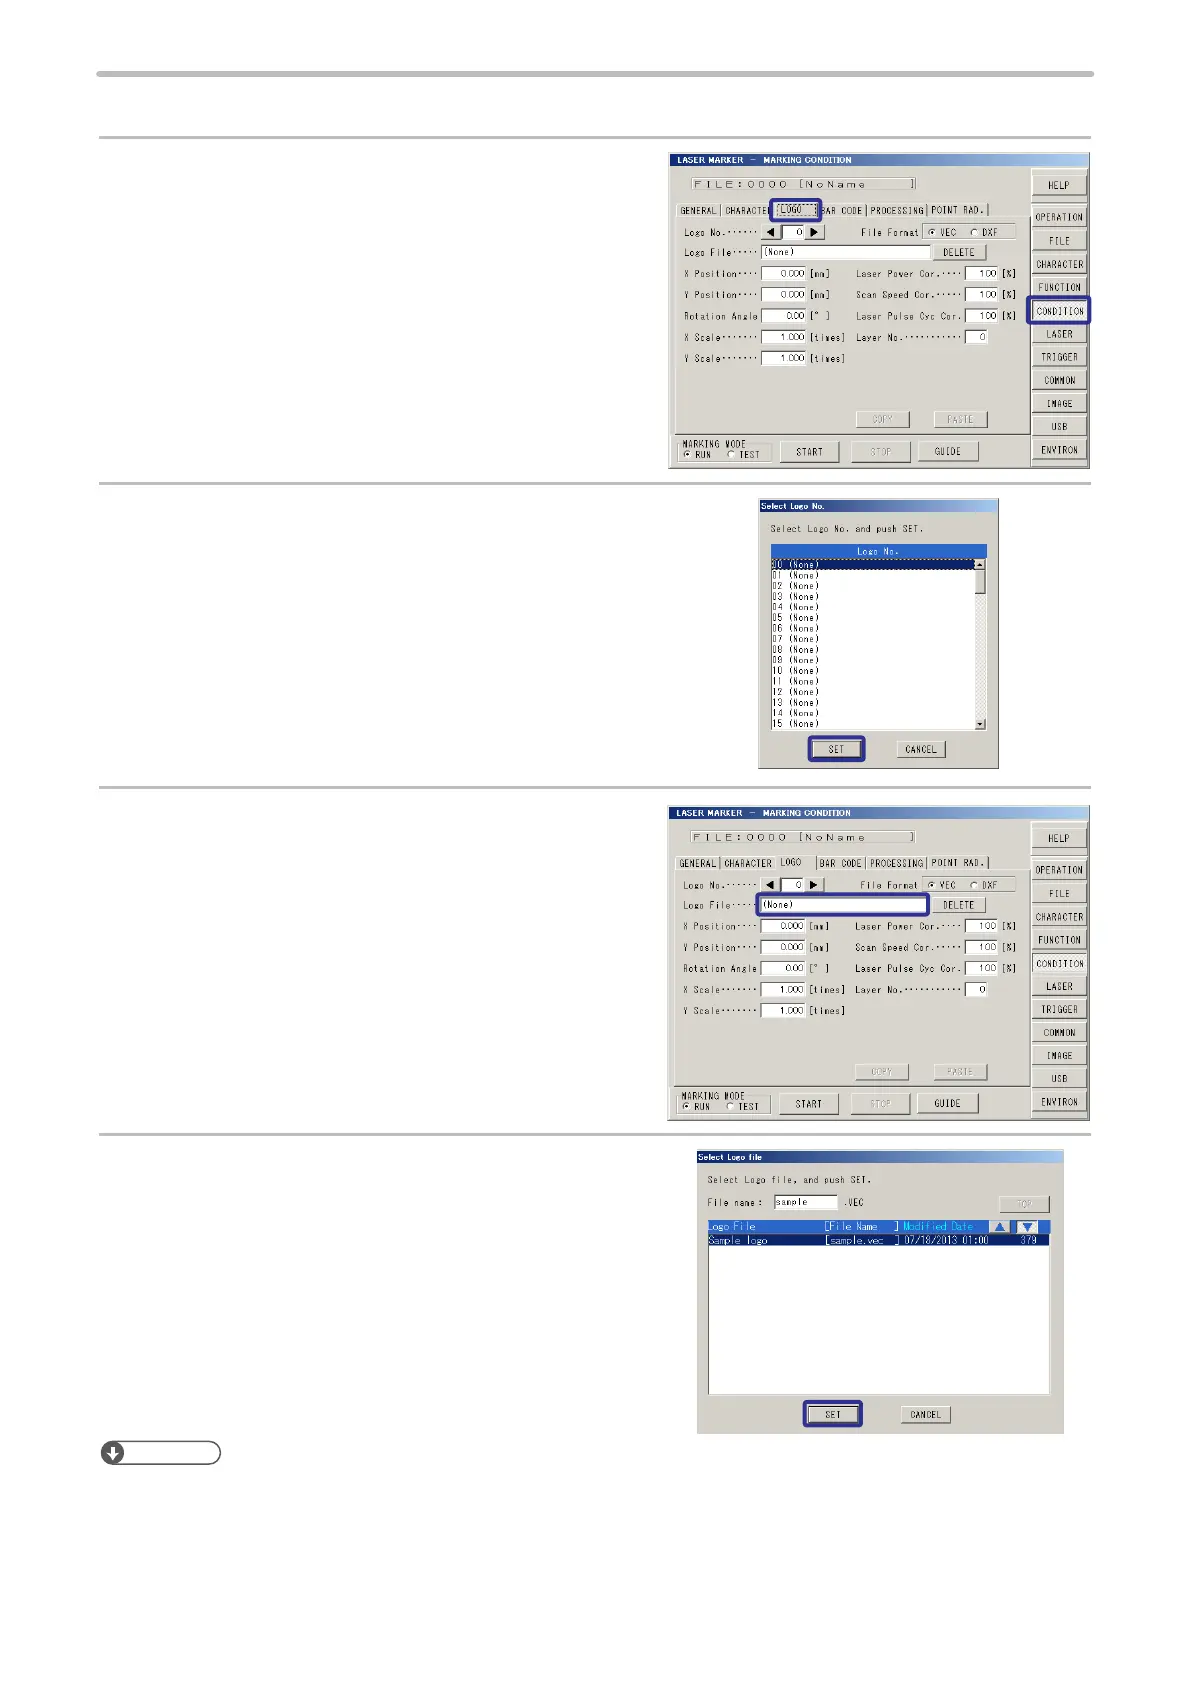
1. Select the logo data.
1.
Press [CONDITION] and press [LOGO].
2.
Select the logo No. 00, and then press [SET].
The logo No. is available to set from 0 to 99.
3.
Press [Logo File].
4.
Select the logo le from the list and press [SET].
Reference
• The logo le created newly is required to register into the laser marker. Refer to “2-15 USB Media” (P.214) and “Logo Data
Conversion Software Operation Manual”.
• As for the following le format data, BMP, DXF, JPEG, and HPGL, and art work made by Adobe
®
Illustrator
®
convert
these data into the appropriate le format data using logo data conversion software or ExportVec, and then register the
data into the laser marker. (DXF les are not required to be converted.) Refer to the “Logo Data Conversion Software
Operation Manual”, “ExportVec Operation Manual” for details.
 Loading...