EasyManuals Logo

Panasonic LUMIX DC-G9M2 User Manual

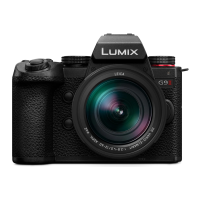
Panasonic LUMIX DC-G9M2
832 pages
To Next Page IconTo Next Page
To Previous Page IconTo Previous Page
Page #46 background imageLoading...
Page #46 background image
Getting Started Charging the Battery
46
1
Set the camera on/off switch to [OFF].
2
Insert the battery into the camera.
3
Connect the camera USB port and the AC adaptor using
the USB connection cable.
Check the direction of the terminals and plug in/out straight holding onto the
plug.
(Inserting these at an angle may cause deformation or malfunction.)
4
Connect the AC adaptor to an electrical outlet.
The charging light (B) turns red and charging begins.
Charging Light Indications
Charging light (red)
On: Charging.
Off: Charging has completed.
Blinking: Charging error.
3
4
1
2
(B)

Table of Contents

Questions and Answers:

Question and Answer IconNeed help?

Do you have a question about the Panasonic LUMIX DC-G9M2 and is the answer not in the manual?

Panasonic LUMIX DC-G9M2 Specifications

General IconGeneral
Sensor Resolution25.2 MP
Effective Pixels25.2 MP
Image ProcessorVenus Engine
ISO Sensitivity100-25600 (expandable to 50-25600)
Viewfinder3.68 million dots
MountMicro Four Thirds
Sensor TypeMOS
Sensor Size17.3 x 13.0 mm
Shutter Speed1/8000 sec - 60 sec
Autofocus Points779
Viewfinder TypeElectronic
Screen Size3.0"
Video Resolution4K (3840 x 2160) at 60p
Image Stabilization5-axis in-body image stabilization (IBIS)
Memory Card SlotDual SD card slots (UHS-II)
ConnectivityWi-Fi, Bluetooth
Battery LifeApprox. 400 shots
Weight658 g (body only)
Autofocus SystemContrast Detection with DFD Technology
ScreenFree-angle Touch LCD (1.84 million dots)
BatteryDMW-BLK22 Lithium-ion

Related product manuals