213
SQW0419
Stabilizer, Zoom and Flash
Recording mode:
When you use the flashes (DMW-FL360L, DMW-FL580L: optional) with the wireless flash
recording function, you can separately control the firing of the flashes in three groups and
of the built-in flash (or the flash attached to the hot shoe of the camera).
■
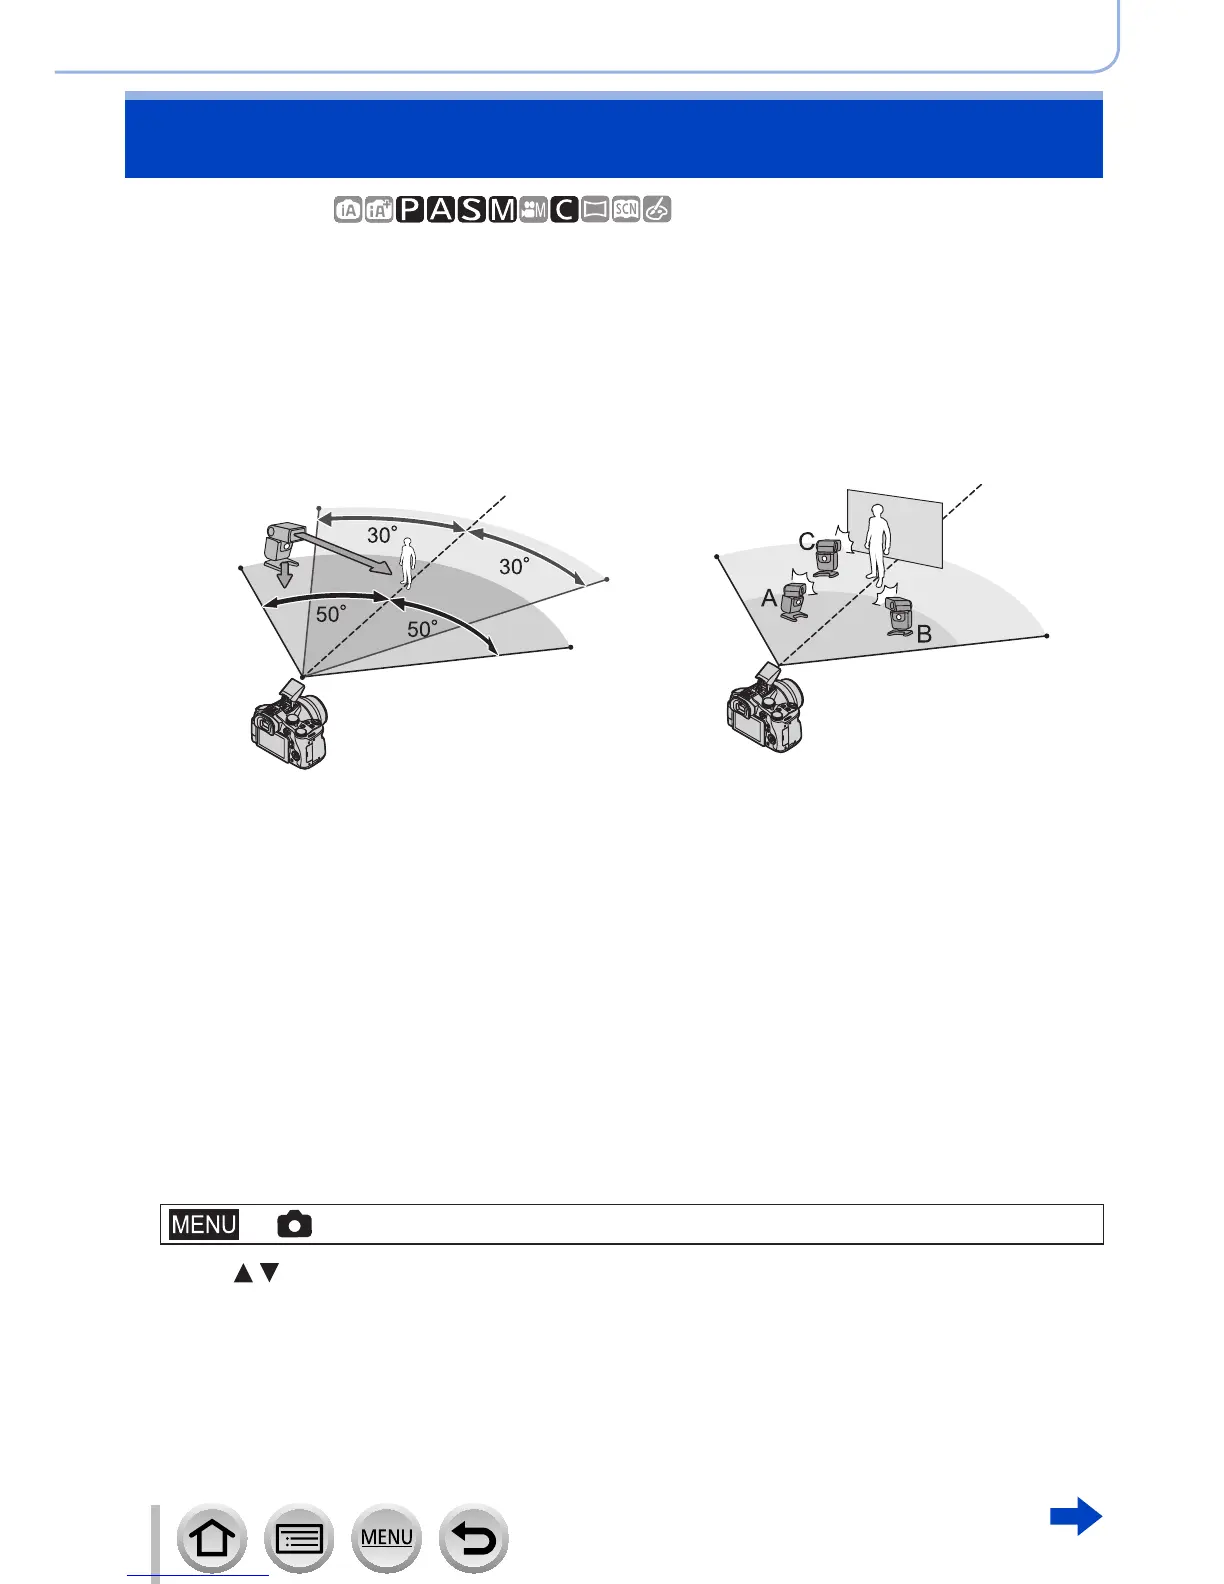
Positioning the wireless flash
Position the wireless flash with its wireless sensor facing the camera. The following
illustration is an example of the range within which the flash can be positioned. The
flash controllable range varies depending on the surrounding environment.
Flash controllable range Example of positioning flashes
2 m
(6.6 feet)
2 m
(6.6 feet)
3 m (9.8 feet)
3 m
(9.8 feet)
• This flash positioning example shows a case where flash unit C is positioned in order to
eliminate the shadows from the subject’s background, which is produced by flash unit A
and flash unit B of the flash group.
• For the number of wireless flashes to be controlled, we recommend setting up to three
flash units in each group.
• When a subject is too close, the communication light emission may affect the exposure
of the picture. This problem can be mitigated if you decrease the flash output by setting
[Communication Light] to [LOW] or using a flash diffuser or similar device.
1
Set the wireless flash to RC mode and position the flash
• Select the channel and group of the wireless flash.
2
Either open the flash by sliding the flash open lever, or attach a flash (DMW-
FL360L, DMW-FL580L: optional) to this unit
3
Set the menu
→ [Rec] → [Flash] → [Wireless]
4
Press to select [ON] and press [MENU/SET]
• When [Wireless] is set to [ON], [WL] will appear with the flash icon on the recording screen.
Taking Pictures with Wireless Flashes
 Loading...