10,00
10,002
45736
3
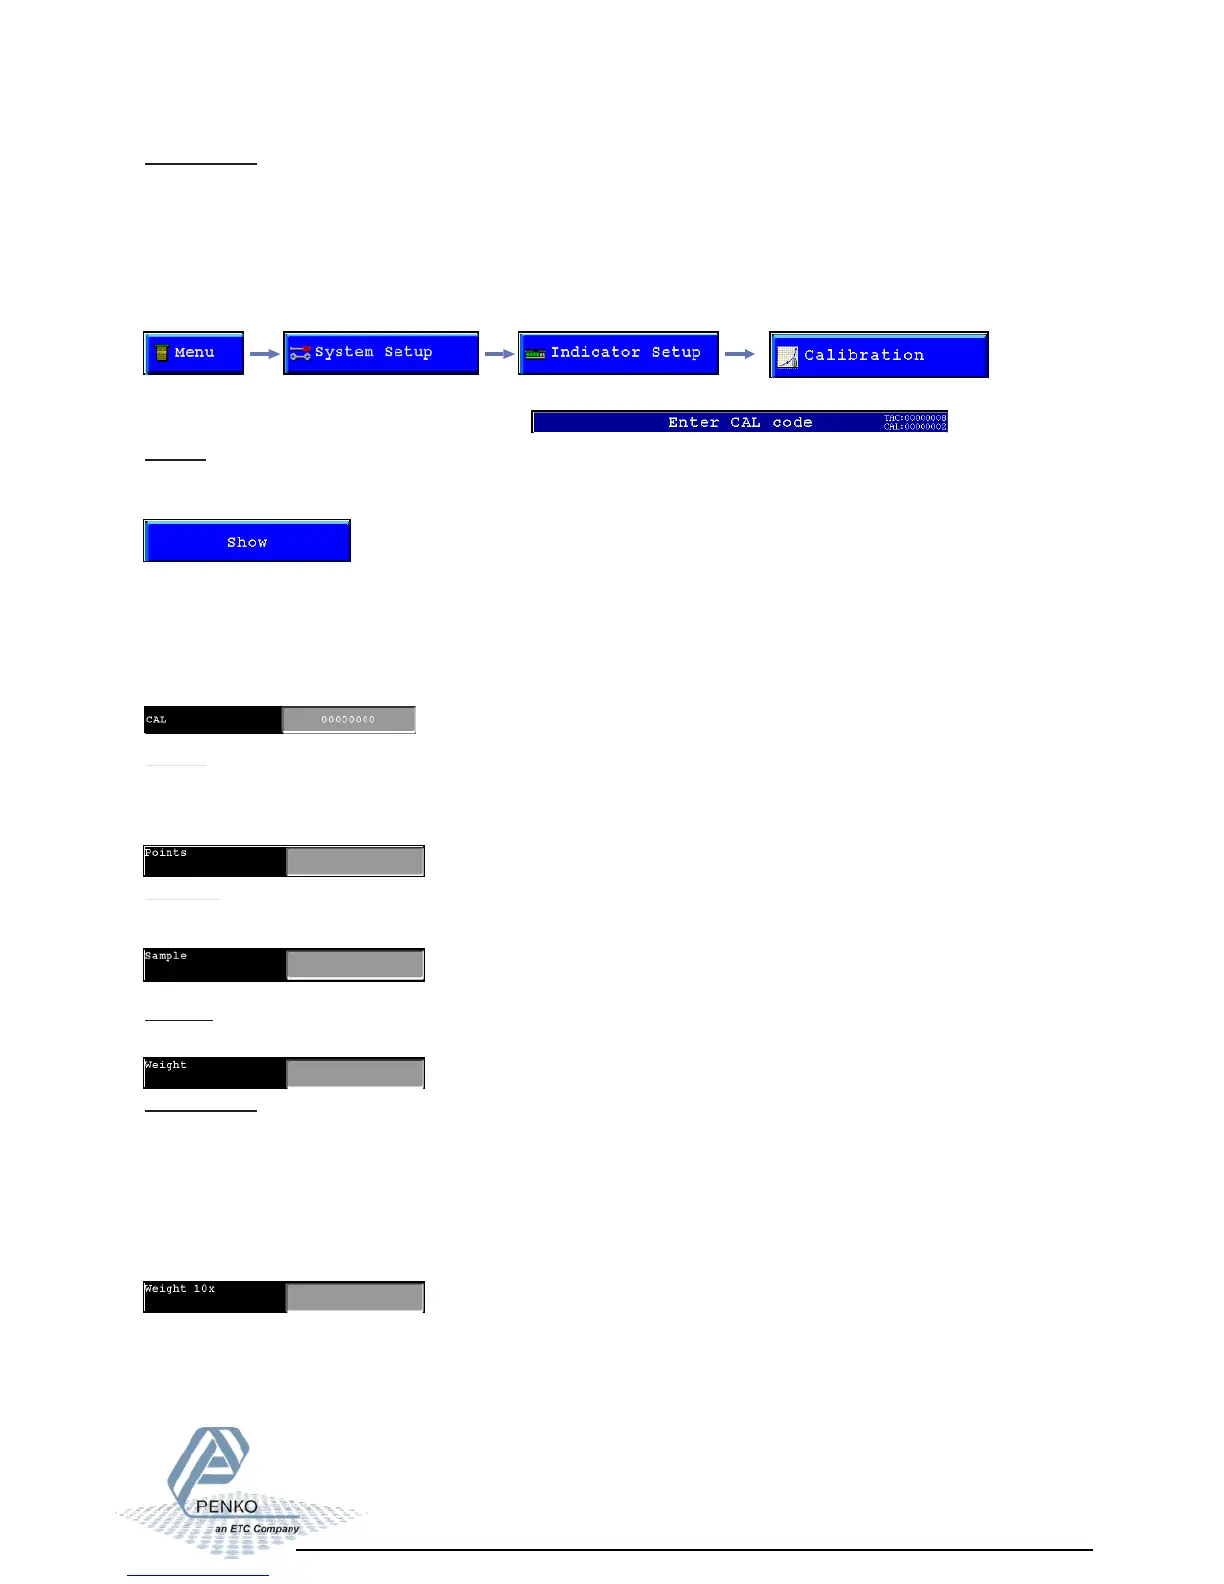
Show:
In the calibration “Show” its possible to see and check all calibration information.
To show measured sample, resulting weight and weigt x10, press the “ Show” button.
CAL:
CAL means “ Calibration code”, every time the calibration is changed this number will
increase with 1. When an indicator gets certified this number will be written on the device and
is used by the controlling agency to see if the calibration isn’t changed after sealing.
So if an indicator is certified its not allowed to change the calibration by an non authorised
person.
Points:
This field shows the amount of existing calibration points.
Its possible to have more then 2 calibration points. This is mostly used if the weigher signal in
not linear.
Before an indicator can be used, the ADC (Analog Digital Converter) needs to be calibrated.
This way it knows where to start and where to end.
The ADC converts the analog output from the load cells to a digital signal, this signal is used
for all different calculations and to make it ready for readable information on the display.
To change and check the calibration, select “Calibration” from the indicator setup
Sample:
Sample shows the direct value of the ADC (analog digital converter).
0 = minimum, 1000000 = maximum.
Weight:
This field shows the actual weigher value.
Weight x 10:
This field shows the actual weigher value + an extra digit, so this weigher value is 10 times
more accurate then the normal value.
This value is needed when the indicator gets certified.
Example:
The normal weigher value is 10,00 kg
The weigher value x 10 could be 10,002, 10,001, 10,000, 9,999 or 9,998 kg.
Press the “OK “ button to leave this menu,.
Calibration menu 01
Calibration:
Before its possible to enter this menu, the indicator will ask for the “CAL” code. This “CAL”
code is shown in the right upper corner.