5. Wheel speed sensor (* The speed sensor is an optional part.)
1. Arrange the supplied magnet triggers around the axle or wheel. Usually 4 to 10
magnets are used. The speed pulse length (outer circumference of tire / number
of magnets) should be between 100mm and 999mm. Determine the number of
magnets to set the speed pulse length in this range.
2. Affix the magnets with tape. If you mount the magnets on the sprocket or wheel by
drilling holes, make sure that might reduce their strength.
3. Install the sensor bracket* on the place for ease installation of the sensor. (For
example, on the outside bearing hanger on the brake side of the chassis) Install
the wheel speed sensor so that the sensing surface is close to the magnets but
not touching them. Any touching would cause damage to the sensor. The distance
between the sensing surface and the magnets depends on the installation
condition, but a gap of 5mm or under is recommended.
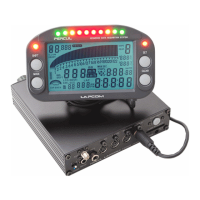
4. Insert the wheel speed sensor connector into the speed sensor jack of the control
unit. *Wheel speed sensor bracket and screws are not supplied.
CAUTION: During installation, do not subject the upper resinous part of the sensor to
any stress by pinching or wrenching it with a tool.
Example of installation onto a racing kart Example of installation onto a motorcycle
6. Liquid sensor (* The liquid sensor and hose joint are optional parts.)
1. Cut the radiator hose and install the hose joint to connect the both edges of the cut hose.
2. Fasten the bands* the both sides of the hose joint. * These bands are not supplied.
3. Install the liquid sensor into the hose joint. Bend the spring/cable of the sensor
roundly like in the picture below. Fix the both side of the green connectors on the
radiator hose.
4. Fix the cable on the radiator side of the vehicle in several points.
5. Insert the liquid sensor connector into the TEMP sensor jack of the control unit.
CAUTION: Keep the sensor away from the engine head. It may occur an error due to the
engine noise.
-13-