2:12
Preparations
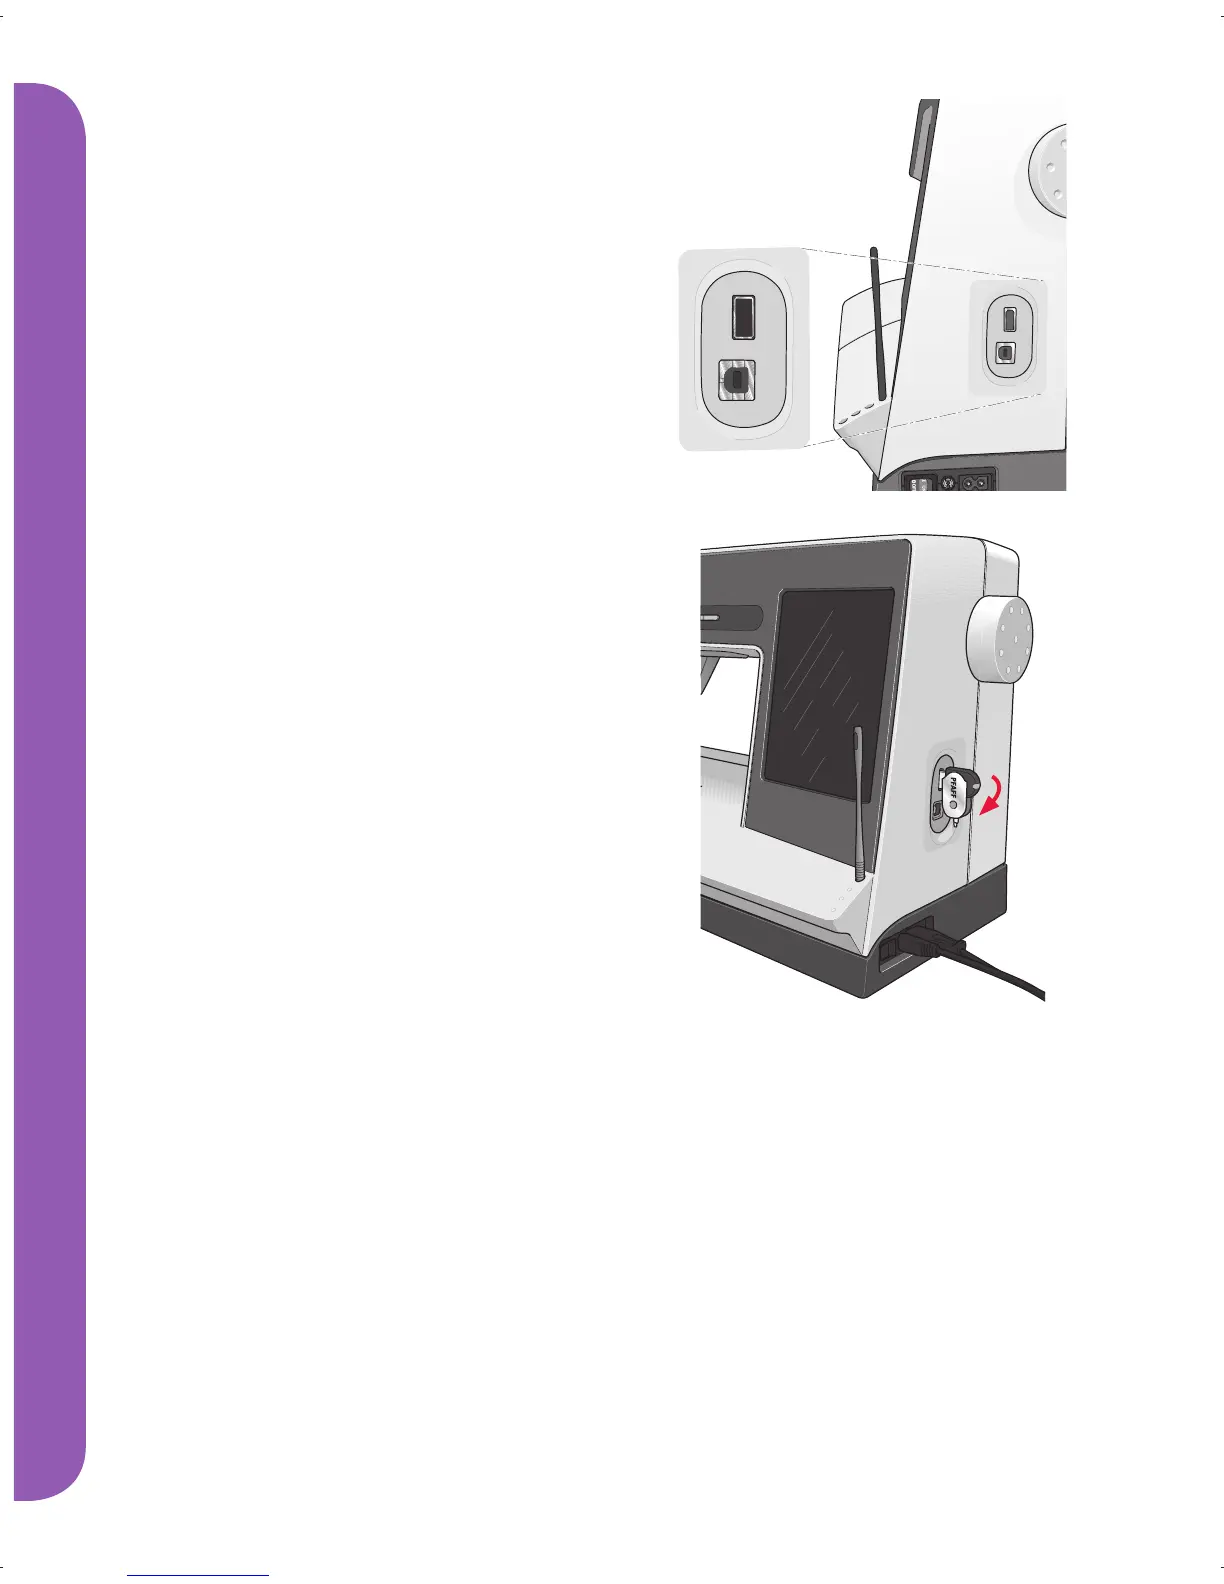
USB ports
Your machine has two USB ports – one to connect
the sewing machine to your computer, and one to
connect either your USB embroidery stick, optional
CD-drive, optional USB hub or optional mouse.
Note: Contact your local authorized PFAFF® dealer for
USB devices for your machine.
USB embroidery stick
Delivered with your machine is a USB embroidery
stick. Use the stick to store designs and other fi les,
or to move fi les between the computer and sewing
machine.
Connect to and remove from USB port
Insert the USB embroidery stick or other devices in
the upper port. The USB plugs can only be inserted
one way – do not force them into the ports!
The USB PC cable packed with your machine
(P/N:412 62 59-04) plugs in to the lower port. No
other cable should be used in this port. Connect the
other end of the cable to your PC.
Note: Install the Embroidery Machine Communication
CD before connecting the machine to your PC.
To remove, carefully pull the USB embroidery stick
or the plug of the USB cable out straight.
Using the USB embroidery stick
A light at the end of the stick indicates that the USB
embroidery stick is plugged in correctly. When
loading from or saving to the USB embroidery
stick, the light fl ashes and an hourglass appears on
the screen.
Note: Do not remove the USB embroidery stick when
the hourglass is shown on the screen or while Files &
Folders is open. Removing the stick at that time can
damage the fi les on your USB embroidery stick.
Connect machine to computer
Your machine comes with an Embroidery Machine
Communication CD. This CD should be installed
before the machine is connected to your computer
for the fi rst time.
When the software on the CD is installed and the
machine and the computer are connected, via the
USB cable, you can easily move designs or other
fi les to your machine.
Note: Your computer must be running Windows® XP
or Windows® Vista.
Note: The USB embroidery stick provided
with the machine can be left in the machine
when putting on the hard cover. Make sure
that the cover of the USB stick is turned
downwards.