PSR-TRISAFE-S
4-14
PHOENIX CONTACT 103503_en_03
Connecting objects As shown in Figure 4-6 on page 4-12, signal inputs and outputs as well as constants can be
connected as soon as they are inserted in the connection editor (using drag & drop).
Free terminal points are connected as described below.
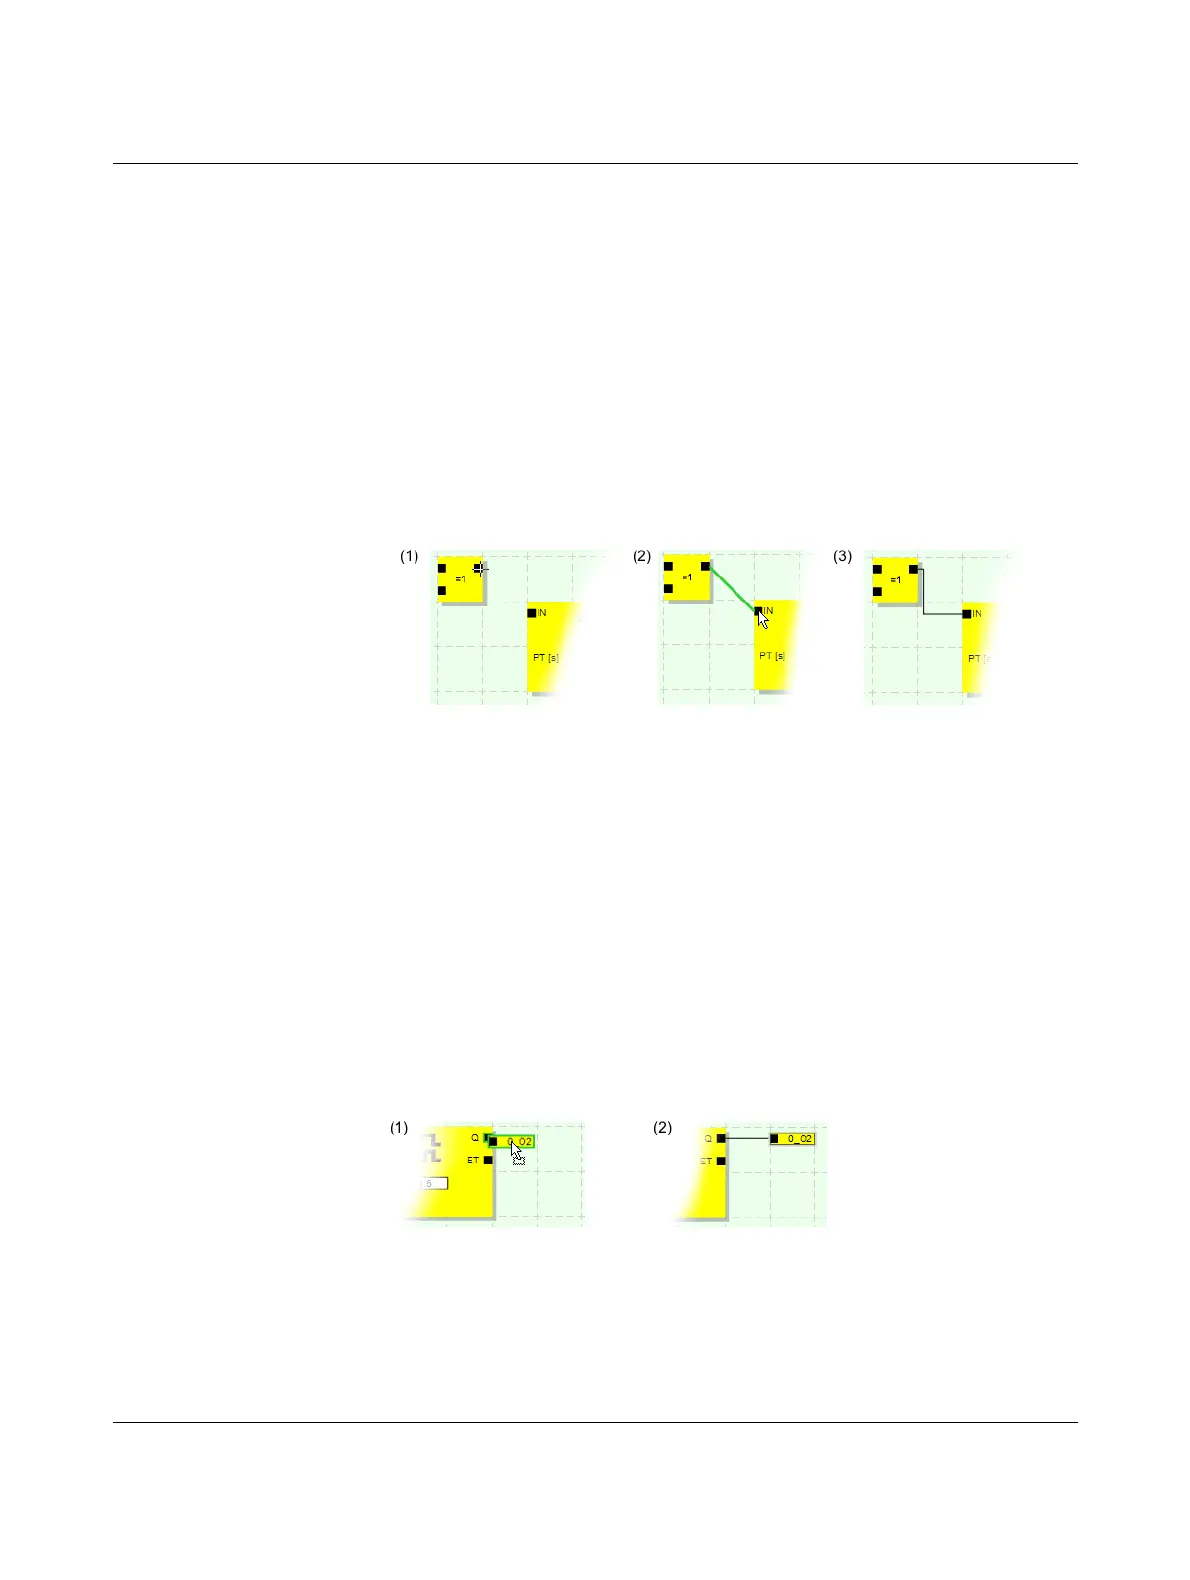
Connecting objects by drawing a connecting line
1. Position the cursor over the connection area where the connecting line is to start. The
cursor now appears as a cross (see (1) in the figure below).
2. Left-click, hold the mouse button down, and drag the mouse directly to the destination
connection area.
If the connection is permitted, the line is green.
If the connection between the two objects is not permitted, the line is not displayed in
green. In this case, no connection can be established.
3. Now release the mouse button to create the connection. The connection editor
automatically determines the path for the connecting line (automatic routing).
Figure 4-7 Connecting objects using a line
Connecting objects using drag & drop
This method is only suitable for connecting inputs, outputs, and signal constants.
1. Click on the (dual) signal or the constant to be connected and hold the mouse button
down (see Figure 4-8).
2. Drag the object to the desired destination connection point. If the relevant signals and
connection areas are displayed within a green border (see Figure 4-8, (1)), release the
mouse button.
If the connection between the two objects is not permitted, these items are not
displayed within a green border. In this case, no connection can be established.
The dragged object is positioned automatically and the connecting line is also created
automatically (automatic routing).
If required, the objects can then be moved, whereby the connection editor manages the
connecting lines automatically.
Figure 4-8 Connecting unconnected signals to functional blocks or functions using
drag & drop
 Loading...