14 SETTINGS
User’s Manual Planmeca ProOne 79
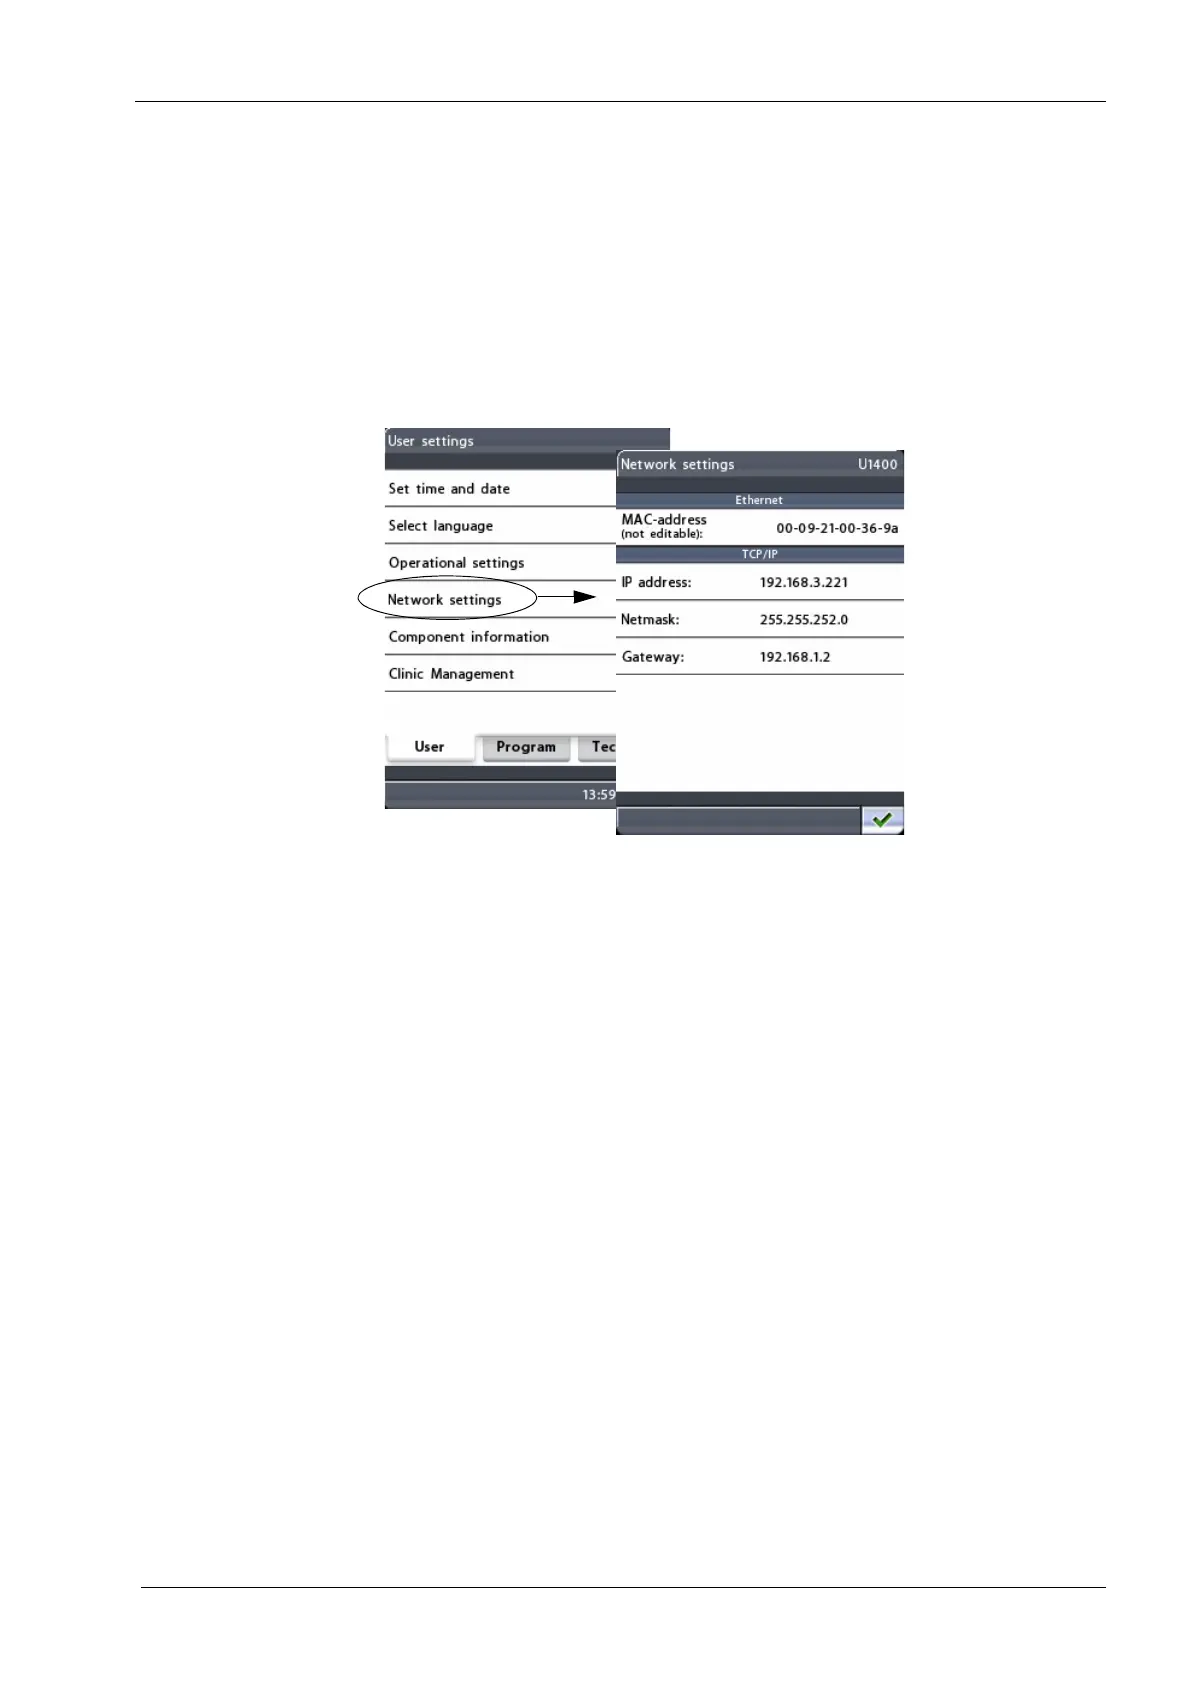
14.1.4 Network settings (U1400)
Only a service technician/local administrator may change
the network settings.
To view the settings for Ethernet or TCP/IP connection,
first select the option
Network settings (U1400)
on the
User settings
display. The
Network settings (U1400)
display will appear.
The Planmeca ProOne X-ray unit communicates through
an Ethernet link. To enable the communication it is
necessary to configure the link settings for the X-ray unit
and the PC which is connected to the X-ray unit. This is
done by a service technician/local administrator when the
digital system is installed.
• Ethernet
MAC address: MAC (Media Access Control) address is
unit specific and it cannot be changed.
•TCP/IP
IP address: This field shows the Ethernet interface IP
(Internet Protocol) address. The IP address is a unique
number assigned to a specific X-ray unit and the address
may be changed by a service technician/local
administrator only.
Netmask: This field shows the subnet mask. The value
may be changed by a service technician/local
administrator only.
Gateway: This field shows the gateway IP (Internet
Protocol) address. The value may be changed by a
service technician/local administrator only.
Exit the
Network settings
(U1400)
display by touching the
green check mark button in the bottom right corner of the
display.