Replacement
Adjustment
4 August 2009
TR-3-21
11. Bring the Upper knife down to the bottom position by turning crank [R] using a
13 mm wrench.
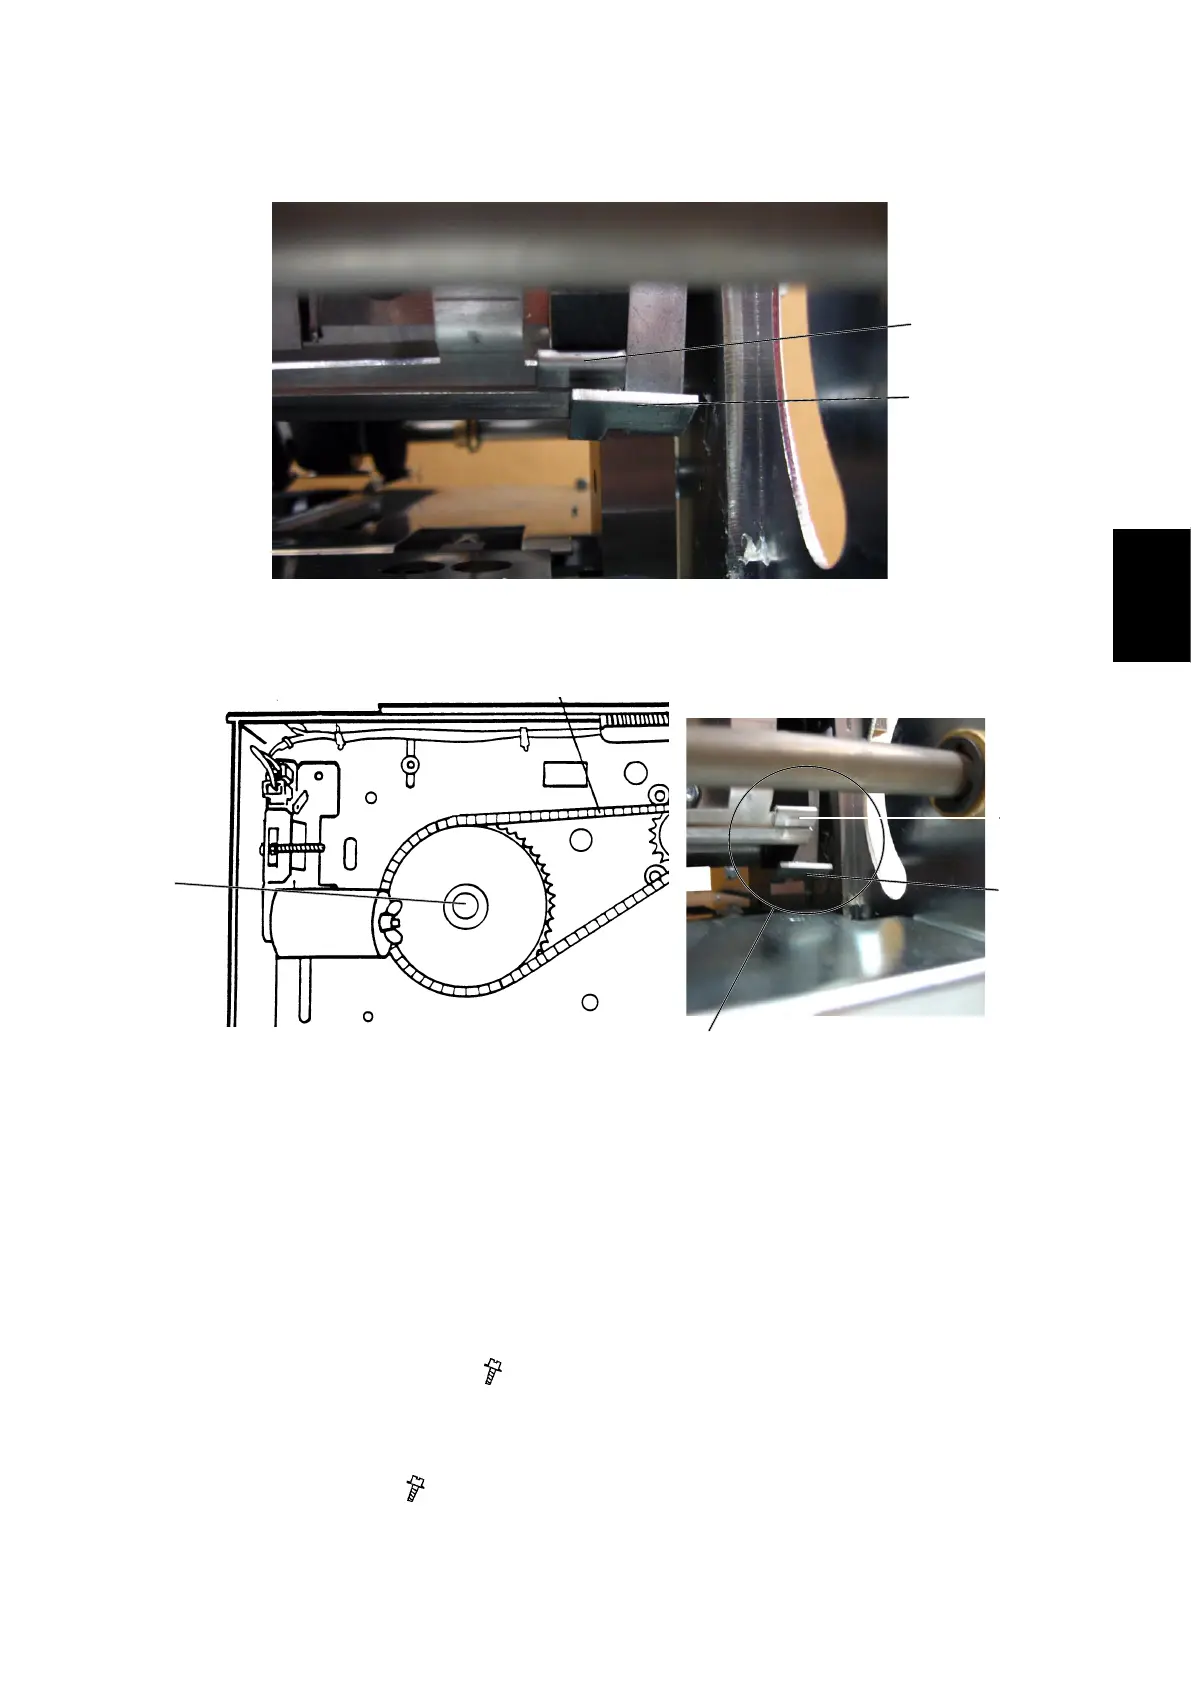
Note: When bringing the Upper knife down, make sure it does not touch the
Lower knife or the knife protection plate.
Check that the knife protection plate [S] is released from the lock [U]
and that it moves out [V] when the upper knife is lowered.
12. Gently push in the Lower knife against the Upper knife.
NOTE: Listen that it touches on both sides.
13. Raise the upper knife to the top position by turning crank [R].
14. Tighten screws [I] & [H] (
x6).
Note:Tightenalittleatrstaccordingtothesequence1-6.Thentightenalittle
hardertonallyfullytightenthescrews.Alwaysaccordingtothesequence
1-6.
15. Turn screws [M] (
x3) so they touch the lower knife.
[R]
AREA C
10. Check that the knife protection plate is secured from moving outwards by the
lock on the rear side [U].
[U]
[S]
[V]
[U]
[S]