9.22
BRAKES
Pad Installation
1. Install new pads in caliper body.
2. Install caliper and torque mounting bolts.
3. Turn adjuster screw back in finger tight using a hex wrench.
4. Slowly pump the brake pedal until pressure has been built
up. Maintain at least 1/2"(12.7 mm) of brake fluid in the
reservoir to prevent air from entering the master cylinder.
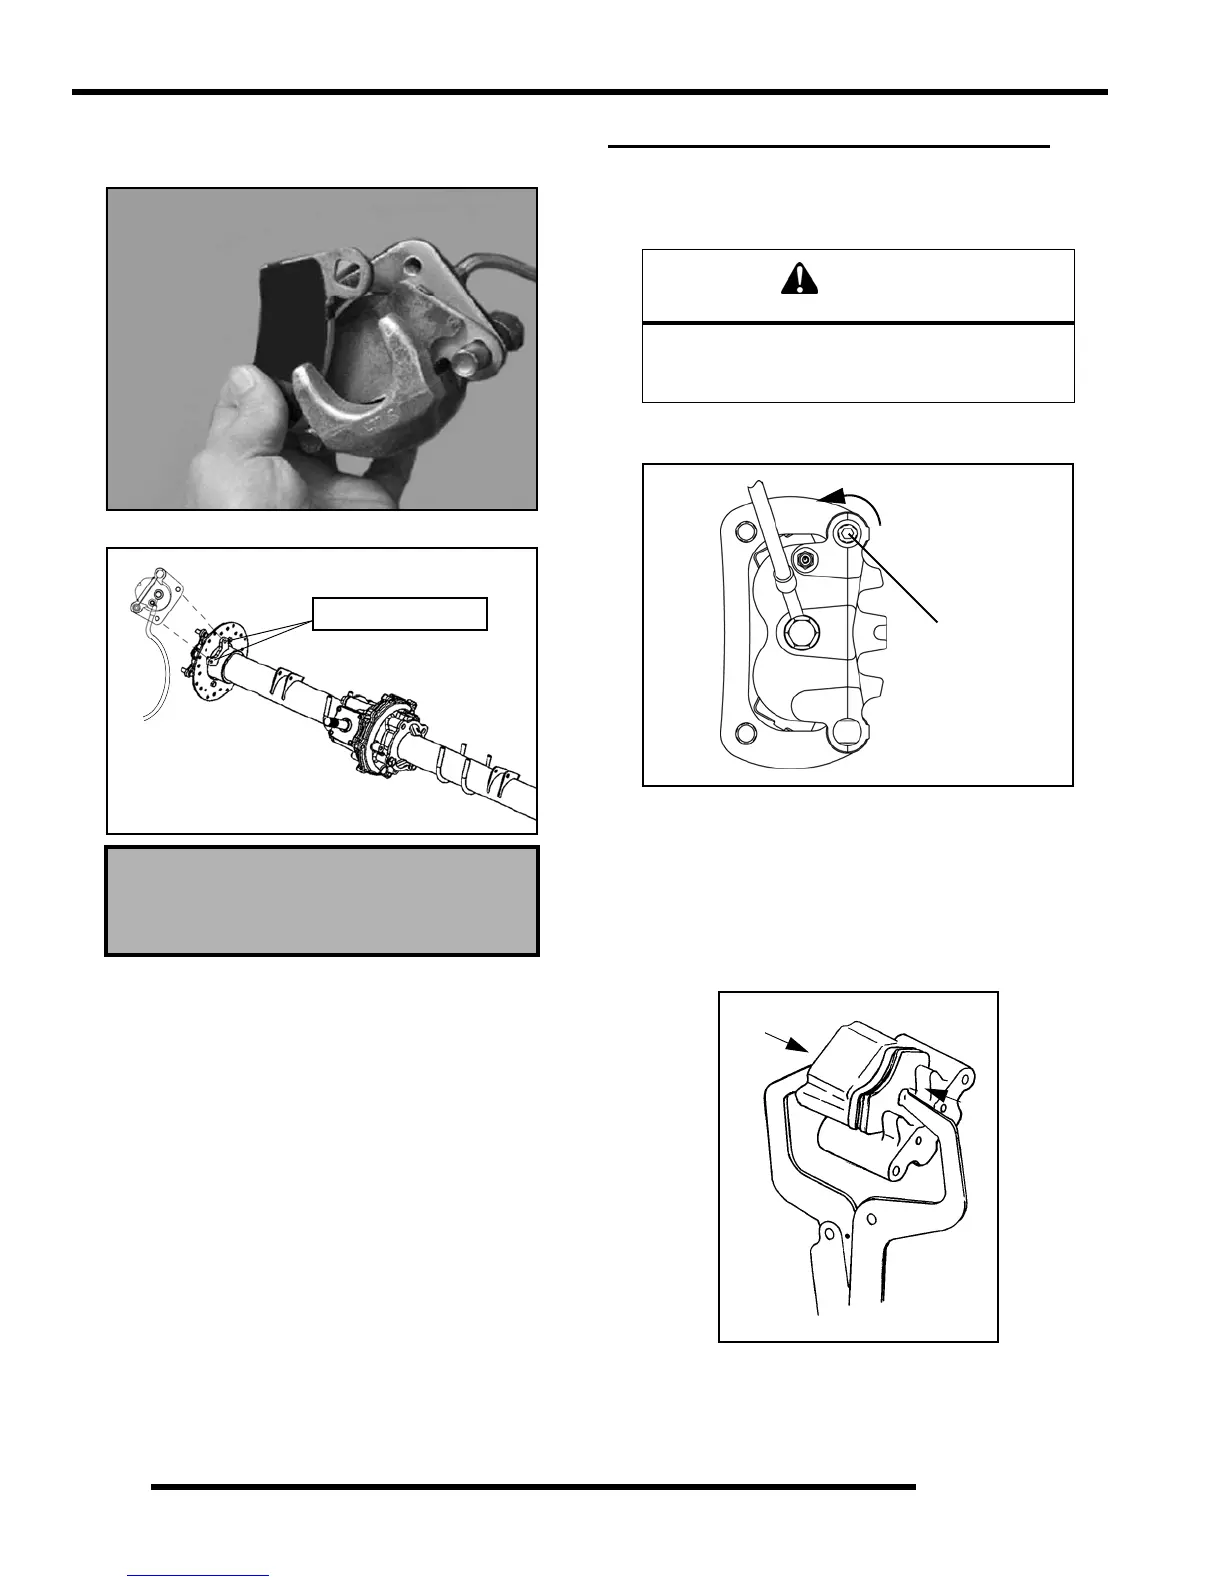
REAR BRAKE PADS (4X4 CREW)
Pad Removal
1. Elevate and support rear of vehicle.
2. Remove the wheel nuts, washers and rear wheel. Loosen
pad adjuster screw 2-3 turns.
3. Remove the upper and lower caliper mounting bolts and
remove the caliper from the front hub.
NOTE: When removing caliper, use care not to
damage brake line. Support caliper so to avoid
kinking or bending brake line.
4. Push caliper piston into caliper bore slowly using a
C-clamp or locking pliers with pads installed.
NOTE: Brake fluid will be forced through
compensating port into master cylinder fluid
reservoir when piston is pushed back into caliper.
Remove excess fluid from reservoir as required.
Rear Brake Caliper Mounting Bolt:
Torque 18 ft. lbs. (24 Nm)
18 ft. lbs. (24 Nm)
CAUTION
Use care when supporting vehicle so that it
does not tip or fall.
Severe injury may occur if machine tips or falls.
Pad
Adjuster

 Loading...