TIP: Use (turn) the Drive Motor flywheel to make it easier to turn the motor pulley
and help walk the belt onto or off the Drive Motor and Drive Roller pulleys.
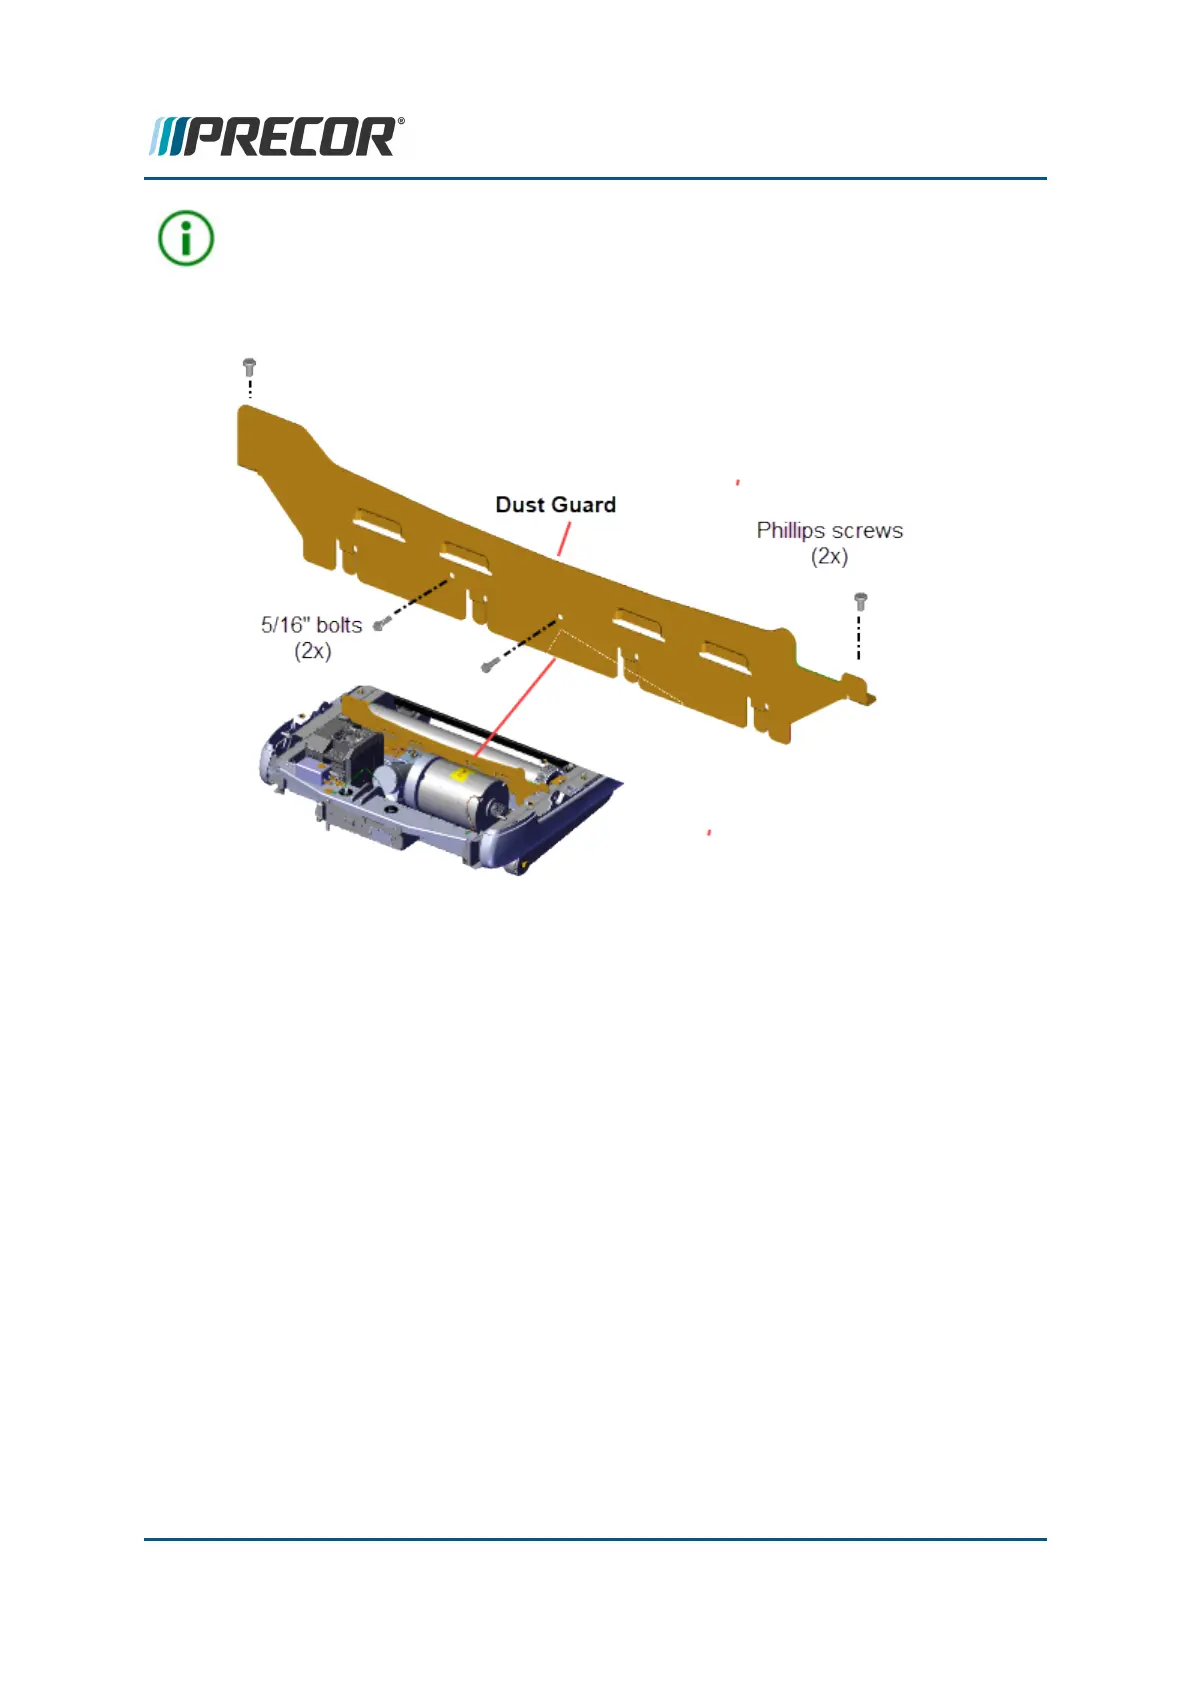
4. Reinstall the left side Dust Guard #3 Phillips fastener and fully tighten.
5. Make sure the Drive Belt pulley alignment is correct and verify that the belt tension is
within specification. see "Legacy Frame Drive Belt Tensionand Alignment" on
page58. If the belt is not within specification, tension to specification.
6. Connect the power cord and switch the power ON.
7. Operate the treadmill and verify the running belt tracking, see "Running Belt Tension
and Tracking Adjustment" on page67.
8. Reinstall the left and right trim landing covers, see "Trim Landing Covers Replace-
ment" on page91.
9. Reinstall the hood cover, see "Covers and Panels Replacement" on page86.
10. Do the Operation Verification tests (see "Operation Verification" on page24) and
return to service.
Common Frame Drive Belt Replacement
Review entire procedure before starting.
Contact Precor Customer Support at support@precor.com or 800.786.8404 with
any questions.
Page 149
6 Replacement Procedures
Drive Belt Replacement
 Loading...