Common Frame Drive Roller Replacement
Review entire procedure before starting.
Removal
1. Switch the power OFF and unplug the power cord.
2. Remove the hood cover (see "Hood Cover Replacement" on page88), and the left &
right Landing Trim covers (see "Trim Landing Covers Replacement" on page91).
3. Alternately loosen the left and right 5/16" hex key tension adjustment bolts (use a hex
key socket and ratchet) in 1/4 turn increments so that the running belt tension is
evenly relaxed. Continue loosening the tension adjustment bolts until all tension is
removed from the belt.
(missing or bad snippet)
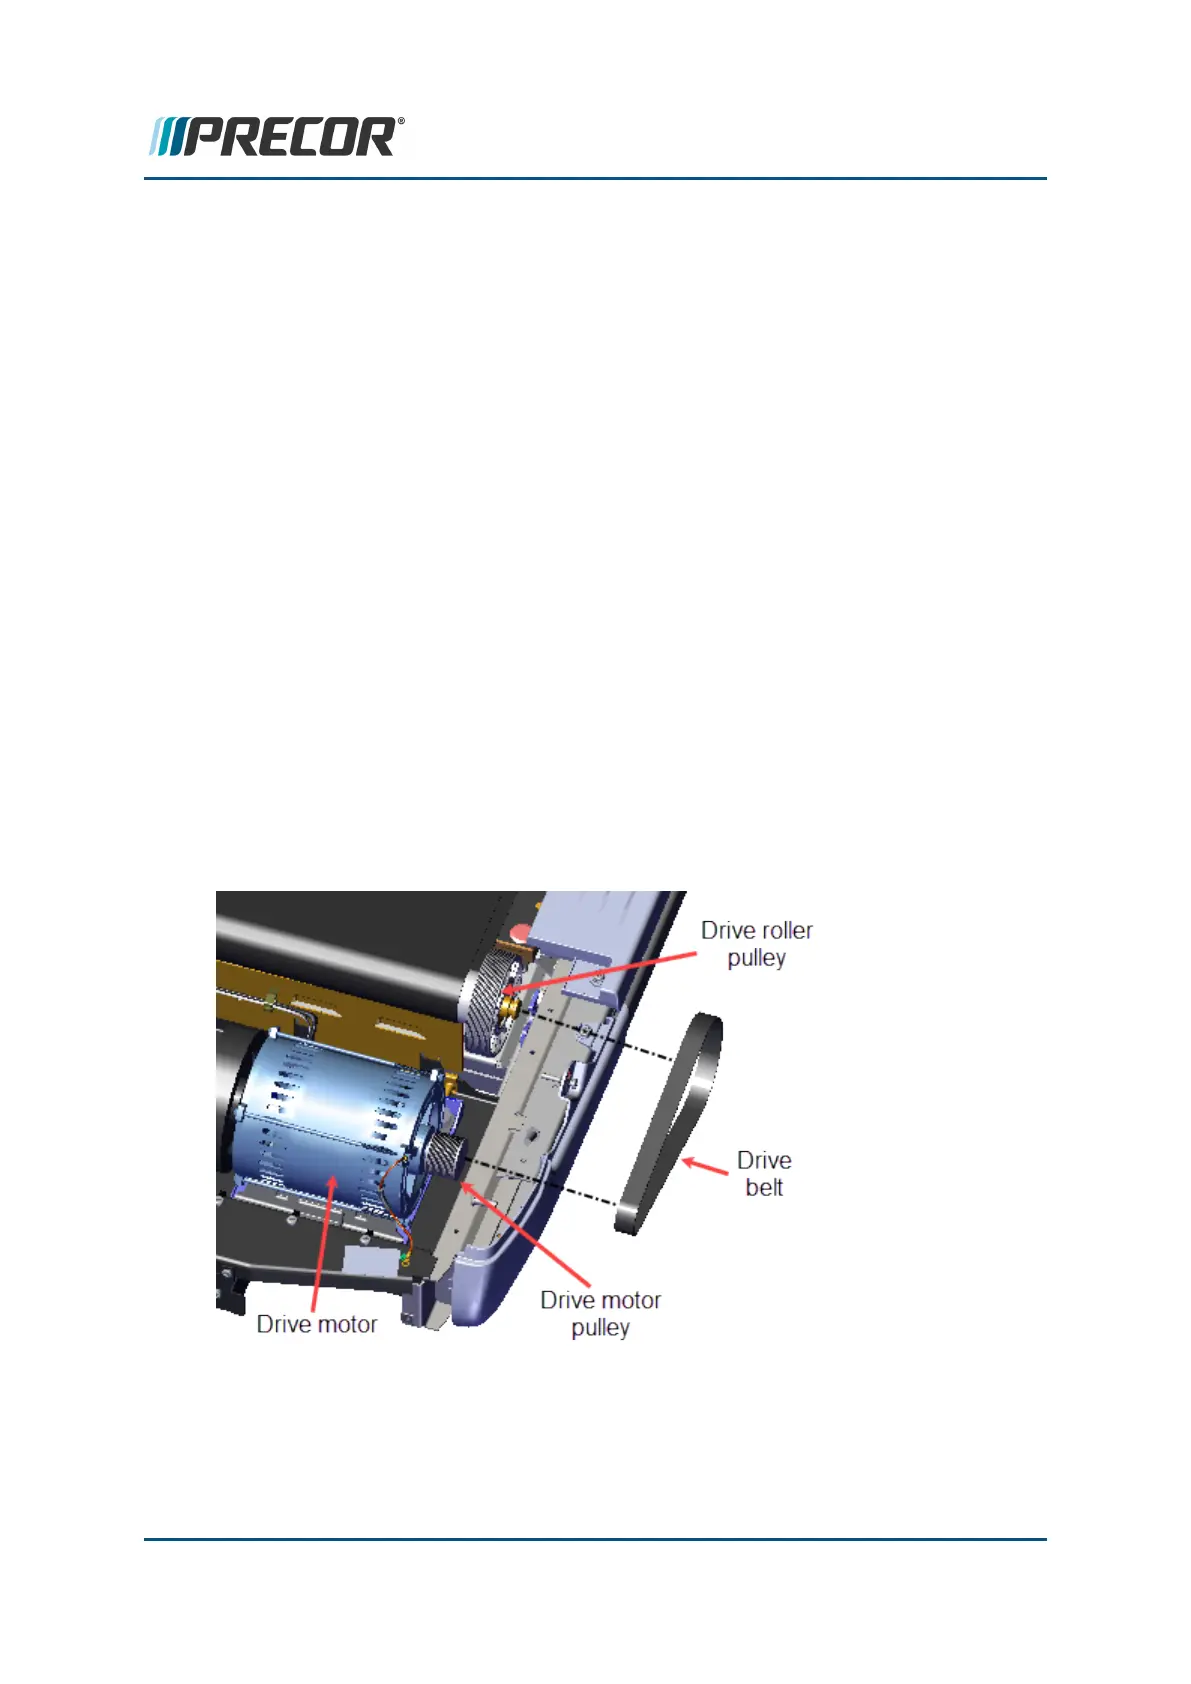
4. Loosen the drive belt tension and remove the Drive belt off the drive roller pulley, see
"Running belt tension adjustment" on page68.
a. Use a 1/2" socket with 6" extension to loosen the four Drive Motor mount bolts
enough so that the motor can slide forward and/or rearward in the mounting
tray.
b. Loosen the 1/2" drive belt tension adjustment bolt to remove the drive belt ten-
sion.
c. Then walk the belt off the drive motor and drive roller pulleys.
5. Lift the drive roller and running belt from the frame. Lift the roller left side from the
frame bracket mount and then slide the roller right side from the frame pin mount and
Contact Precor Customer Support at support@precor.com or 800.786.8404 with
any questions.
Page 174
6 Replacement Procedures
Drive Roller Replacement
 Loading...