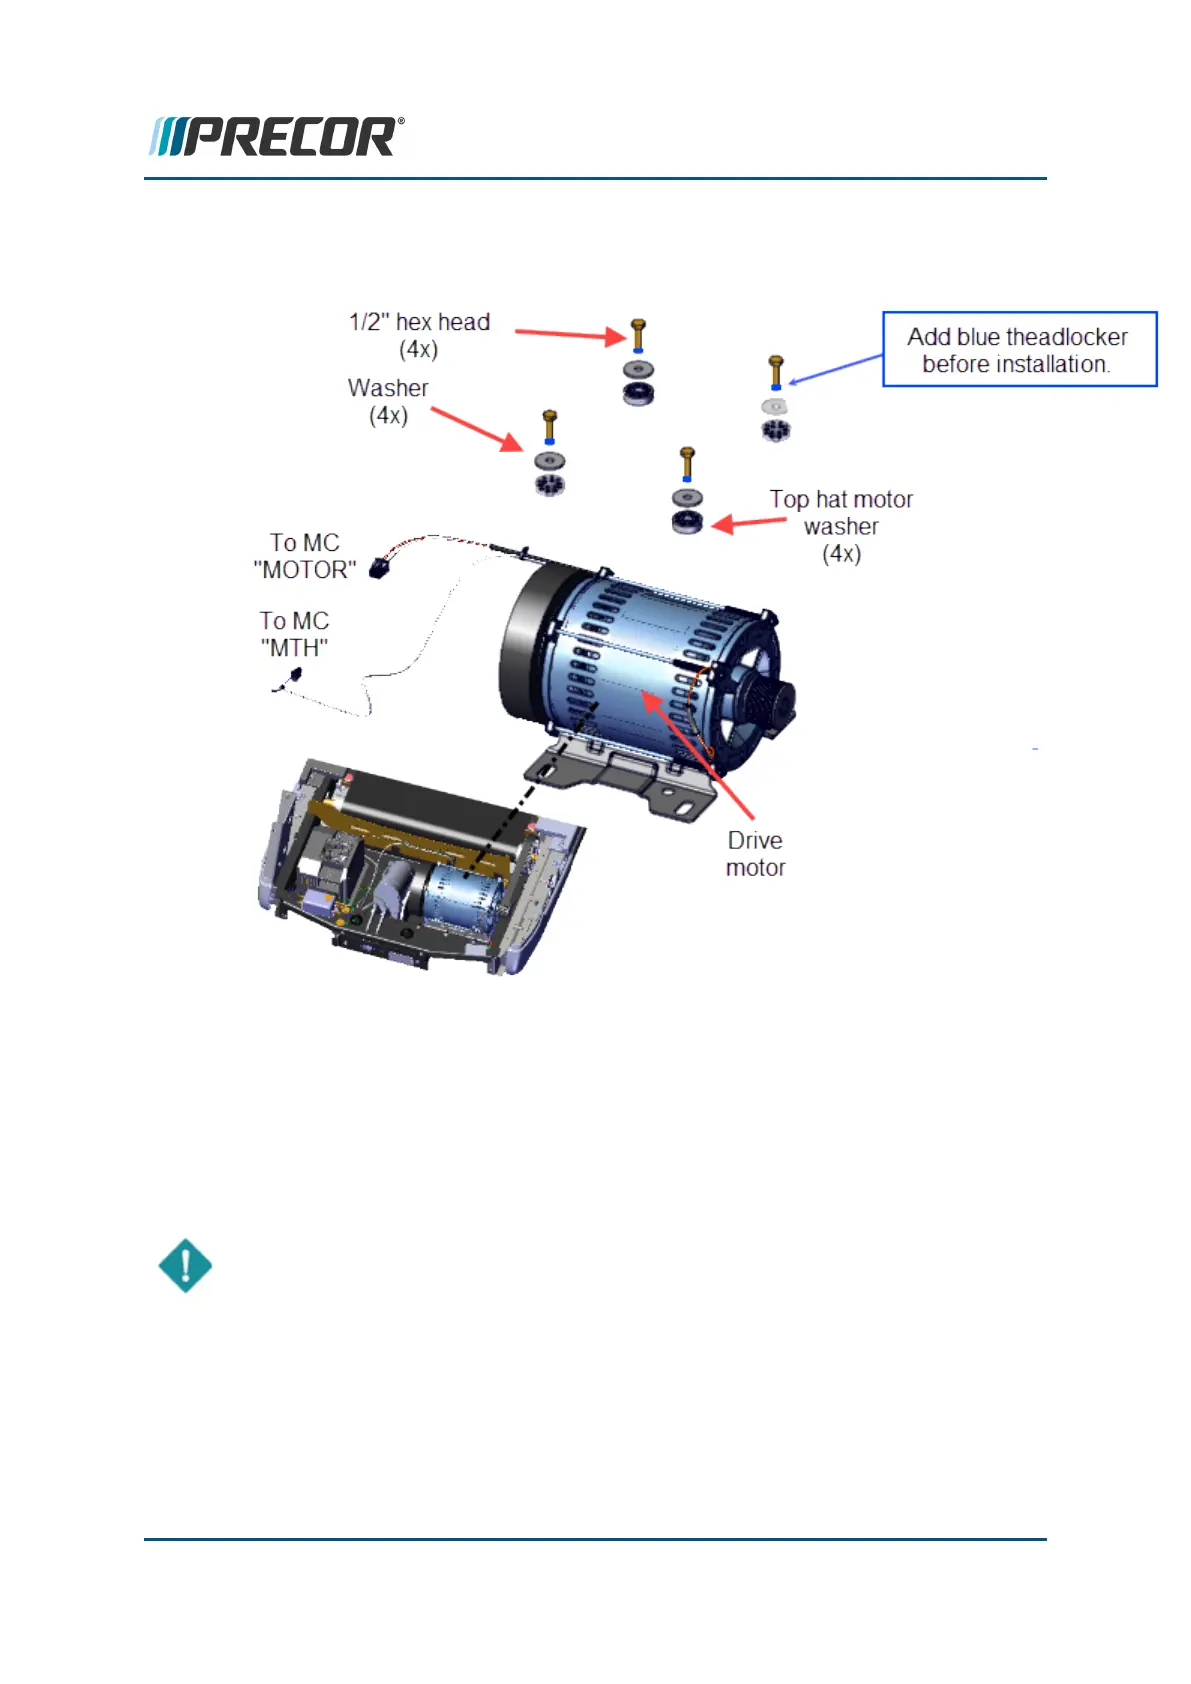
8. Use a 1/2" socket with 6" extension to remove the four 1/2" hex head bolts, washers,
and plastic top hat washers. Remove the drive motor. (missing or bad snippet)
Installation
1. Install the Drive Motor into the motor isolation tray and secure using the four 1/2" hex
head bolts, washers, and plastic top hat washers. DO NOT fully tighten the mounting
bolts, the motor must be able to slide forward and rearward for drive belt tension
adjustment. Add Loctite 243 threadlocker to each of the four 1/2" hex bolts.
IMPORTANT: Add Loctite 243 to the 1/2" hex head motor mount bolts.
Contact Precor Customer Support at support@precor.com or 800.786.8404 with
any questions.
Page 163
6 Replacement Procedures
Drive Motor Replacement
 Loading...