1. Switch the power OFF and unplug
1
the power cord.
2. Remove the hood cover, see "Covers and Panels Replacement" on page86, and
left/right Landing Trim covers, see "Covers and Panels Replacement" on page86.
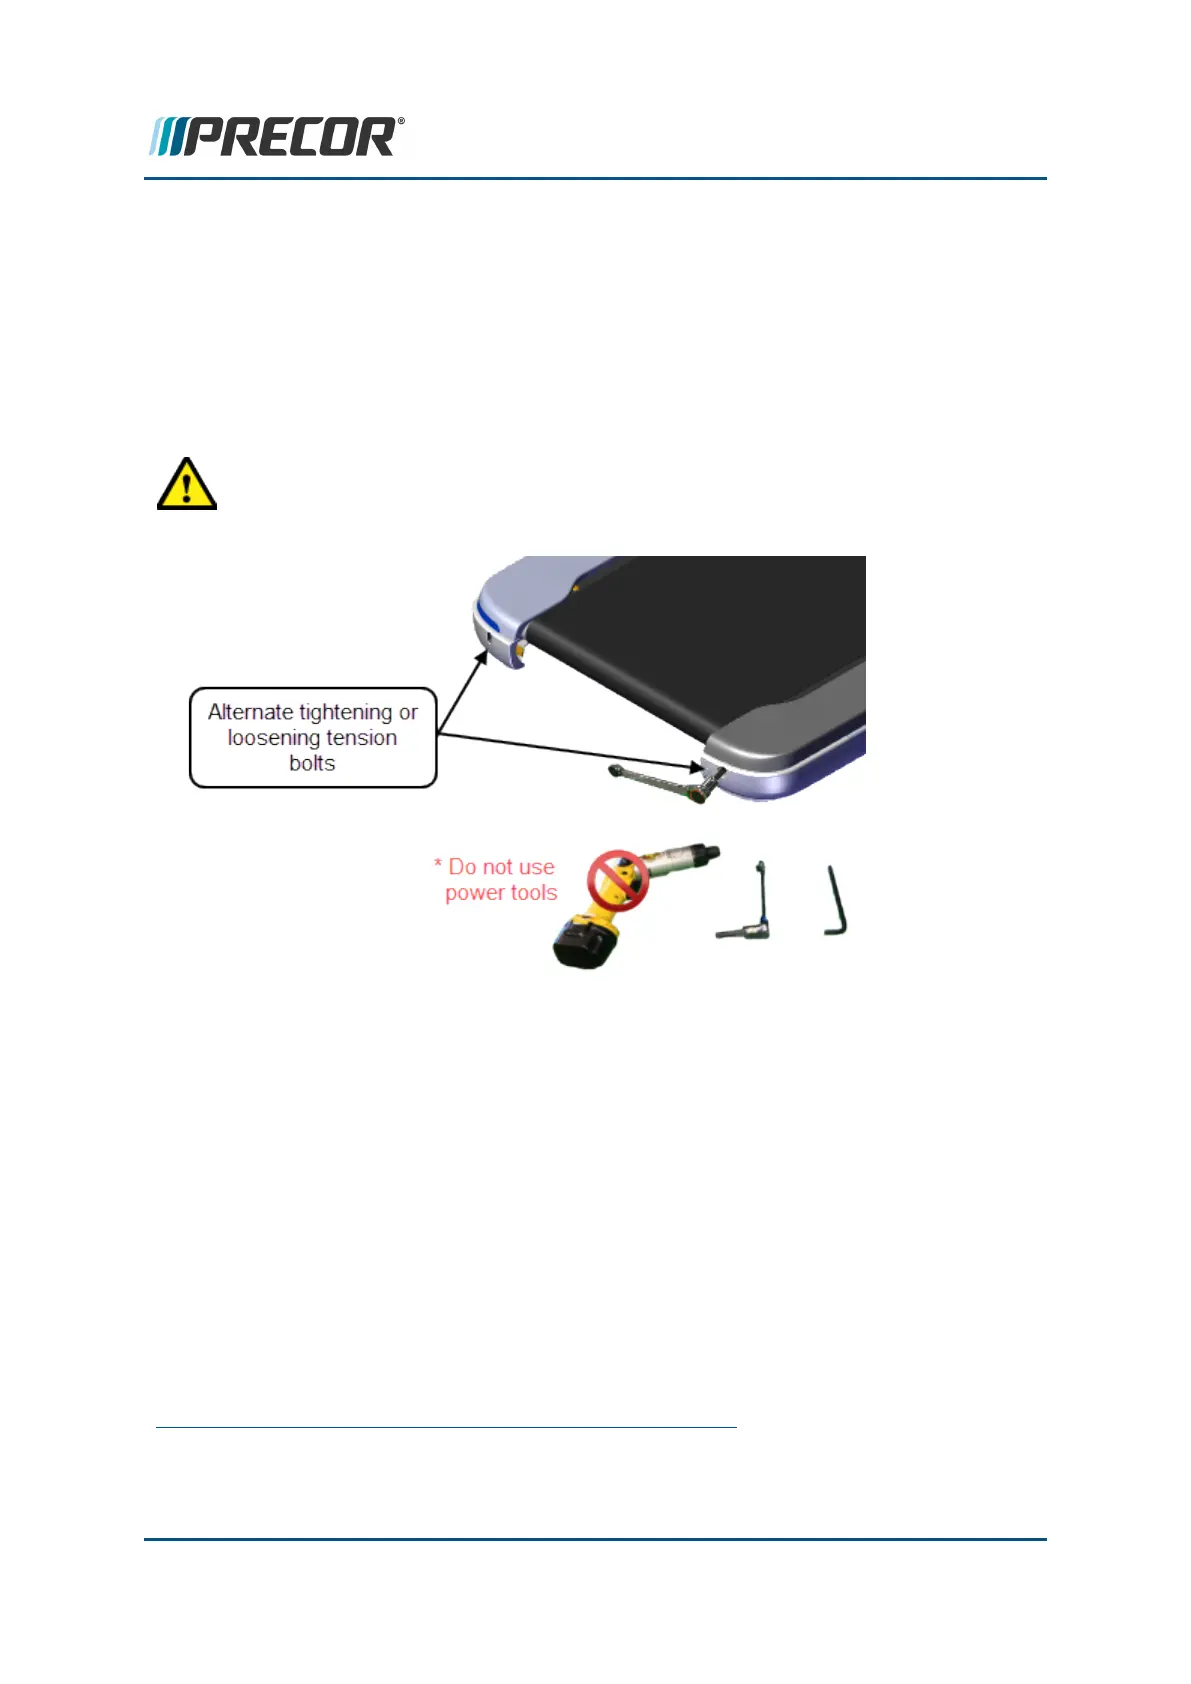
3. Relax the running belt tension by loosening the left and right 5/16" hex key tension
adjustment bolts. Alternately loosen the left and right adjustment bolts in 1/4 turn
increments so that the running belt tension is evenly removed. Only use hand tools
and not power tools which could cause damage to the take-up roller tension mech-
anism.
CAUTION:Only use hand tools to adjust tension. Power tools can easily over
and/or under tension causing damage to the belt and/or tension hardware mech-
anism.
4. Remove the two #3 Phillips screws, two 7/16" hex head fasteners and remove the
Dust Guard . Retain fastener hardware for installation.
1
Disconnect a device power cord plug or cable connector from the power receptacle or out-
let.
Contact Precor Customer Support at support@precor.com or 800.786.8404 with
any questions.
Page 169
6 Replacement Procedures
Drive Roller Replacement
 Loading...