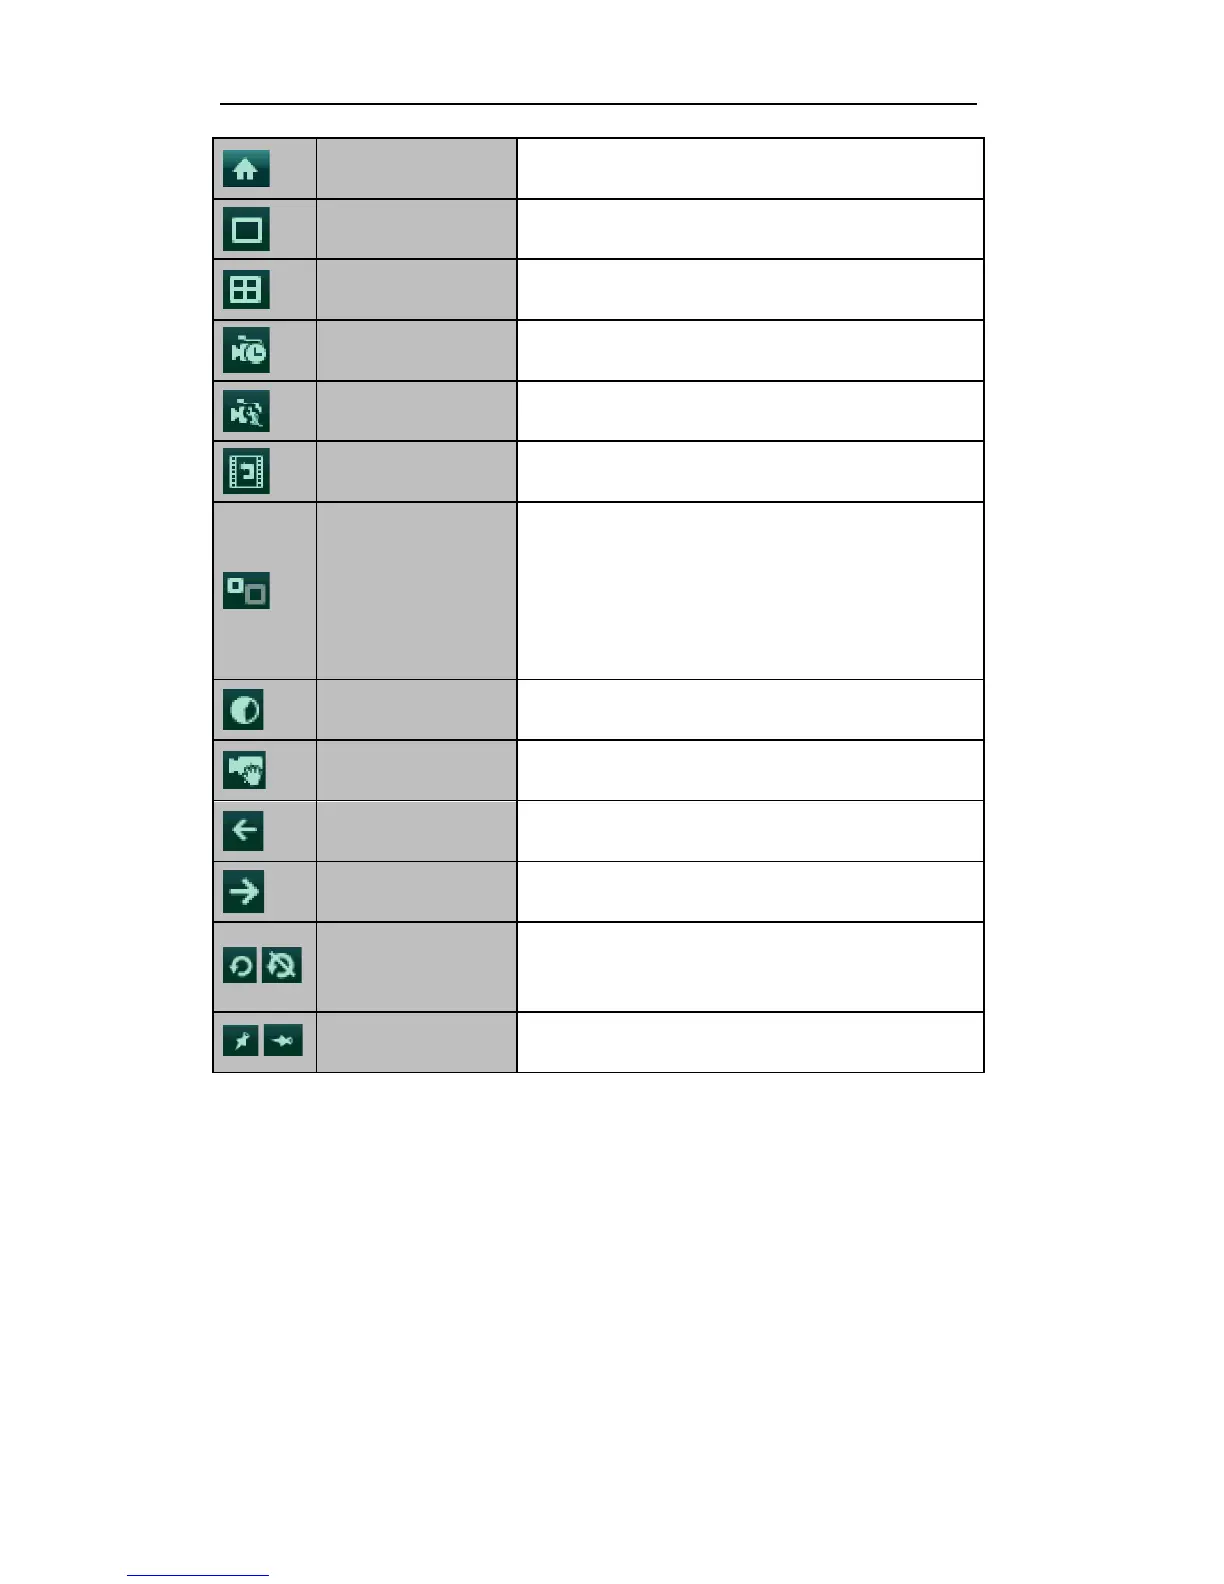
Enter the main menu of the system.
Switch to the single full screen live view mode.
Switch to multi-screen live view mode.
The multi-screen icon varies according to the device models.
Start all-day normal recording for all channels.
Start motion detection recording for all channels.
Play back the record video.
Switch to the auxiliary output mode and the operation for the
main output is disabled.
If you enter Aux monitor mode and the Aux monitor is not
connected, the mouse operation is disabled; you need to switch
back to the Main output with the VOIP/MON button and Enter
button on IR remote control.
Set the video output mode to Standard, Bright, Gentle or Vivid.
Enter the IP Camera Management interface to add the locally
searched online IP camera quickly.
Switch to the previous screen.
Switch to the next screen.
Enable/disable the auto-switch of the screens.
The dwell time of the live view configuration must be set before
using Start Auto-switch.
Note: The Add IP Camera item is provided by the HDVR models only.
2.2.3!Using!an!Auxiliary!Monitor!
Certain features of the Live View are also available while in an Aux monitor. These features include:
• Single Screen: Switch to the single full screen by choosing channel number from the dropdown list.
• Multi-screen: Adjust the screen layout by choosing from the dropdown list.
• Previous Screen: Switch to the previous screen.
• Next Screen: Switch to the next screen.
• Quick Set: Set the video output mode to Standard, Bright, Gentle or Vivid.
• Menu Output Mode: Select the menu output mode to HDMI/VGA, Main CVBS or Auto.
• Main Monitor: Switch to the Main Output mode and the operation for the auxiliary output is
disabled.
 Loading...