ProMinent
®
Page 27
NOTE
• Check the screw torques after 24 hours in operation.
• For PP liquid ends check the screw torques again after three months.
Screw torques: 4.5 to 5 Nm
Liquid ends - types 0220, 0232 and 0420
왘 Remove liquid end (2) from the pump by unscrewing screws (1) (see Fig. 30).
Type 0230 only: remove the screws from the back plate (4) below the diaphragm (3).
Screw liquid end (2) back on – the screws (1) should still project into the holes of the
diaphragm (3) but not into the liquid end.
왘 Take hold of the pump housing (6) and use the other hand to clamp the diaphragm (3) between
the liquid end (2) and the back plate (4). Loosen the diaphragm (3) from the drive axis by lightly
turning the liquid end (2) and the back plate (4) anticlockwise.
왘 Draw the liquid end (2) with the screws (1) out of the diaphragm (3) and unscrew it completely
from the drive axis.
왘 Remove the back plate (4) from the housing (6).
왘 Check the condition of the safety diaphragm (5) and replace it if necessary.
왘 Push the safety diaphragm (5) onto the drive axle until the outer edge is flush with the pump
housing (6) - do not push further!
왘 Screw the new diaphragm (3) carefully up to the stop on the drive axis – this must be exact to
ensure correct metering!
왘 Check whether the holes in the diaphragm (3) are flush with the holes in the pump housing (6).
왘 If not, start the pump and set the stroke length to 100 %.
왘 When the pump is running, turn the diaphragm (3) slowly in a clockwise direction until the four
holes in the diaphragm are flush with those on the pump housing (6).
왘 Hold the diaphragm (3) in this position, set the stroke length to 0 % and stop the pump.
왘 Screw the diaphragm (3) tight once more.
왘 Position the top plate (4) on the pump housing (6).
Only for Type 0232: Screw down the head disk (4) with the screws.
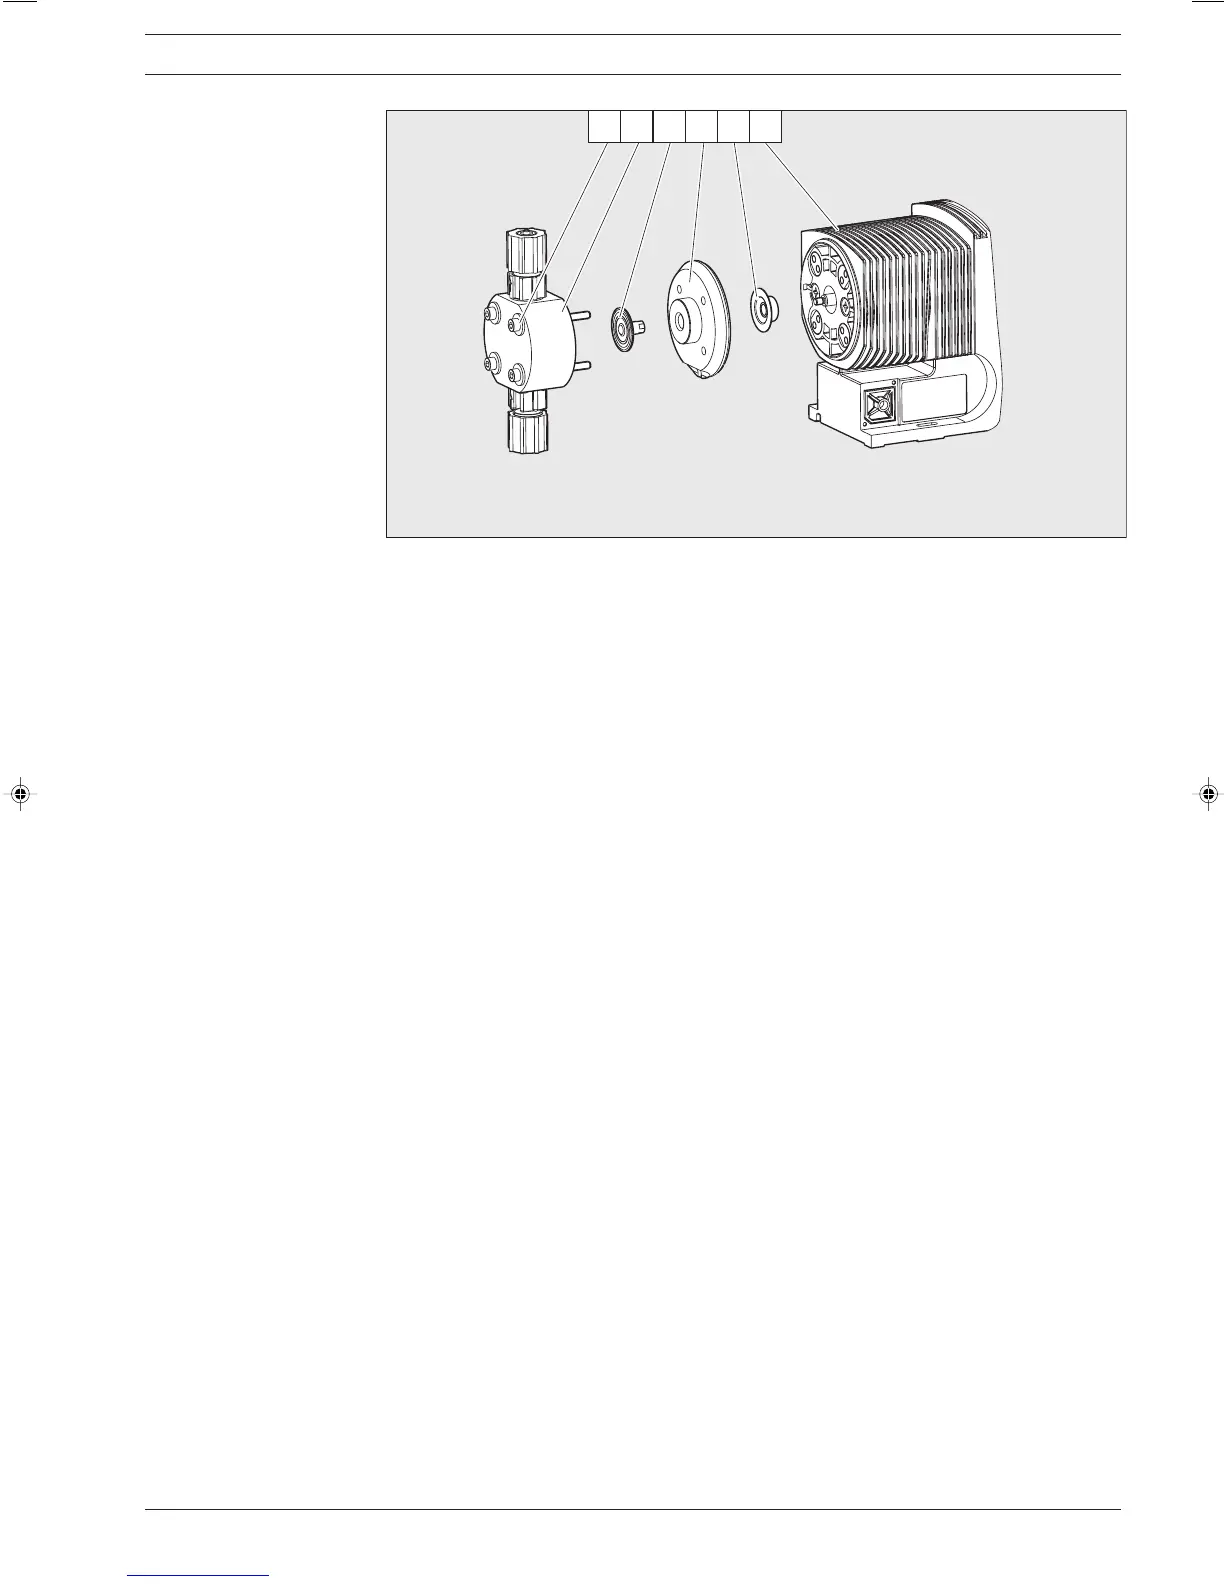
Repairs
Fig. 18 1 Screws
2 Liquid end
3 Diaphragm
4Top plate
5 Safety diaphragm
6 Pump housing
BA_BE_021_07_08_GB2.p65 17.07.2008, 14:35 Uhr27