CHAPTER 3
14 ISO Product Controller II and Hawkeye Operation Manual
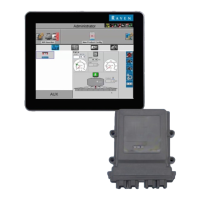
1. Turn power on to the UT and allow the display to power up and initiate the ISOBUS system.
NOTE: If properly connected and powered, the UT will automatically detect the Hawkeye
®
Product
Controller II ECU.
If the Product Controller II ECU is not detected by the display terminal, troubleshoot the Hawkeye
®
Product Controller II ECU and restart the system. Refer to “Troubleshooting” on page 57 for assistance
with connection issues. Contact a local Raven dealer for additional troubleshooting assistance if the
Product Controller II ECU is still not detected.
2. Once the Hawkeye
®
Product Controller II ECU is detected, the Hawkeye
®
Menu button will display in the UT
Menu.
3. Touch the Menu button to access the Hawkeye
®
nozzle control system user interface.
The first time that the Hawkeye
®
system is started on the UT, or if the default settings have been reset, the first
calibration wizard prompt will be displayed.
NOZZLE SETUP, SPACING, AND TIP SIZE
The following steps are intended to assist with entering the nozzle calibration information required for the
Hawkeye
®
system.
1. Verify the total number of Nozzle Control Valves (NCV’s) on the Hawkeye
®
system matches the NCV’s detected
by the Hawkeye
®
Product Controller II ECU.
NOTE: If the total number of nozzles displayed does not match the expected number of nozzle control
valves connected to the system refer to Chapter 8, Troubleshooting for assistance with the Hawkeye
®
nozzle control valve circuit.
2. The Hawkeye
®
Product Controller II ECU will attempt to detect the number of nozzle control valves connected
to the left boom (center of the boom to the tip of the left boom) circuit. Check the displayed value against the
actual number of valves connected to the left boom circuit. If necessary, select the Nozzle Count field and enter
the appropriate number of nozzle control valves connected to the left boom circuit.
3. To bypass nozzle configuration and operate the system without the Hawkeye
®
Nozzle Control Valves, press the
Skip Nozzle Setup button. If the Nozzle Control Valves are installed on the machine, the NCV’s will remain
closed and must be manually bypassed at the boom by opening a secondary flow outlet, or removed from the
machine to apply product. The system will then operate as a conventional sprayer with the Hawkeye
®
Product
Controller II ECU.Select the applicator type:
• Sprayer - If full rate is required across the entire boom (sprayer or strip-tiller)
• Applicator - If 0.5X or 1.5X rate is required at the ends of the boom (28% applicator with 15 or 17
coulters)
4. Select the Next button to continue to the Nozzle Spacing prompt.
NOTE: Select the Nozzle Spacing field and enter the distance between nozzle control valves. For liquid
fertilizer applicators, enter the crop row spacing.
5. Select the Next button to continue to the Tip Size prompt.
 Loading...