page 65 of 91 USB-QFLCII-14804/0
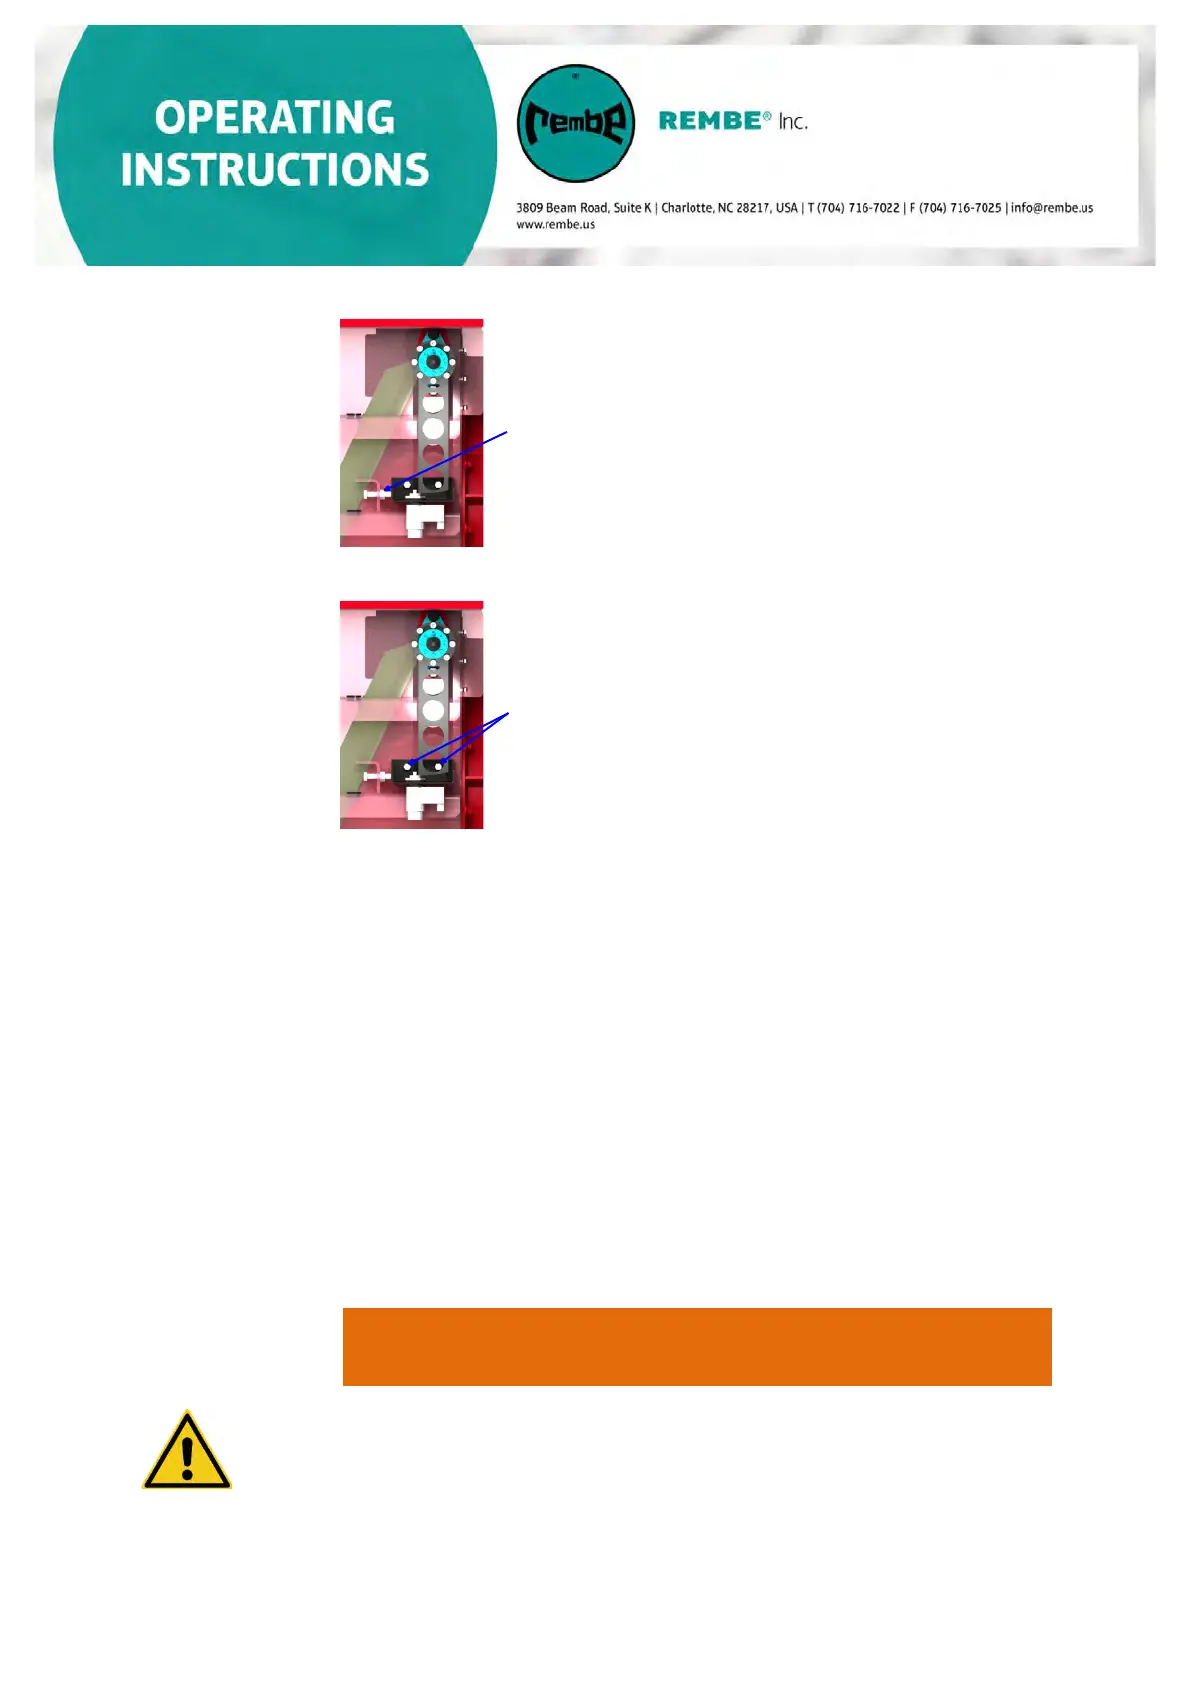
e) Tightly re-screw the counter nut at the stop.
Counter nut
f) Tighten both locking unit mounting screws as shown below .
Mounting screws
g) Verify the gap between the locking unit and the locking lever again after having
tightened the counter nut and mounting screws.
h) Verify the flap blade closes properly (see Section 9.10 Inspection locking unit).
If not, proceed again as described above.
9.11 Inspecting the closed-position sensor
a) Ensure that the system is disconnected.
b) Ensure, through a supervisory person, that the system is not able to be restarted while
inspecting.
c) Check the monitoring panel to see whether the flap blade is detected by the
closed-position sensor while the inlet isolation device is disconnected and the flap
is in the closed position.
If the flap blade is not detected by the closed postion sensor, the closed position
sensor must be readjusted.(see Section 9.13 Adjusting the closed-position sensor).
d) Open the inspection lid (see Section 9.4 Inspection door opening and closing).
WARNING
Danger of head injuries due to protruding flap stopper when inspection
lid is opened!
Please watch out for the protruding flap blade stopper while working inside the
inlet isolation device. If necessary, equip the stopper with a bumper during
the maintenance process. The bumper must be removed prior to closing the
inspection lid.
--------------------------------------------------------------------------------------------------------