25
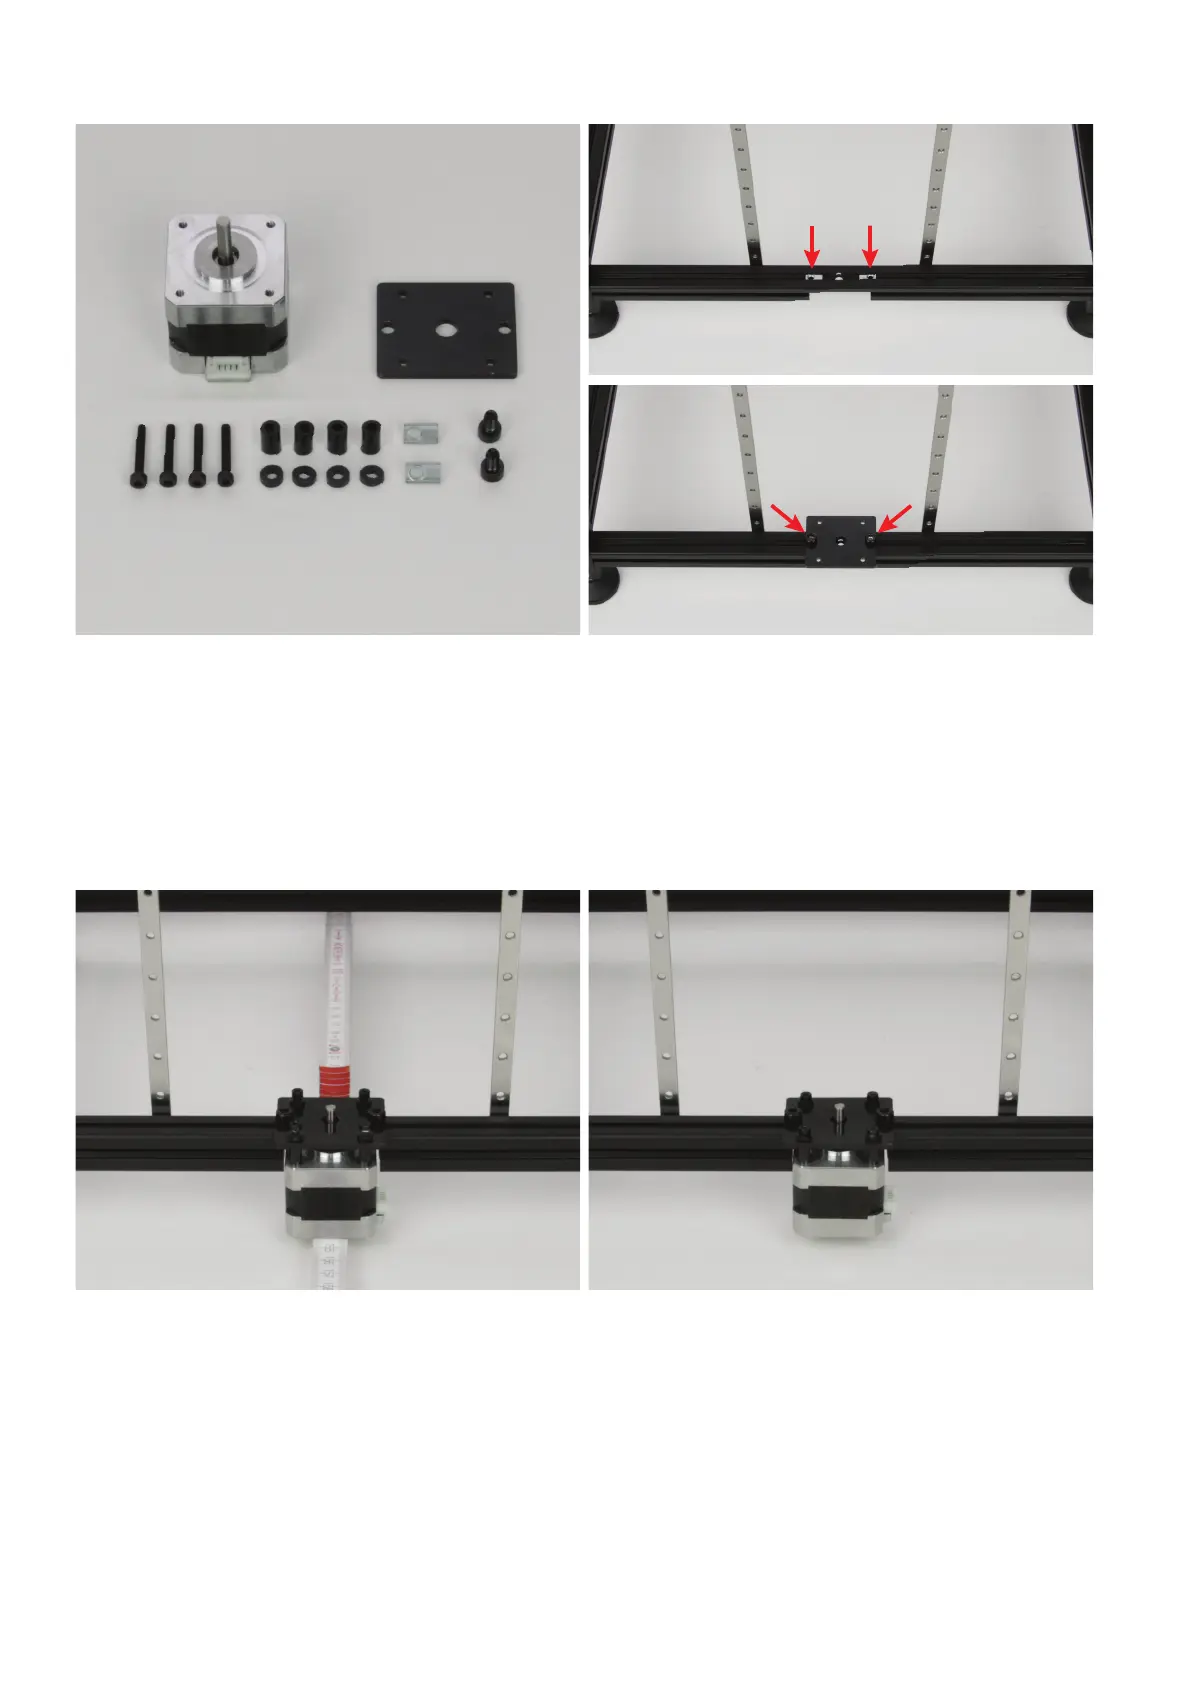
InstallingtheZ-motor
1x actuator
1x Z-motor holder, black
4x cylinder head screw M3x20 black
4xspacer10mm(diameterinside3mm)
4xspacer2mm(diameterinside3mm)
2x slot nut M5
4x cylinder head screw M5x8 black
Pushthe2slotnutsintotheloweraluminiumproleattherearas
shownintheuppergure.
Take the Z-motor holder and attach it to the two slot nuts with the two
M5-cylinder-head screws.
The Z-motor holder must be aligned above the bore of the aluminium
prole.Donottightenthescrewsrmlyyet!
Thread the motor into the bore from below. The connection plug must
bealignedwiththeleftsideoftheprinter,inthedirectionofthela-
mentinfeed(fromtherearviewtowardstheright).
For example, take a yard stick or similar and place it under the motor.
Attach the motor to the Z-motor holder with 4 cylinder-head screws
M3x20. A 10 mm spacer is needed between the Z-motor holder and
the motor. A 2 mm spacer is needed between the Z-motor holder and
the screw head.
Tightenthe4M3-screwsrst.
Then tighten the two M5-cylinder-head screws. The motor shaft must
bealignedcentredinthebore.Itmustnottouchthealuminiumprole.