37
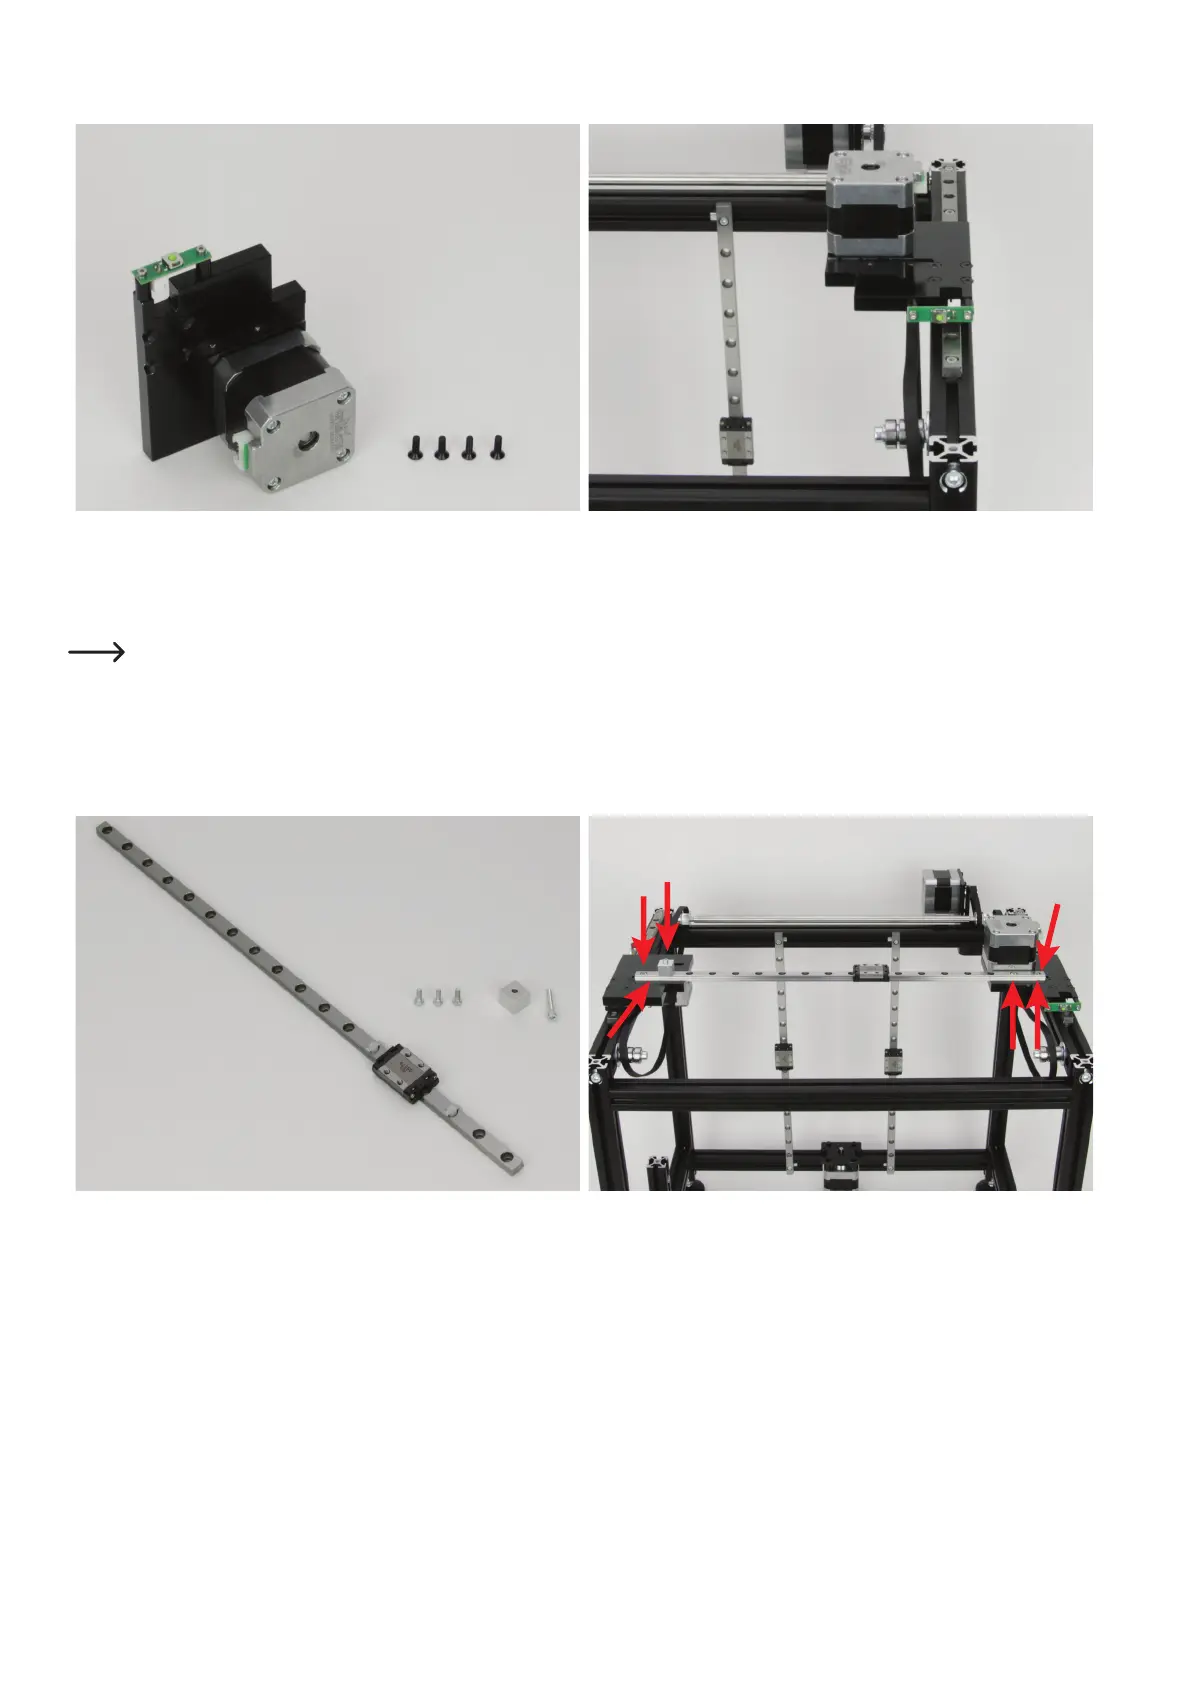
Installationoftheguidecarriageplateontherightofthebasicframe
1x right guide carriage plate with motor and limit switch
4x countersunk head screw M3x10 black
Install the right guide carriage plate with the 4 recessed-head screws
ontheguidecarriageoftherightY-guiderail.
Optionally, the screws can be secured with threadlocker varnish.
Check after installing the 2nd guide carriage plate whether both guide carriage plates are straight and parallel with the front alumin-
iumproleinstalledcrosswise.Ifthisisnotthecase,releasetheattachmentscrewsoftherespectivealuminiumproletowhichthe
guide rail with the guide carriage plate that is not straight is installed. Align the respective guide carriage plate and tighten the screws
again.
InstallationoftheguiderailfortheX-direction
1xguiderailwithguidecarriage(355mm)
3x cylinder head screw M3x8
1x aluminium block silver
1x cylinder head screw M3x20
Remove the two cable ties from the guide rail.
Releasethe4attachmentscrewsinbothY-guiderailssothatthey
can be moved a little.
Insert the guide rail in the groove of the left and right guide carriage
plateseach(1).
Loosely attach the guide rail on the left side of the outer bore with an
M3x8cylinder-headscrew(2).
Use two M3x8 cylinder-head screws in the two outer-most bores for
attachment on the right. Tighten the two screws only loosely as well
(3).
On the left side, attach the silver aluminium block with the cylinder-
headscrewM3x20(4)inthesecondbore.
Now tighten all 4 screws in sequence.
1
1
2
3
4