53
Finalalignment,relievingandtighteningoftheguiderails
Thetablestillmustbesupportedontheangenut.
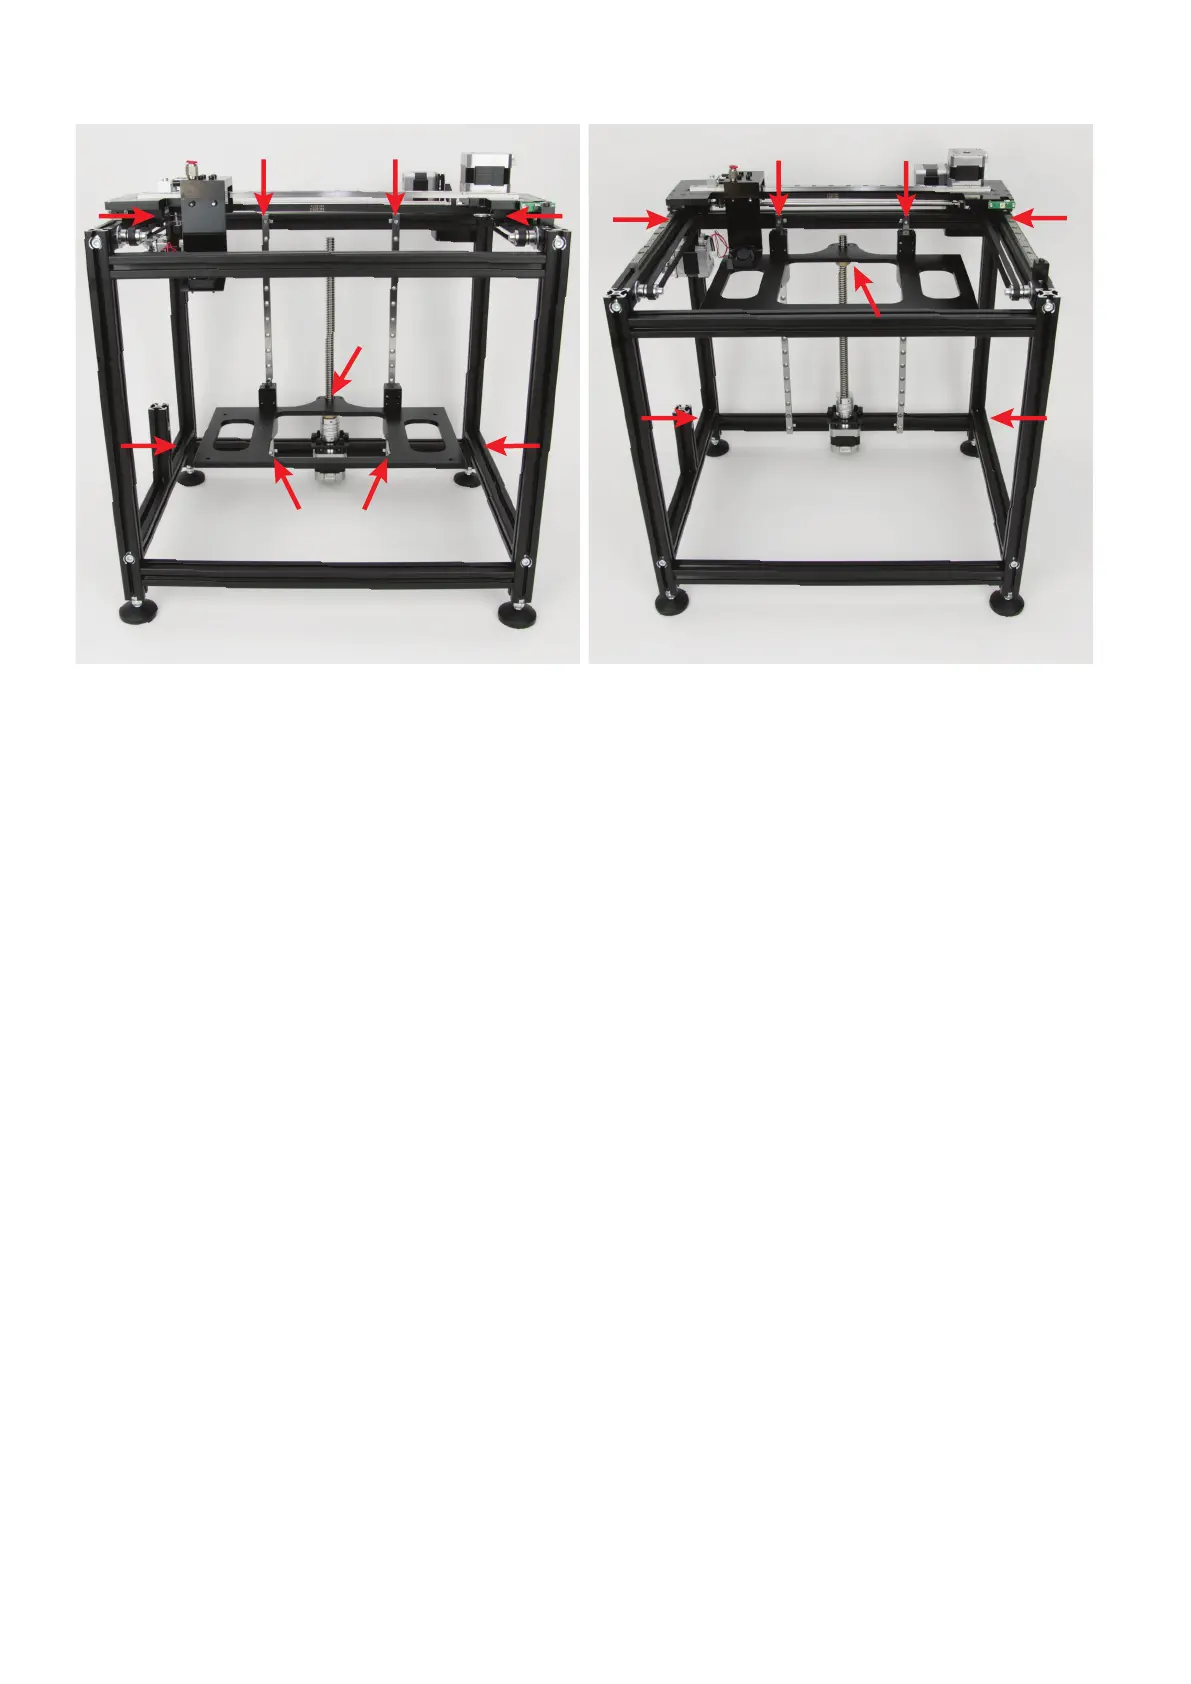
• Loosenall4cylinder-headscrewsofthetwoguide rails(1),but
only until they can be moved a little.
• Alsoreleasethe4M5-cylinder-headscrewsalittlethatarescrewed
intotheupperandloweraluminiumprolesattherearfromtheleft
andright(2).
• Checkthatthespindleiscentredintheboreofthetable(3).Ifthis
is not the case, adjust the table at the guide rails.
• Tightenthetwolowerattachmentscrewsoftheguiderailsagain
slightly(1bottom).
• Movethetableupanddown.Itmustnotbestiffatthebottomorat
the top. If it is, release the bottom screws of the guide rails again.
• Liftthetableandturntheangenutalmostallthewayup.Putthe
tablebackdownonit(4).
• Checktheupperandlowerdistancesonbothsidesoftheguide
rails again. If necessary, align the rails.
• Checkbasedontheholesintheguiderailsagainwhetherthetable
is aligned straight, and readjust if necessary.
• Nowtightenthetwoupperscrewsoftheguiderailsslightlysothat
theycannotmoveanymore(5).
• Liftthetableandturntheangenutallthewaydown.
• Movethetableupanddownseveraltimes.Italwaysmustmove
evenlyeasily.Thenputthetablebackdownontheangenut.
• Tightenthe4M5screwsagainalittlecarefullyinsequences,start-
ingwiththebottomonesandfollowingupwiththeupperones(6).
• Finally,tightenthe4attachmentscrewsofthetwoguiderails.
1 1
11
2 2
2 2
3
4
6
55
6 6
6