4. Check the settings for preventing paper abrasion, paper type, and paper thickness.
• Adjustment results vary depending on the Prevent Paper Abrasion mode's status. If you
perform an adjustment while Prevent Paper Abrasion mode is enabled and do not want to
print using this mode, cancel Prevent Paper Abrasion mode, and then perform the adjustment
again.
• Check the settings of paper type and paper thickness in [Paper Type/Thickness] under
[Settings] [Paper Input Location/Paper Settings] [Paper Size/Paper Type].
5. Press [Print Quality] to select the write mode.
6. Press [Start Printing] [Start].
7. Press [Exit].
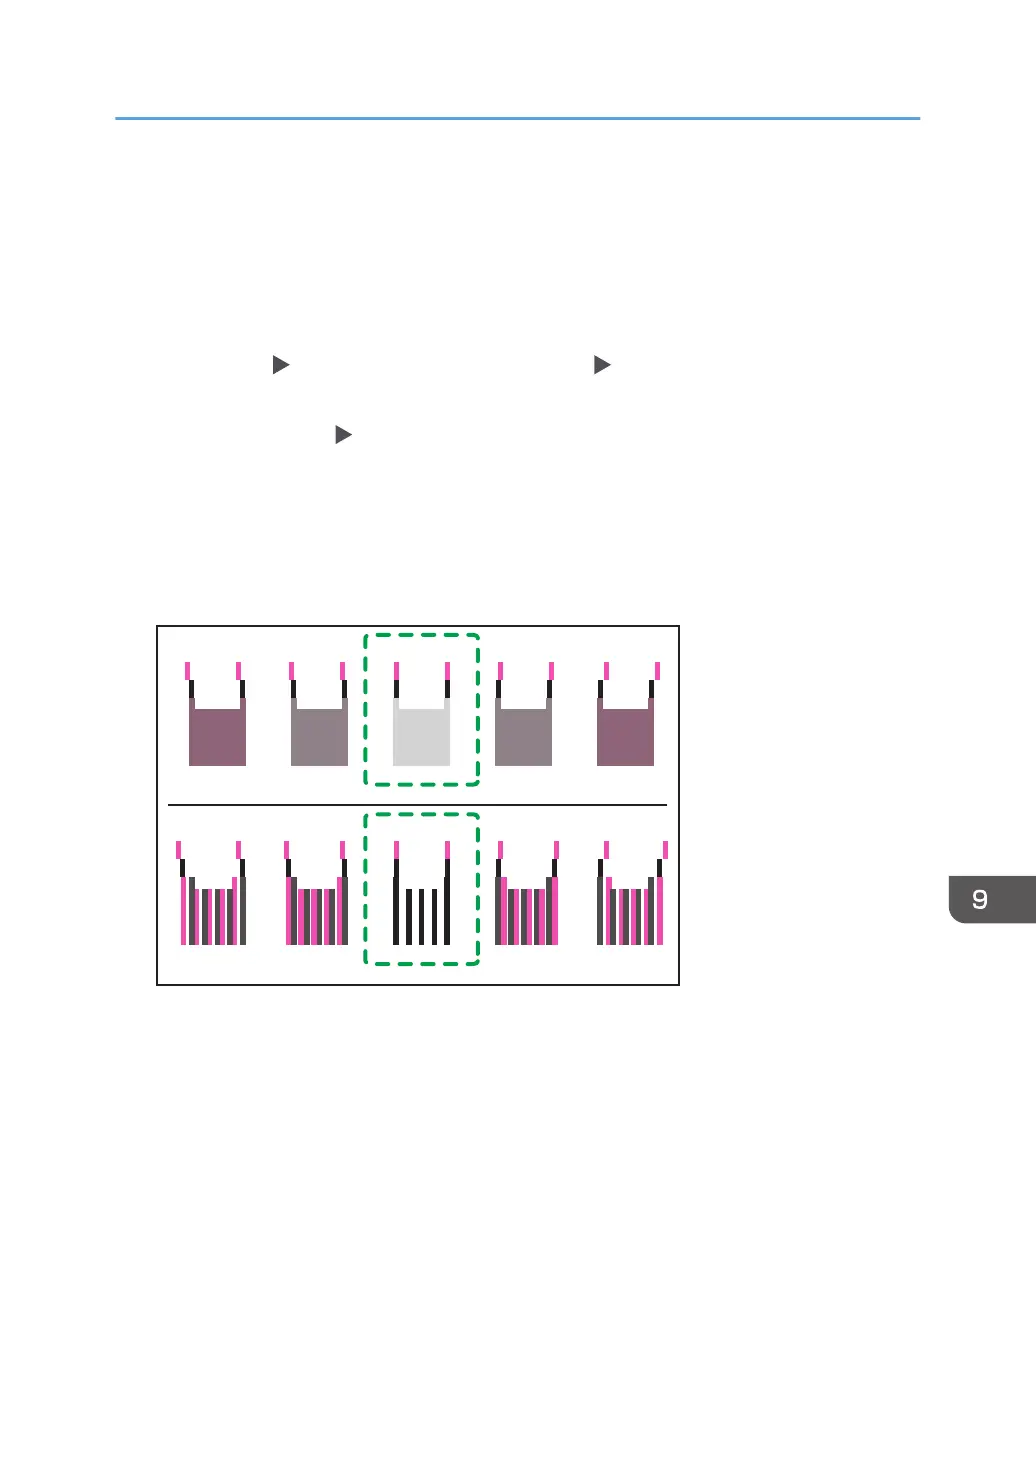
8. Check the optimal adjustment value based on the print results of the test pattern.
The optimal adjustment value is the number above the square pattern that has the faintest color
closest to gray and aligned verticals on both sides. For example, if the value in column "A" is "-2",
the adjustment value of "A" is "-2".
CHU017
-2-4 -3 -1 0
-2-4 -3 -1 0
Combined two-color lines form squares, and depending on line overlapping, (white) spaces
between the lines are painted and look darker. Sometimes the colors of the lines are identical.
For this illustration, the adjustment value is "-2". Checking adjustment values for each item is
required.
• If you cannot determine the adjustment value, select the square that is between the straightest
lines.
Adjusting the Print Quality
255

 Loading...


