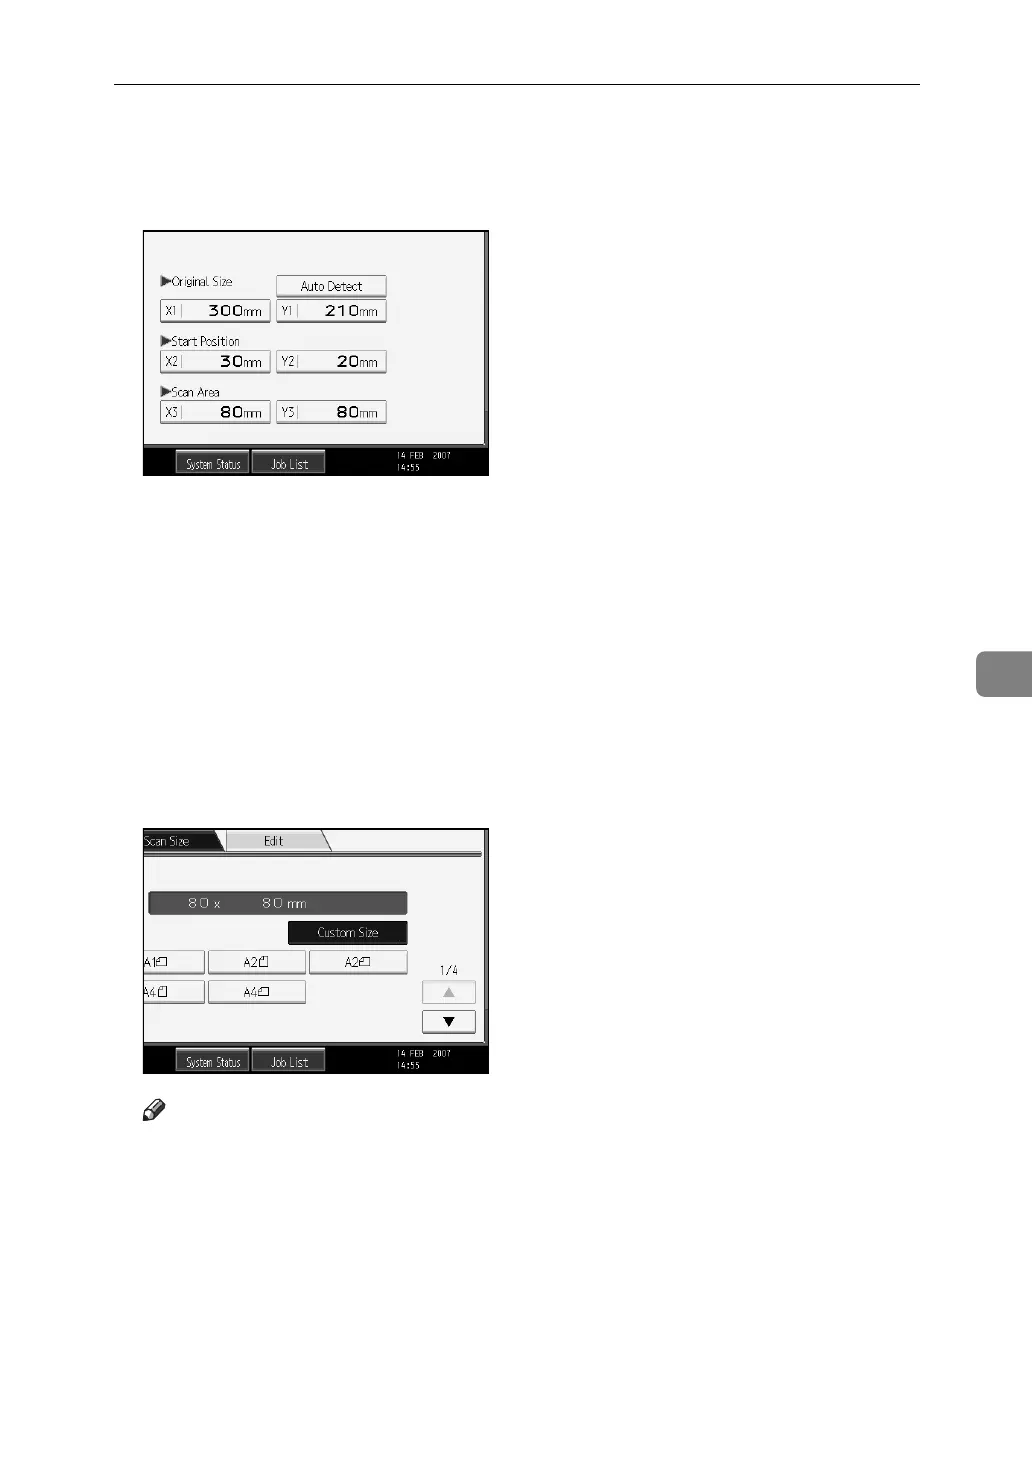
Scanning Custom Size Originals
115
6
D Specify Original Size (X1 and Y1) using the number keys, and then press
the {q} key.
For example, set X1 to 300 mm and Y1 to 210 mm.
E Specify Start Position (X2 and Y2) using the number keys, and then press
the {q} key.
For example, set X2 to 30 mm and Y2 to 20 mm.
F Specify Scan Area (X3 and Y3) using the number keys, and then press the
{q} key.
For example, set X3 and Y3 to 80 mm.
G Press [OK].
H Check the values of Scan Area (X3 and Y3) are displayed above [Custom
Size], and then press [OK].
Note
❒ Depending on the default setting of [Start Position] or [Scan Area], you might
not be able to make settings for [Original Size] before other items. If this is
the case, first make settings for [Start Position] or [Scan Area], and then [Orig-
inal Size]. For details about making default settings for [Scan Area] and [Start
Position], see General Settings Guide.
 Loading...