RIGOL Chapter 5 Trigger
5-46 MSO4000/DS4000 User’s Guide
2. Specify the signal type
Press Signal Type and turn the multi-function knob to select the desired
signal type. You can also press Signal Type continuously to switch the current
signal type.
Rx: the receiving signal from the CAN signal line.
Tx: the transmitting signal from the CAN signal line.
CAN_H: the actual CAN_H bus signal.
CAN_L: the actual CAN_L bus signal.
Differential: the CAN differential bus signal connected to the analog channel
via the differential probe. Connect the probe’s positive lead to the CAN_H
bus signal and connect the probe’s negative lead to the CAN_L bus signal.
3. Set the trigger condition
Press When, turn the multi-function knob to select the desired trigger
condition and press the knob. You can also press When continuously to switch
the current trigger condition.
SOF: trigger on the start of the data frame.
EOF: trigger on the end of the data frame.
Frame Type: trigger on the frame of the specified type.
Frame Error: trigger on the error frame of the specified type.
When the trigger condition is set to “Frame Type” or “Frame Error”, you need to
set the following frame type parameters or select the error type of the frame.
1) Frame Type
When the trigger condition is set to “Frame Type”, press FrameType; turn
the multi-function knob
to select the desired frame type and press the
knob. You can also press FrameType continuously to switch the current
frame type. The frame types available include “Data”, “Remote”, “Error” and
“OverLoad”.
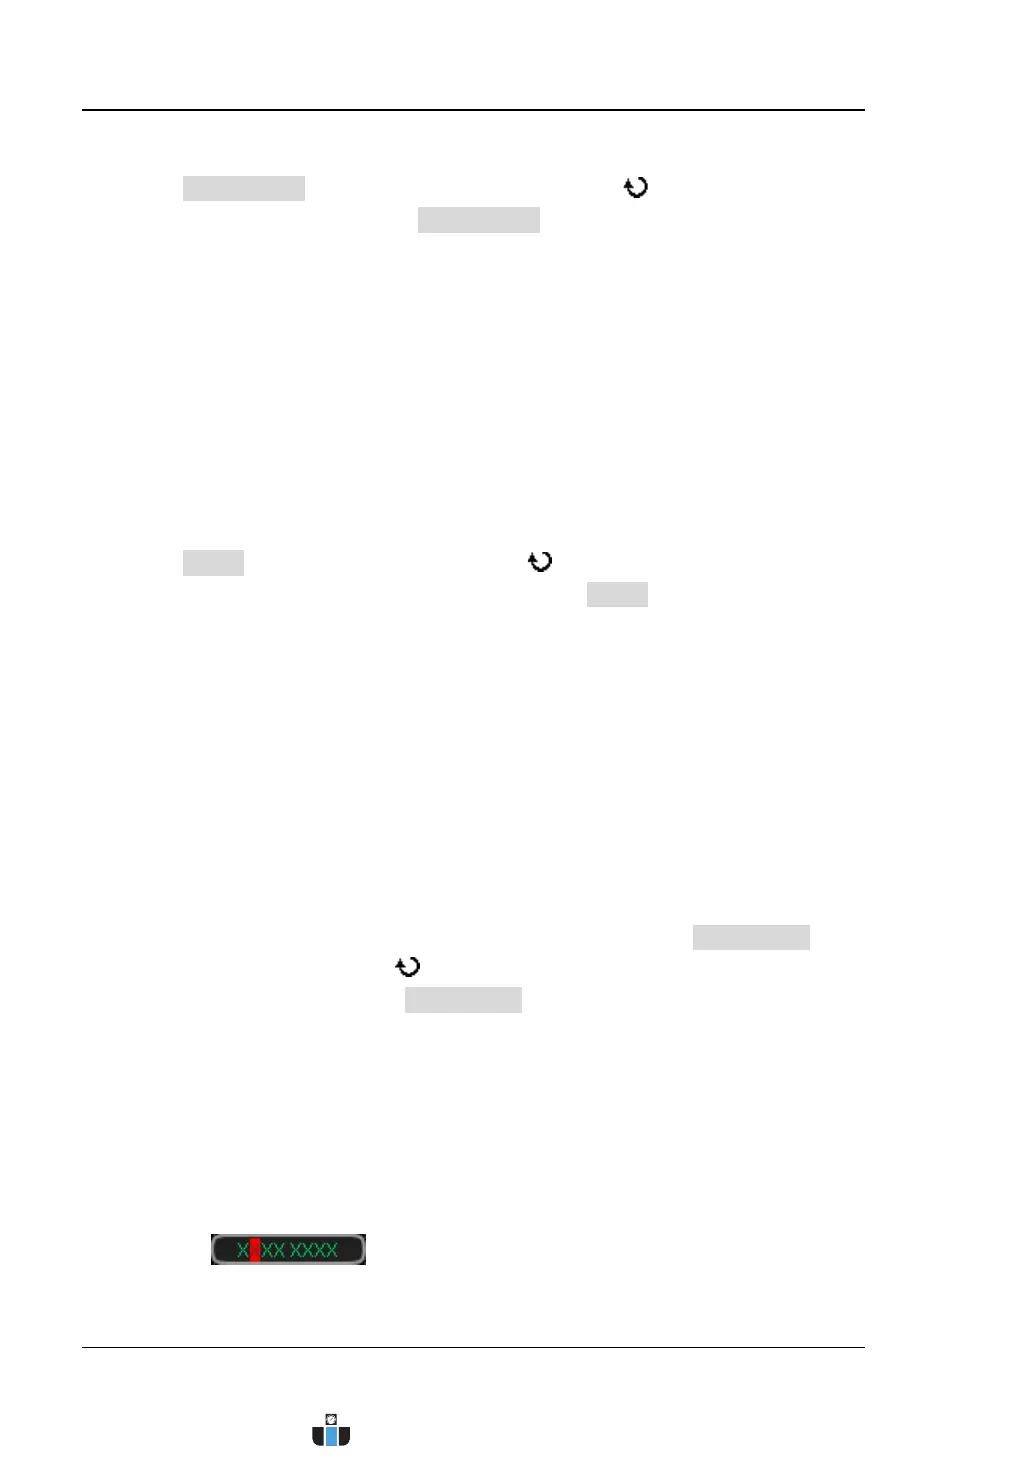
When “Data” is selected, the data setting area (as shown in the figure
below) is displayed at the bottom of the screen displaying the current
data setting information (the data bit currently selected is highlighted
in red) and the data setting information changes with the data setting.
www.calcert.com sales@calcert.com1.800.544.2843
0
5
10
15
20
25
30