106
Trigger Functions
Time waveform mode
The operation principle when using time waveform mode is illustrated below.
1. Make the required measurement parameter settings.
Note
During trigger operation, measurement parameters
such as input range, frequency span, and number of
analysis lines cannot be changed. Set these parameters
before pressing the STORE key.
2. Press the STORE key.
The “Waiting for Time Trigger...” popup indication appears, the
symbol is ashing, and the LED indicator is ashing in yellow.
Note
The trigger operation cannot be paused.
3. When the trigger start time is reached, the popup indication “STORE
XXXX” (where XXXX is the store address) appears, and the data
up to that point are stored.
While storing is carried out, the LED indicator ashes in red. When
storing is complete, the store address is incremented by one. If the
store address was 1000, the trigger operation is terminated when
storing is complete.
4. Subsequently, data are stored at the preset store intervals. The indicator
function and popup indication are the same as in step 3.
5. When the preset store number has been reached, the popup indication
“Time trigger measurement is completed” is shown, and trigger operation
is terminated.
Trigger operation can also be terminated at any previous point by
pressing the START/STOP key.
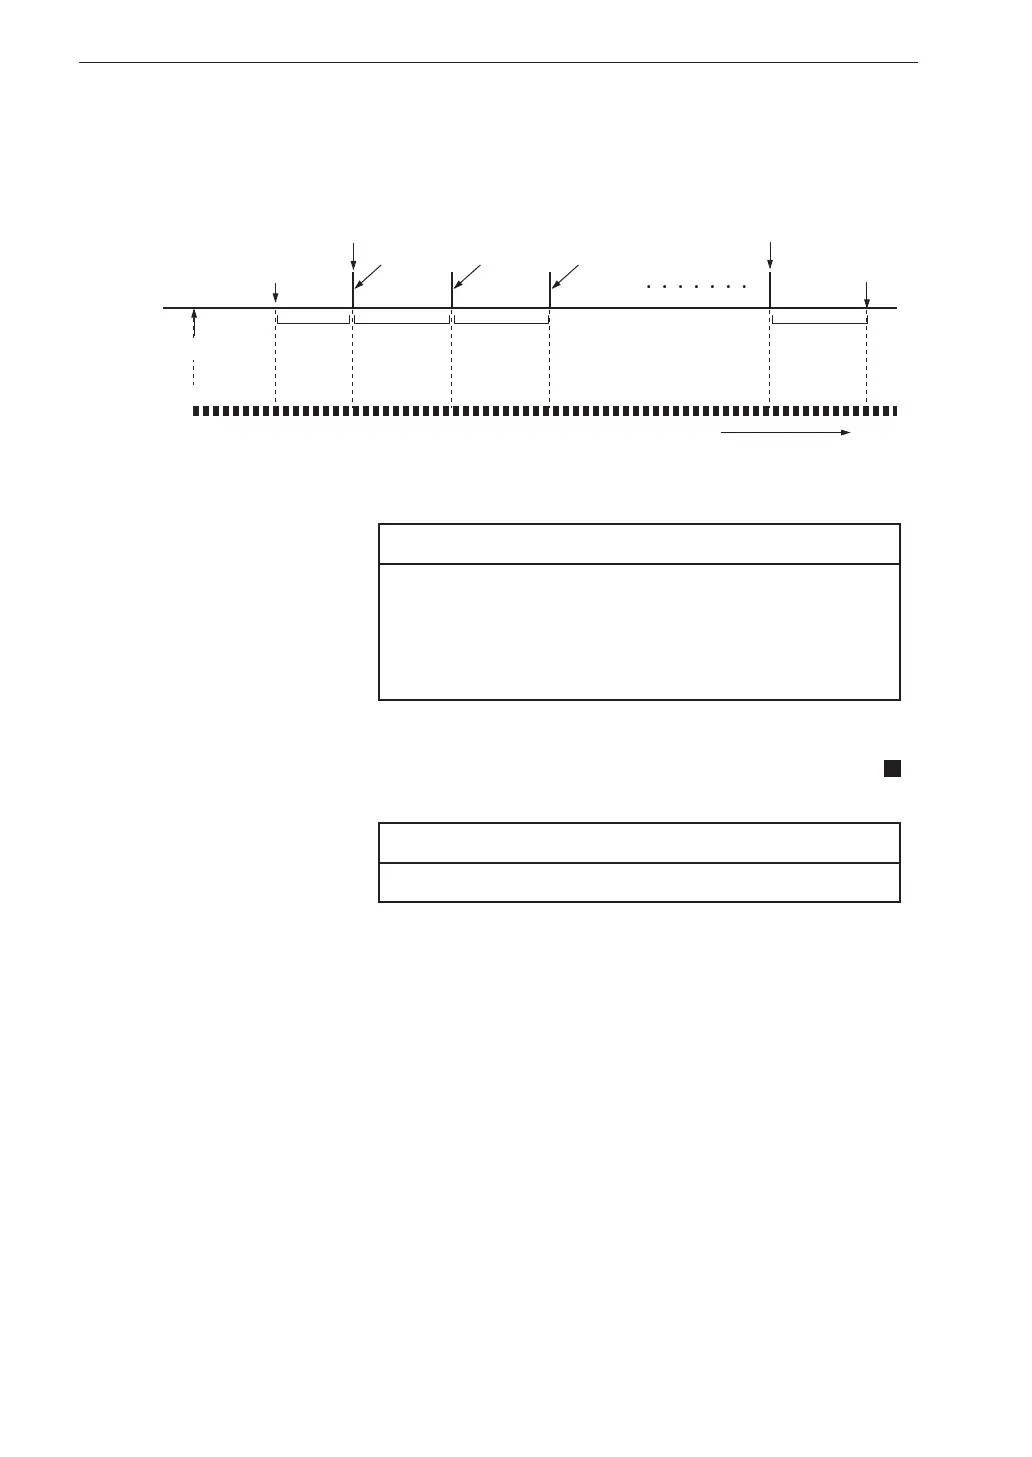
Time/Time waveform mode
STORE key pressed
Trigger start time
Store
action 1
Store
action 2
Store
action 3
S: Preset store number
Store action S
No store
action
Time set
Screen display
Update
Store
interval
Store
interval
Store
interval
Time
standby
Time
 Loading...