Basic Operations
Printing from a Computer Data [Direct Print] [USB Job List]
50
Note:
• If the “USB print (Auto process)” has been set
as the output method (Basic tab), connecting
the USB Flash Drive starts master-making/
printing process as per the “Auto Process” set-
ting. For detailed settings, refer to the “RISO
Printer Driver User's Guide”.
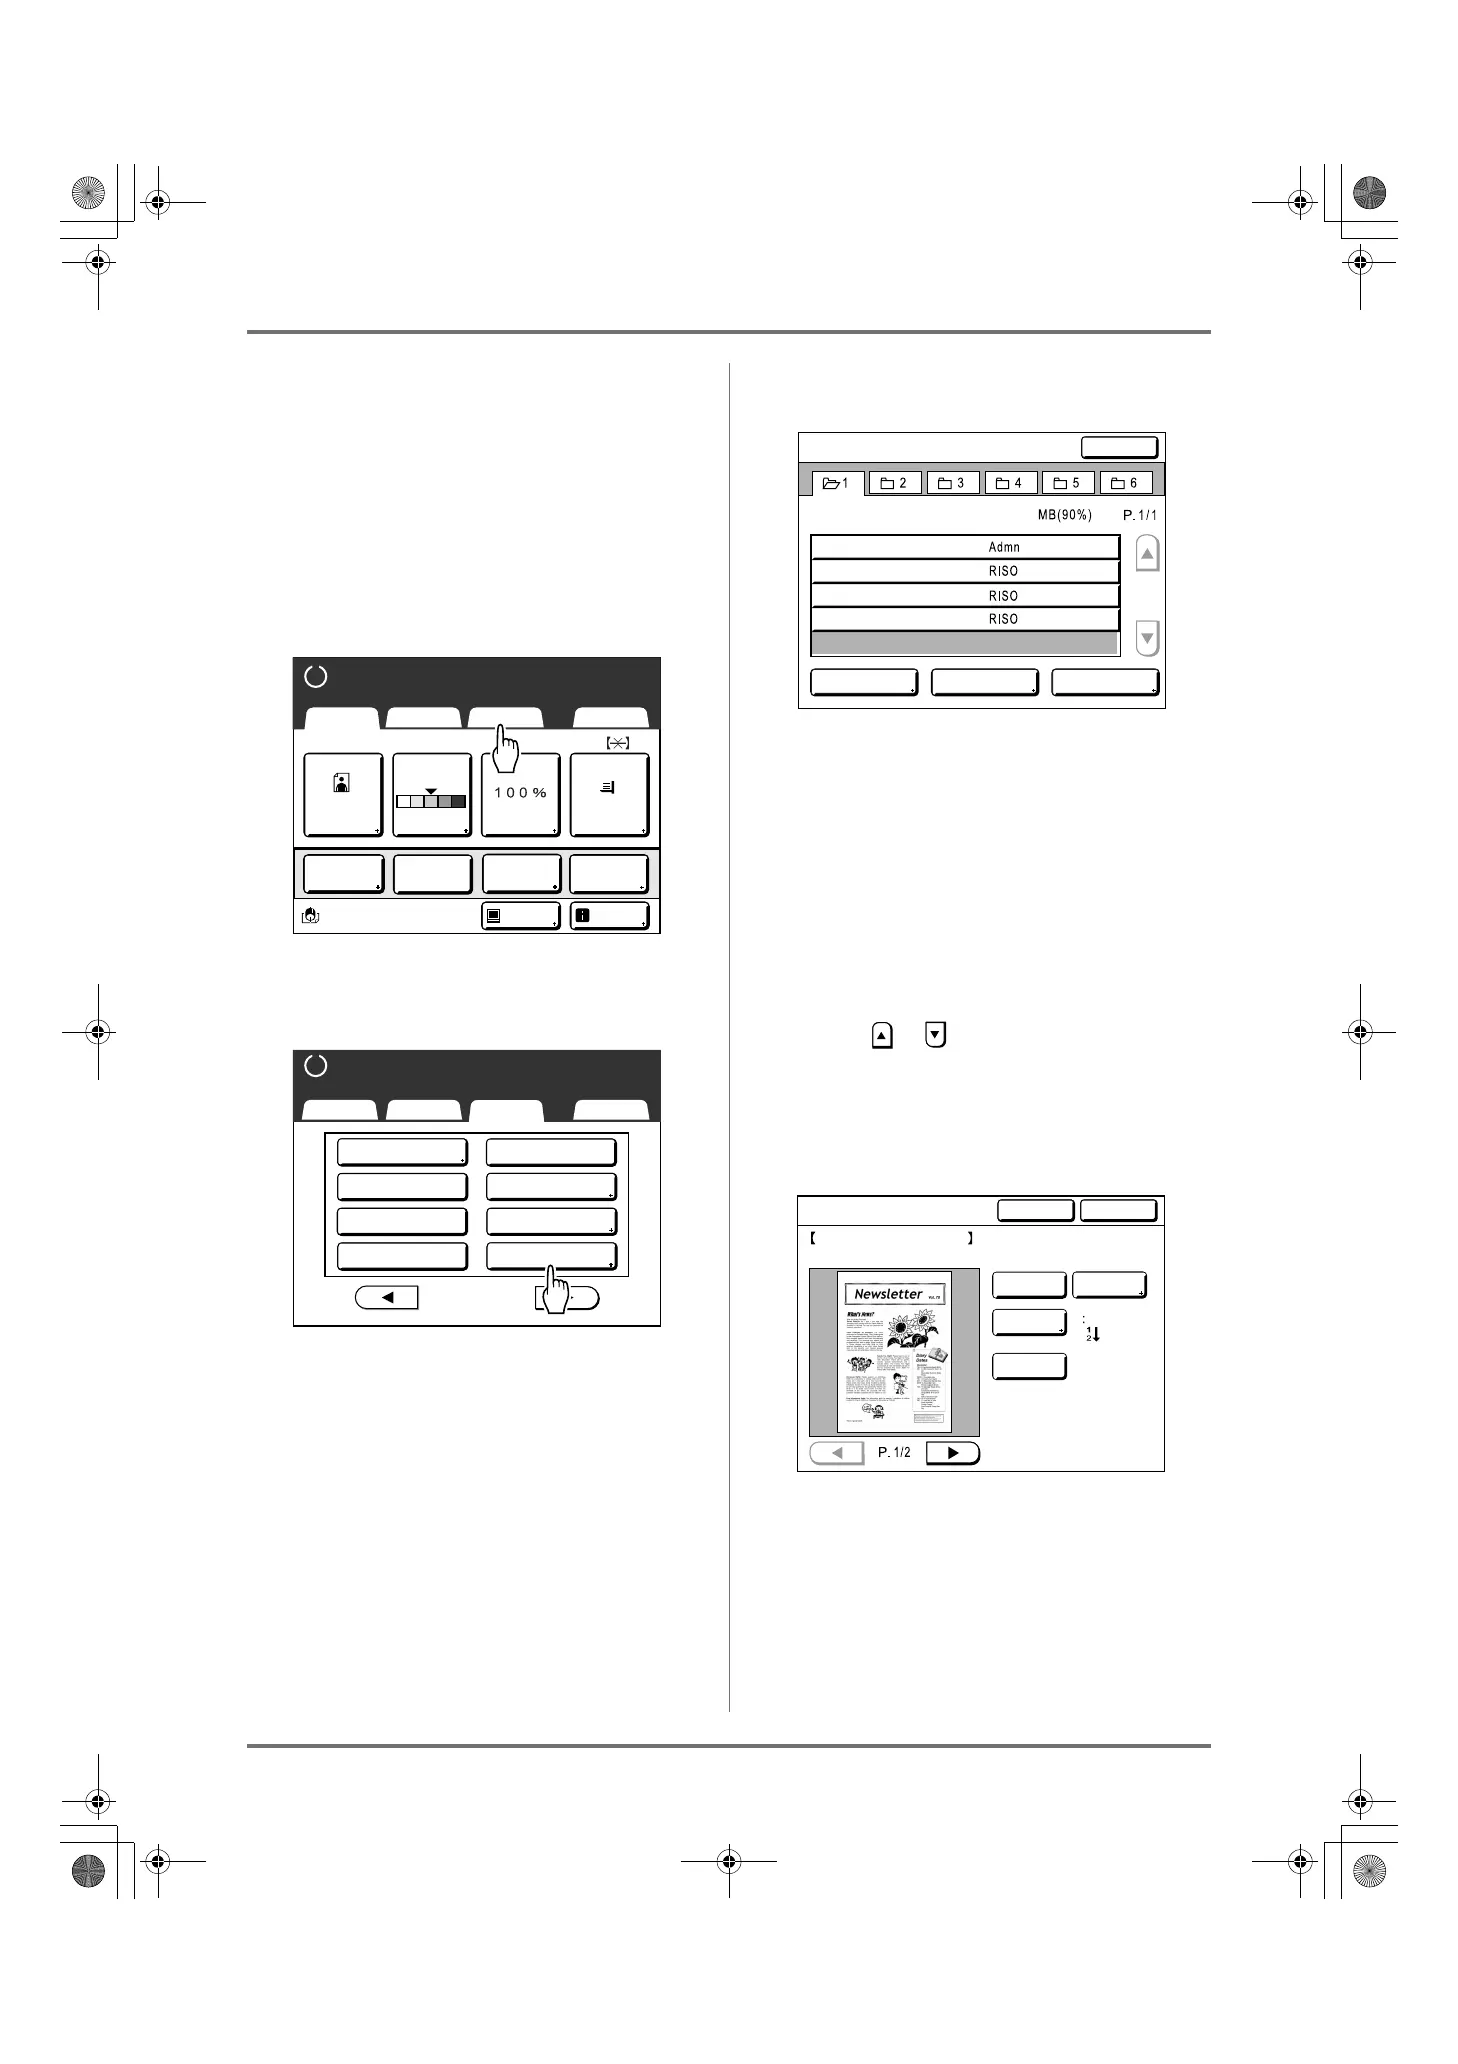
7
Touch [Functions] on the Master
Making Basic Screen.
8
Touch [USB Job List].
The USB Job List Screen (with “Non-ID Print”) is
displayed.
(The “ID Print Job” button is displayed on the
screen.)
9
Touch the data to print.
The “USB Job List” retrieve screen is displayed.
If you are selecting data stored in a different
folder, touch that folder’s tab.
Note:
• To retrieve the ID print, touch [ID Print Job].
• When “Management Level” is set to “Low/
Admin tab only” in the “User Management”, [ID
Print Job] will not be displayed.
• If the stored data is not shown on the screen,
touch or to display it.
10
Confirm the retrieved data.
Use the thumbnail to check whether the specified
data is the desired data or not.
From the “USB Job List” retrieve screen, you can
confirm retrieved data and specify output settings.
See )p.186 for operational details.
A4
Black
Page(A4)
Basic Selections Functions Admin.
Contrast Size Paper
Idle Info
Ready to Make Master
Reserva-
tion
Multi-Up
Print
Editor
Dot
Process
Photo
Basic Selections Functions Admin.
Ready to make Master
P
.
Side Margin
Max. Scan
Storage Memory
USB Job List
2/4
Reservation
ADF Semi-Auto
Overlay
Preview
USB Job List
Close
View edit ID Print Job
Storage Memory
Free Area:
NewsLetter.doc
1_usb_folder
98
30/09/11
30/09/11
30/09/11
30/09/11
FaxReport.doc
Report.doc
SummaryTable.xls
USB Job List
Cancel Retrieve
NewsLetter
A4
Format:
Owner:Admin
Color:Black
Date&Time:30/09/11 19:04
Rotate
Output
All Pages
Ascend
Clear
Copy/Move
REG-ML_EN.book Page 50 Wednesday, September 21, 2011 5:19 PM



 To Next Page