Functions for Master-Making
Printing Multiple Originals on One Sheet [2 Up] [Multi-Up Print]
77
6
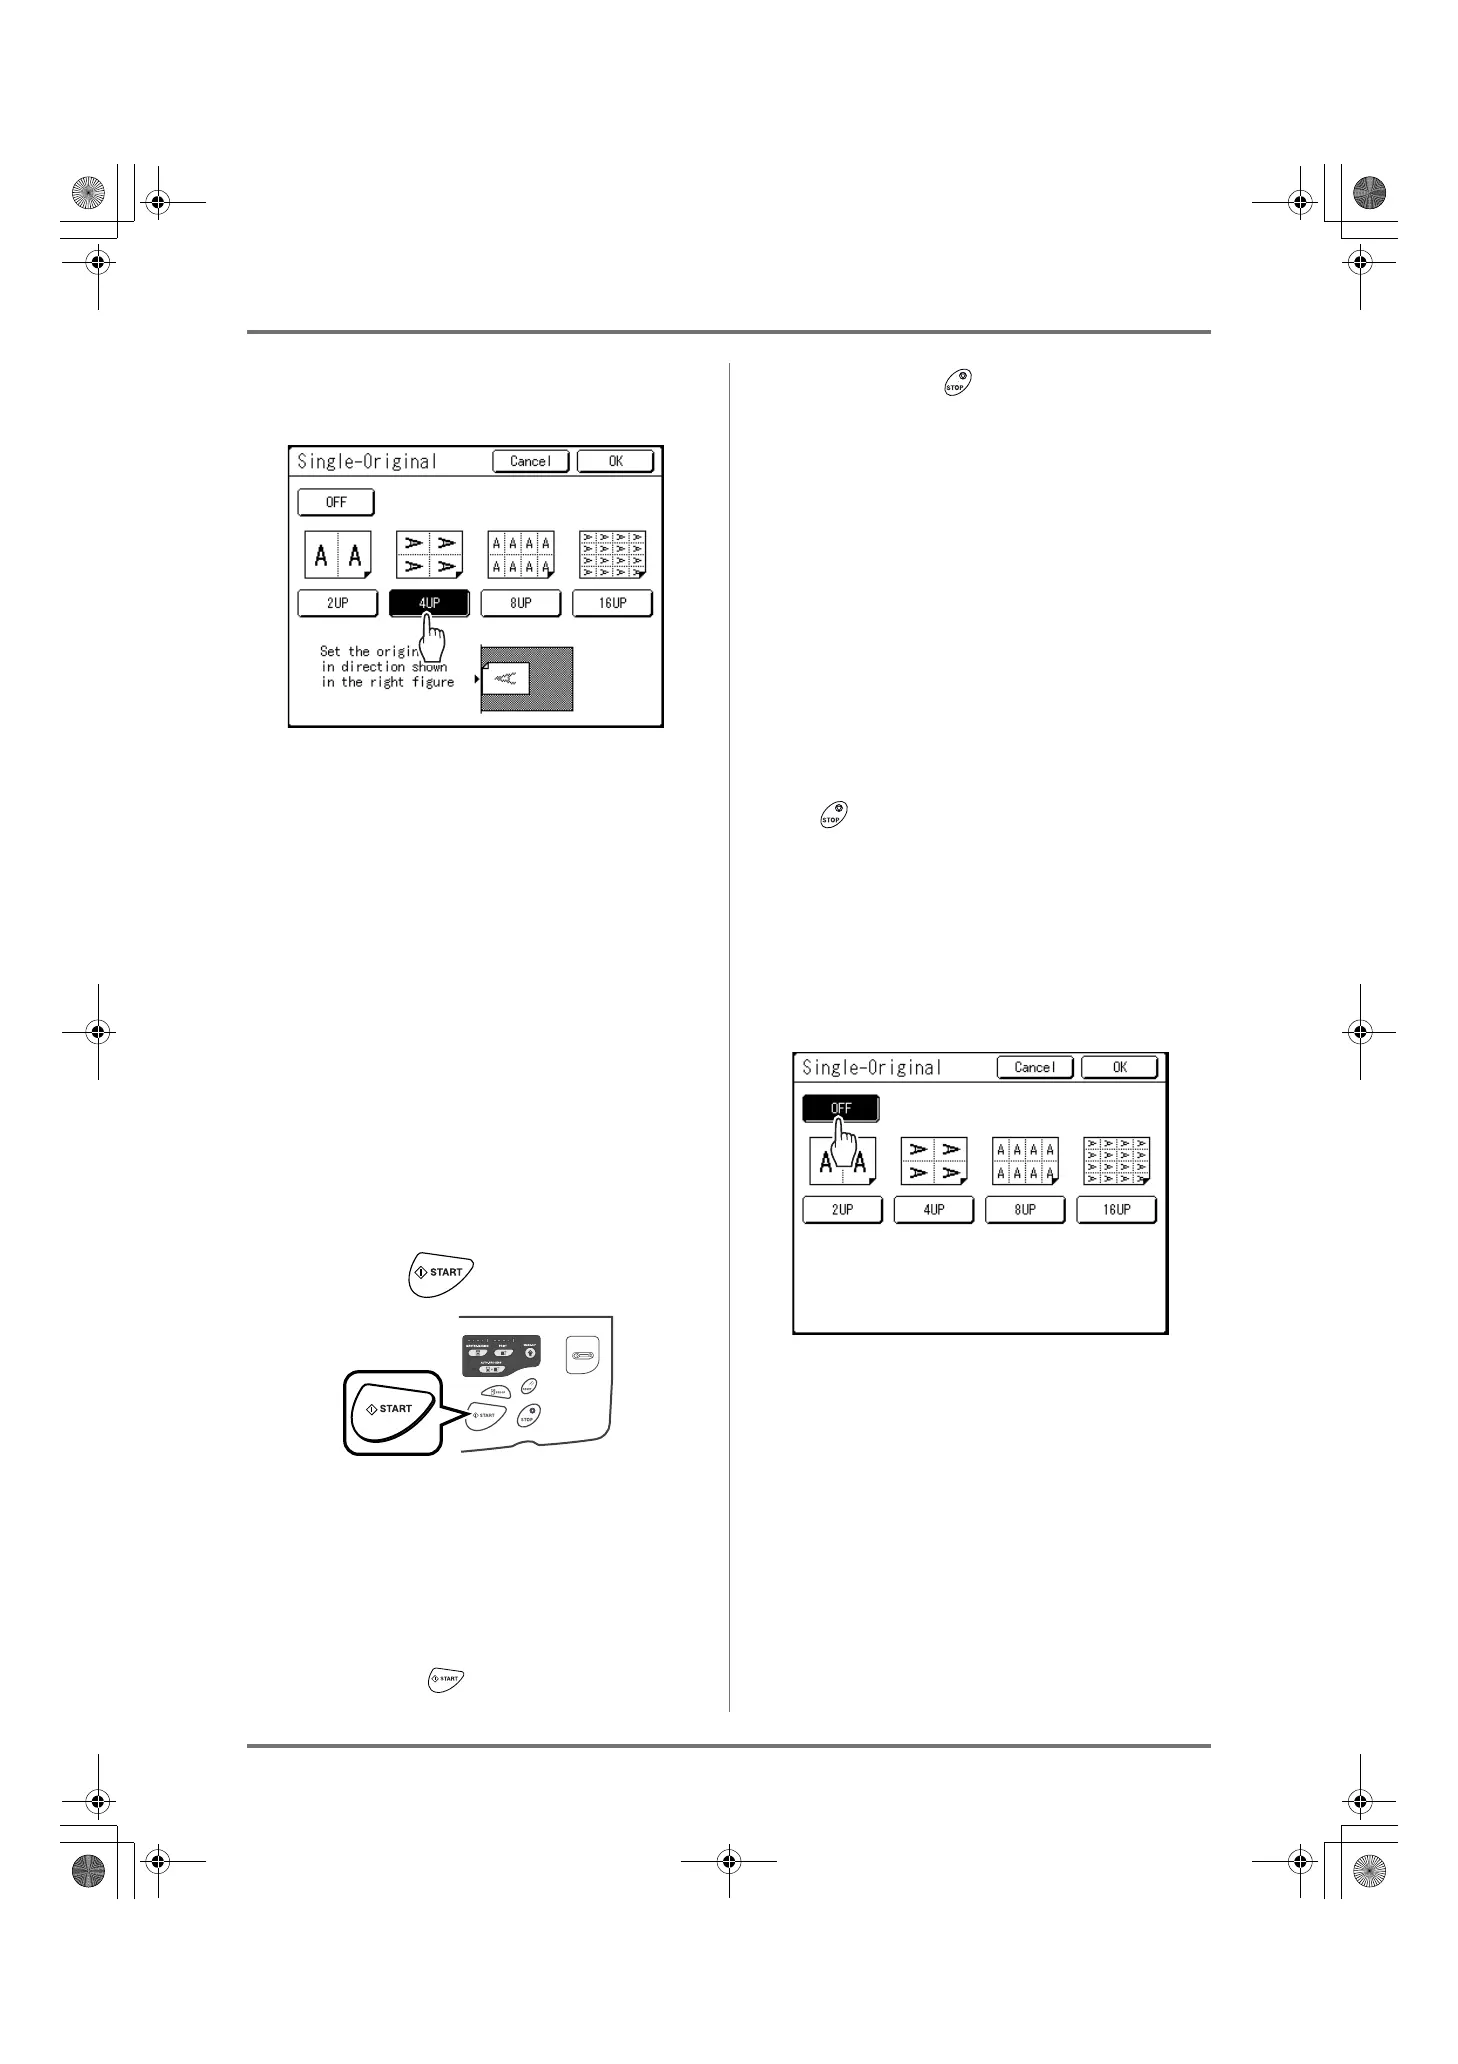
Touch the button of the number of
images to use.
To cancel the “Multi-Up Print” settings or return to
the Functions screen, touch [Cancel].
7
Touch [OK].
Returns to the Functions screen.
“Multi-Up Print” setting is updated.
The reproduction size is automatically set accord-
ing to the selected number of images based on
the paper size and original size to use.
8
Make necessary settings.
Make various settings as needed.
• When the reproduction size is set before setting
Multi-Up Print, the reproduction size is invali-
dated and changes to the size setting suitable
for the selected number of images.
• The image of the 2nd original and subsequent
originals can be changed to something different
from the image of the 1st original.
9
Press the key.
Scanning of the original starts.
After scanning has finished, follow the usual steps
to print.
Important!:
• After displaying the message, “Place Another
Original and Press Start Key
To Cancel, Press Stop Key” the machine waits for
the next original to be loaded. Set the next original
and press the key while waiting (interval)
time. Press the key to cancel the “Multi-Up
Print” mode.
• The Glass Platen and the ADF unit (Option)
cannot be used at the same time. If using the
Glass Platen to scan the first sheet of the origi-
nal, you must continue to use the Glass Platen
to scan the rest of the original.
• To scan the original with the optional ADF unit
and use the “Single-Original”, you need to set
the original twice.
Note:
• When “Multiple-Original” is used in Multi-Up
Print, the actual number of pages to be scanned
is specified. In the case that the actual number of
pages in the document is less than the number of
pages specified in the mode settings, set an
equivalent number of blank pages in the machine
to make up for the specified number
or press the
key in the status of waiting for the next orig-
inal. Master-making starts.
)p.70 “Original Orientation and Print Results”
• When using the “Auto Process” setting, printing
will continue automatically when originals are
set in the ADF unit (Option).
• To cancel a “Multi-Up Print” setting once it has
been confirmed, follow steps 2 and 3, touch
[OFF] and then [OK] on the screen.
REG-ML_EN.book Page 77 Wednesday, September 21, 2011 5:19 PM
 Loading...