2F-85 & 2F-140 - Instruction Manual
Activating a Gripper Connected to the Robot Wrist on a e-SeriesRobot
When connecting a gripper to the robot wrist connector, you need to manually set it up in PolyScope. Otherwise, your gripper will
not be activated. Follow these instructions.
1. Mechanically mount your gripper on your robot. For details, see the Installing the Gripper on the robot section
2. Go to Installation > URCaps> Gripper > Dashboard.
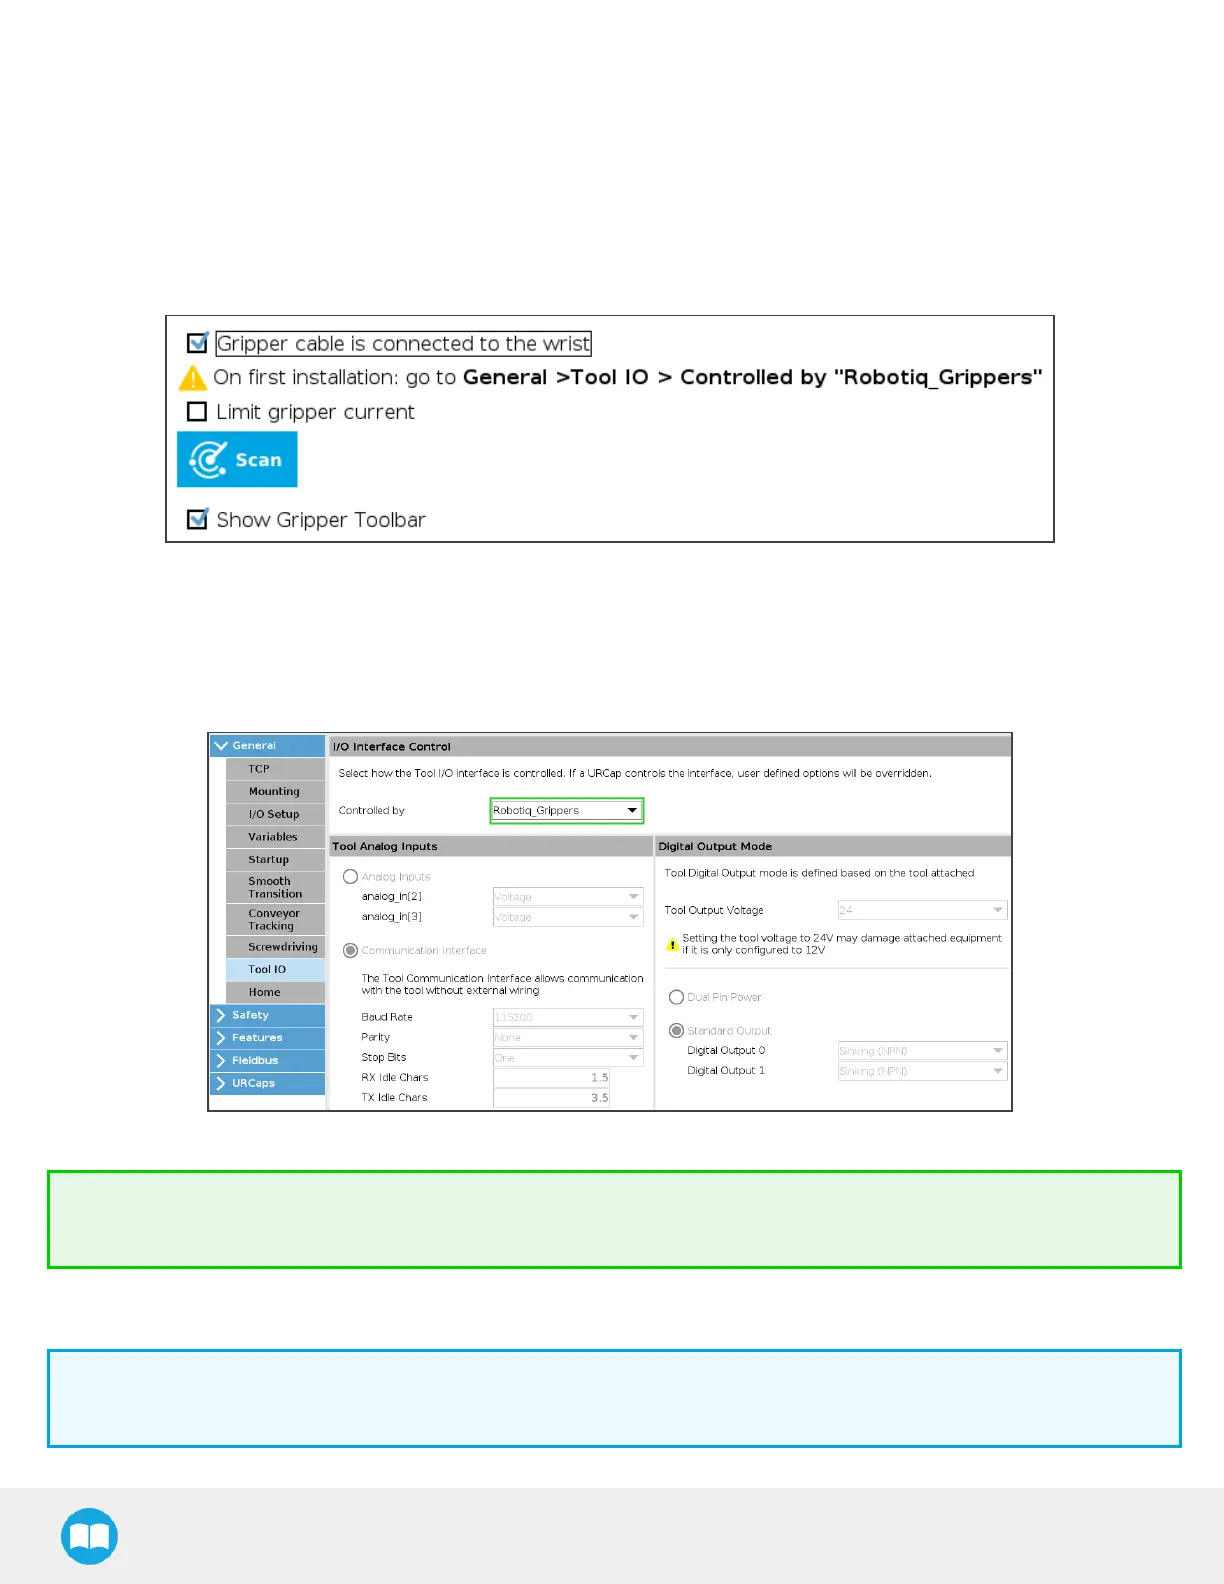
3. Check the box Gripper cable isconnected to the wrist.
Fig. 3-13: Grippercable isconnected to the wrist Check Box.
4. Go to Installation > General > Tool I/O.
5. Go to section "I/O Interface Control" and select " Robotiq_Grippers" in the drop down list of "Controlled by".
Fig. 3-14: I/O Interface Control.
Tip
To reload these settings when your restart your robot, save the Installation file.
6. Go back to the gripper Dashboard, and tap Scan. An icon should confirm your gripper isconnected. To activate it, tap Activ-
ate. You can now use your gripper. Tap E-Open or E-Close to test it.
Info
The number written in the gripper icon correspondsto the gripper ID.
42